Connecting the Display
Using the Computer
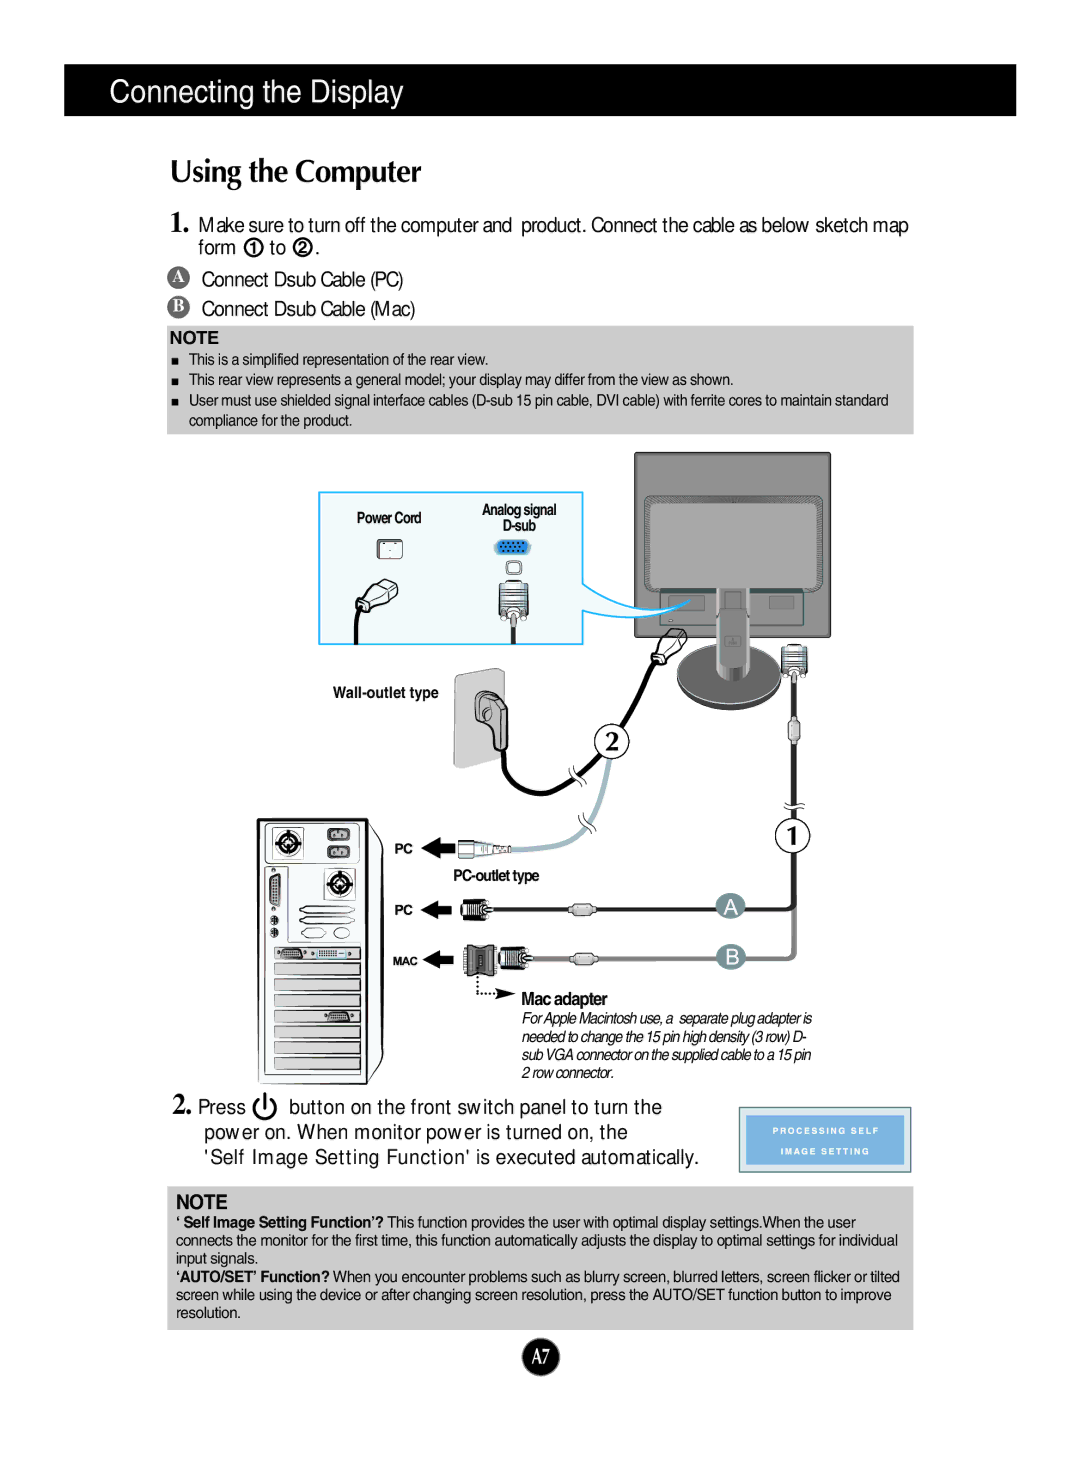
1. Make sure to turn off the computer and product. Connect the cable as below sketch map form 1 to 2 .
AConnect Dsub Cable (PC)
BConnect Dsub Cable (Mac)
NOTE
This is a simplified representation of the rear view.
This rear view represents a general model; your display may differ from the view as shown.
User must use shielded signal interface cables
Power Cord
Analog signal

 Mac adapter
For Apple Macintosh use, a separate plug adapter is needed to change the 15 pin high density (3 row) D- sub VGA connector on the supplied cable to a 15 pin 2 row connector.
2. Press ![]() button on the front switch panel to turn the power on. When monitor power is turned on, the
button on the front switch panel to turn the power on. When monitor power is turned on, the
'Self Image Setting Function' is executed automatically.
NOTE
‘Self Image Setting Function’? This function provides the user with optimal display settings.When the user connects the monitor for the first time, this function automatically adjusts the display to optimal settings for individual input signals.
‘AUTO/SET’ Function? When you encounter problems such as blurry screen, blurred letters, screen flicker or tilted screen while using the device or after changing screen resolution, press the AUTO/SET function button to improve resolution.
A7