
LWHD1200HR specifications
The LG Electronics LWHD1200HR is a highly efficient and versatile window air conditioner designed to provide optimal cooling performance while ensuring user comfort. This model is particularly well-suited for medium-sized rooms, making it an ideal choice for bedrooms, living rooms, and home offices.One of the standout features of the LWHD1200HR is its dual function capability, serving both as an air conditioner and a heater. With a cooling capacity of 12,000 BTU, it can effectively cool spaces up to approximately 550 square feet. In heating mode, it produces 11,000 BTUs, making it suitable for varied climates. This flexibility allows users to enjoy year-round comfort without the need for multiple units.
The LWHD1200HR incorporates advanced technology and features designed to enhance energy efficiency and convenience. Its energy-saving mode helps reduce electricity consumption, lowering utility bills while maintaining a comfortable environment. The unit is ENERGY STAR certified, reflecting its commitment to eco-friendly operation.
Furthermore, the air conditioner features a programmable thermostat, enabling users to set specific temperatures and times for operation. This functionality allows for precise control over the indoor climate, ensuring comfort at all hours. The remote control feature adds another layer of convenience, letting users adjust settings without having to physically interact with the unit.
In terms of air quality, the LWHD1200HR is equipped with a washable and reusable filter that effectively captures dust and allergens, promoting a healthier living environment. The filter is easy to access and clean, ensuring that maintenance is straightforward and hassle-free.
The unit also boasts quiet operation, with noise levels reaching as low as 52 dB. This allows for uninterrupted sleep and productivity, a crucial factor in both residential and workspace settings.
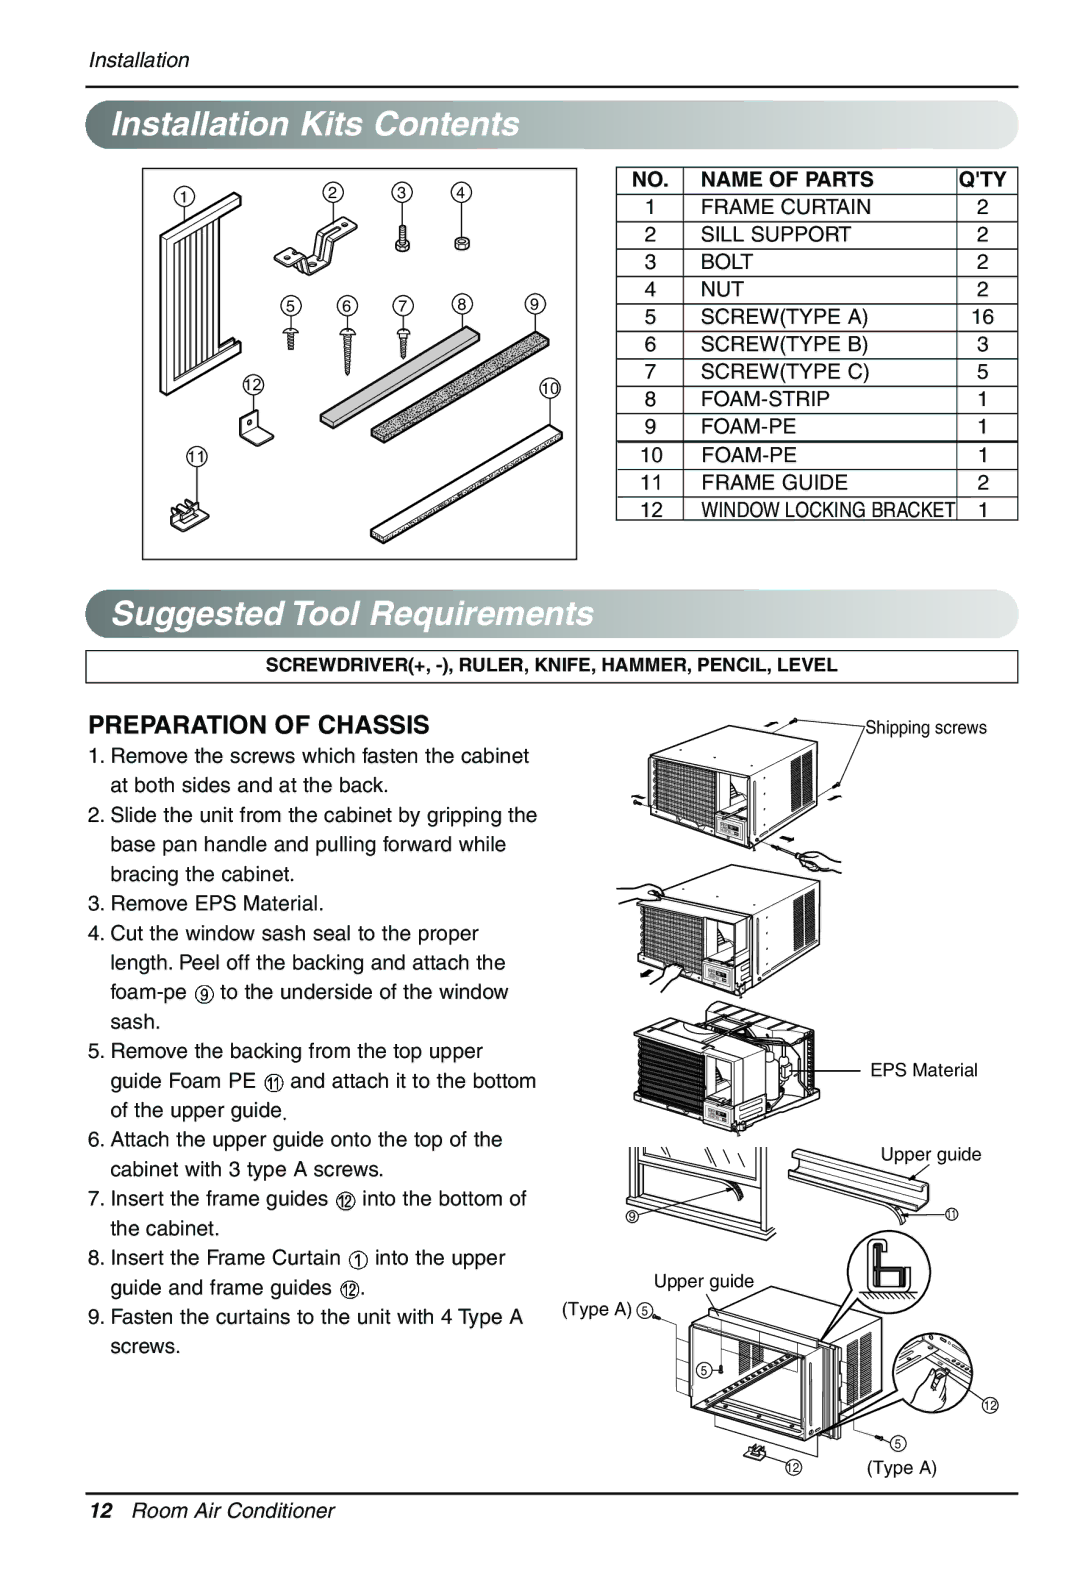
Additionally, the LWHD1200HR is designed for easy installation. It comes with all necessary installation hardware and a user-friendly manual, allowing users to set it up quickly and efficiently.
Overall, the LG Electronics LWHD1200HR stands out in the market with its combination of dual heating and cooling capabilities, energy efficiency, air quality improvement features, and user-friendly design. Whether combatting summer heat or winter chill, this unit delivers reliable comfort all year round.