3.2System Setup
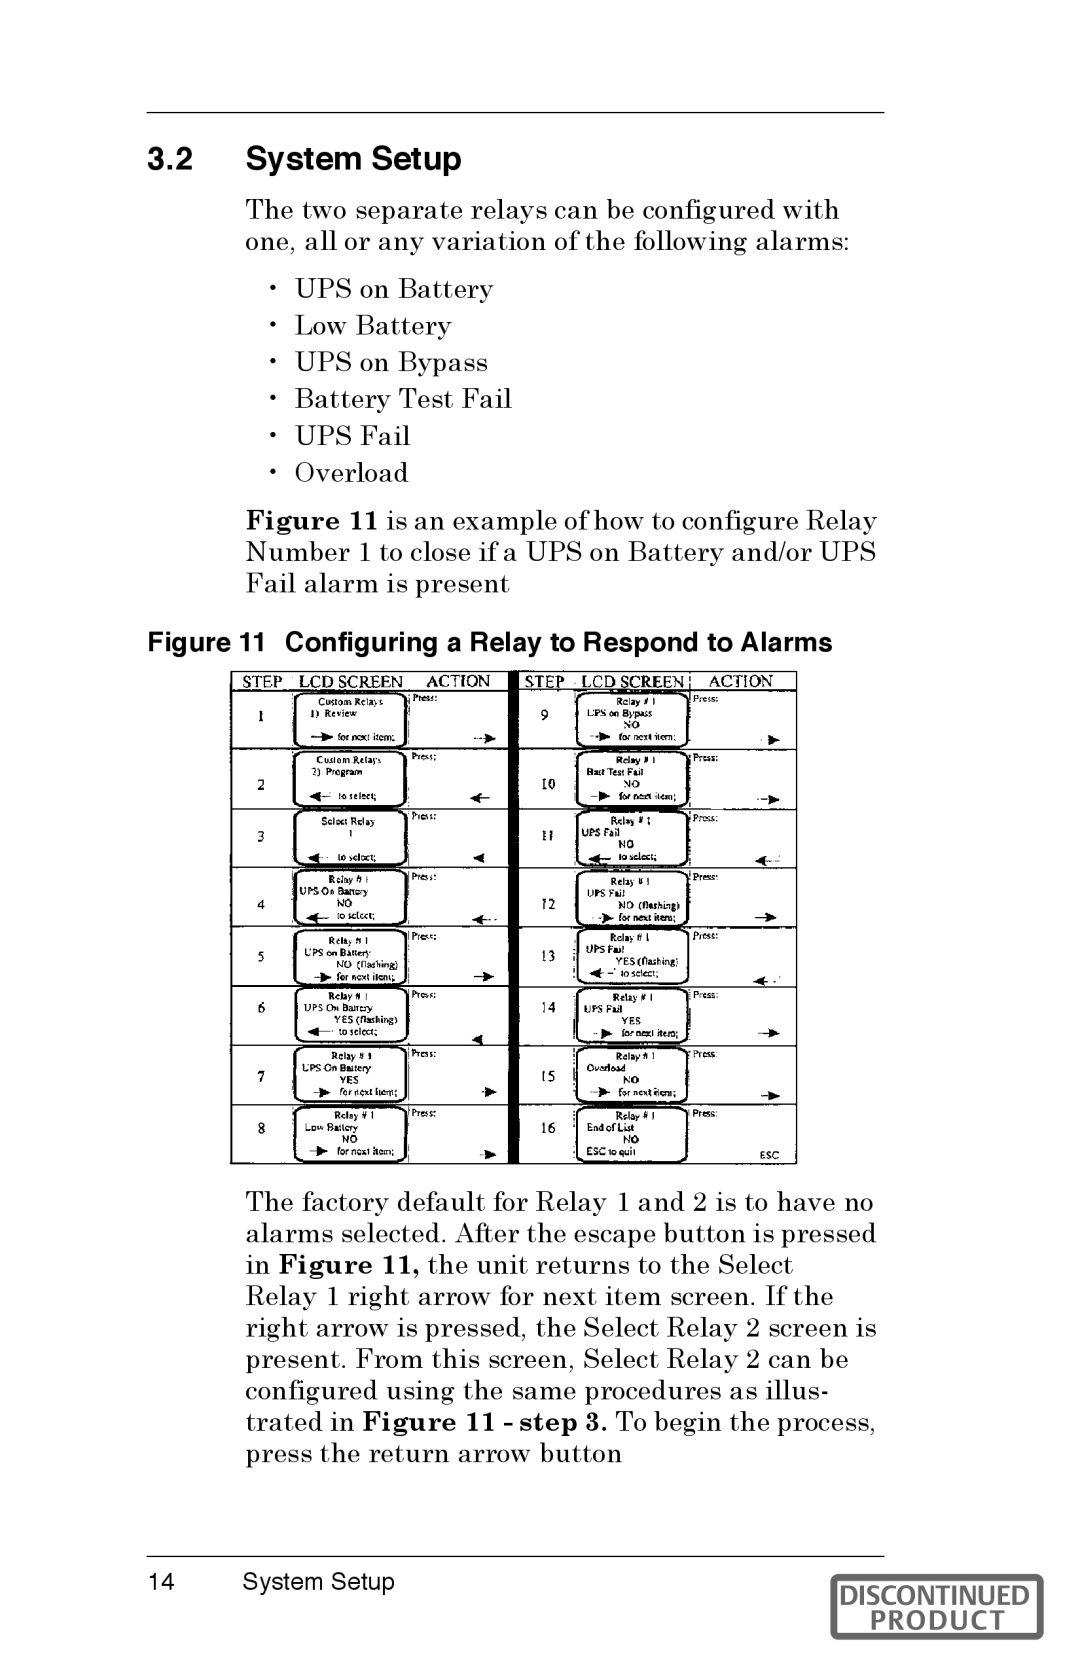
Figure 11 Configuring a Relay to Respond to Alarms
14 | System Setup | DISCONTINUED |
|
| PRODUCT |