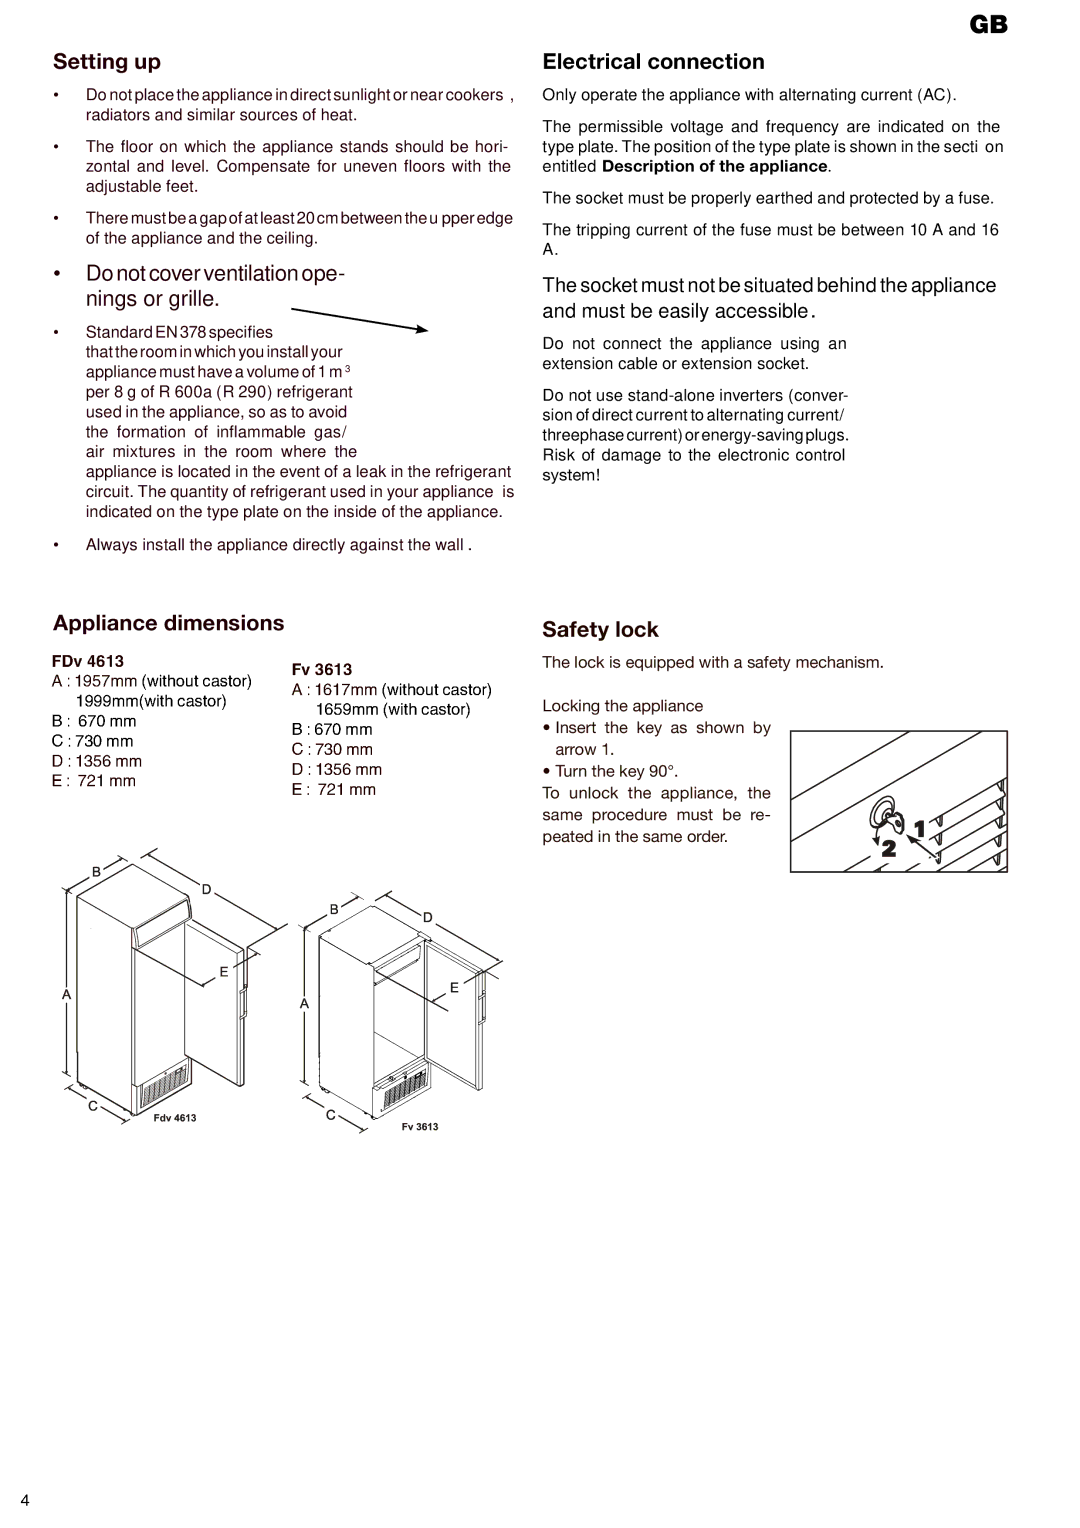
Liebherr FV3613, FDV4613 manual Setting up, Electrical connection

Models: FDV4613 FV3613

1 8
Download 8 pages 15.98 Kb
Page 4
Image 4

Setting up

Do not place the appliance in direct sunlight or near cookers, radiators and similar sources of heat.

The floor on which the appliance stands should be hori- zontal and level. Compensate for uneven floors with the adjustable feet.

There must be a gap of at least 20 cm between the upper edge of the appliance and the ceiling.

Do not cover ventilation ope-

nings or grille.

• Standard EN 378 specifies that the room in which you install your appliance must have a volume of 1 m3

per 8 g of R 600a (R 290) refrigerant used in the appliance, so as to avoid the formation of inflammable gas/ air mixtures in the room where the

appliance is located in the event of a leak in the refrigerant circuit. The quantity of refrigerant used in your appliance is indicated on the type plate on the inside of the appliance.

Always install the appliance directly against the wall.

GB

Electrical connection

Only operate the appliance with alternating current (AC).

The permissible voltage and frequency are indicated on the type plate. The position of the type plate is shown in the section entitled Description of the appliance.

The socket must be properly earthed and protected by a fuse.

The tripping current of the fuse must be between 10 A and 16 A.

The socket must not be situated behind the appliance and must be easily accessible.

Do not connect the appliance using an extension cable or extension socket.

Do not use stand-alone inverters (conver- sion of direct current to alternating current/ threephase current) or energy-saving plugs. Risk of damage to the electronic control system!

Appliance dimensions


Safety lock


The lock is equipped with a safety mechanism.


Locking the appliance


• Insert the key as shown by


arrow 1.


• Turn the key 90°.


To unlock the appliance, the


same procedure must be re-


peated in the same order.


Page 4
Image 4
Liebherr FV3613, FDV4613 manual Setting up, Electrical connection