
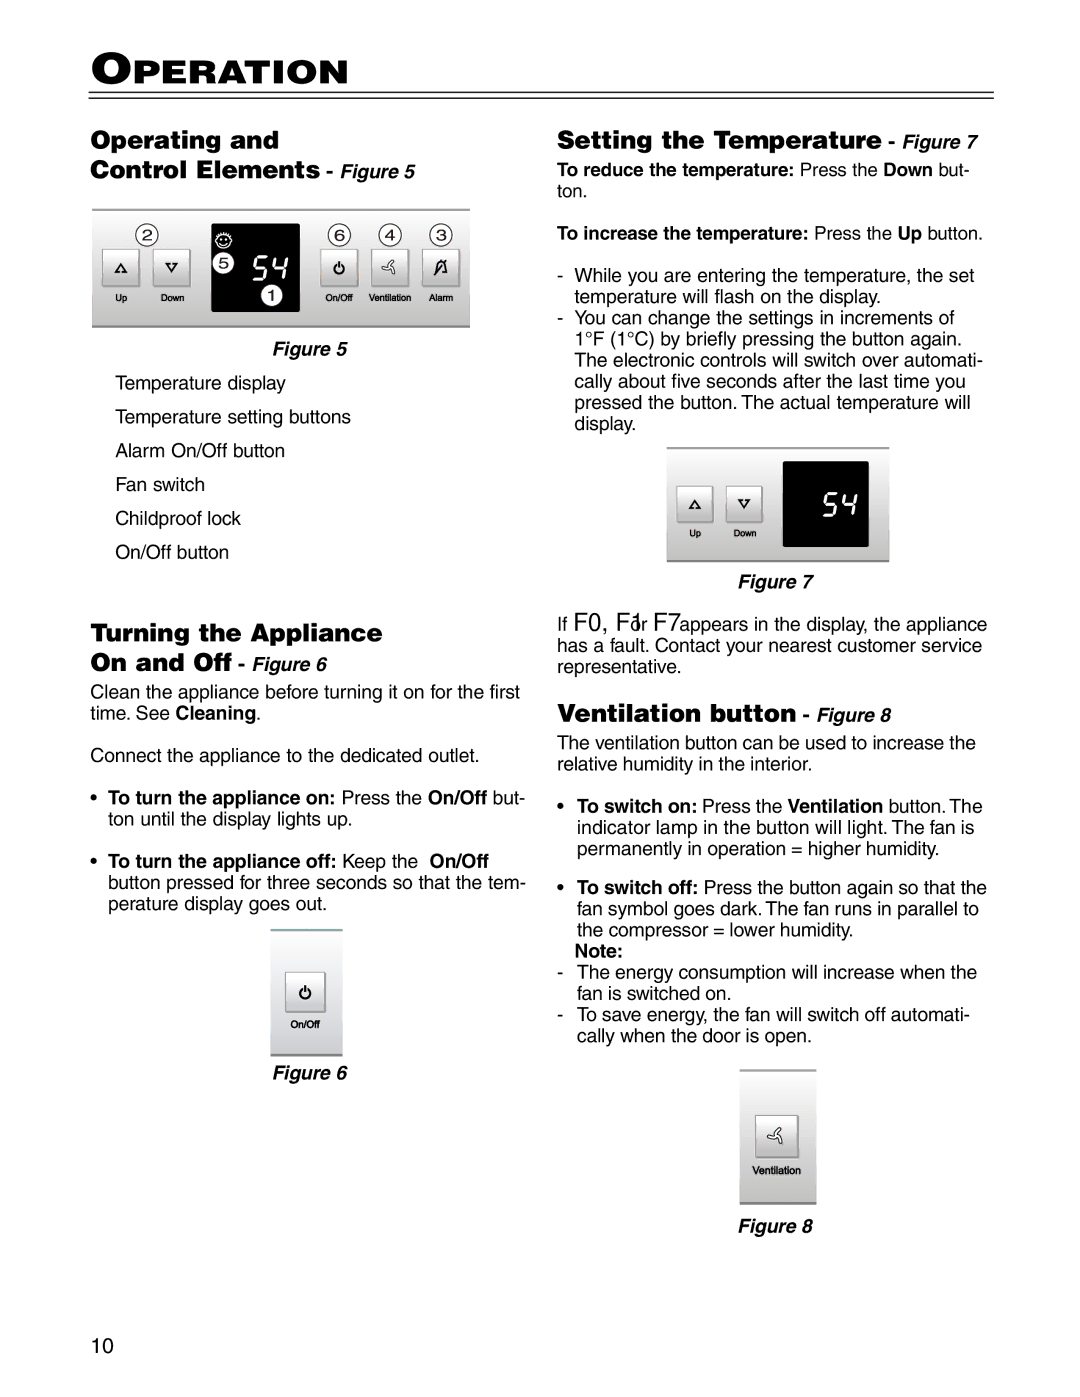
7081 457-00, RO 500 specifications
The Liebherr RO 500,7081 457-00 is a robust and innovative material handling machine that combines advanced technology with high performance. Designed for a variety of applications in the construction and industrial sectors, this model stands out due to its versatility, reliability, and superior efficiency.One of the main features of the Liebherr RO 500 is its powerful engine, which provides a remarkable output, ensuring that it can handle heavy loads with ease. The machine is equipped with a high-performance hydraulic system that enhances its lifting and maneuvering capabilities, making it suitable for tasks requiring significant strength and precision. With a maximum lifting capacity that exceeds industry standards, it can tackle various types of materials, ranging from concrete blocks to steel beams.
In terms of technology, the RO 500 leverages Liebherr's state-of-the-art control systems, allowing for smooth operations and improved user experience. The intuitive interface provides operators with real-time data on machine performance, enabling them to make informed decisions quickly. The incorporation of advanced sensors ensures enhanced safety and stability during operation, minimizing the risk of accidents or equipment damage.
The design of the Liebherr RO 500 also focuses on operator comfort and efficiency. The spacious cab features an ergonomic layout with adjustable seating and easy-to-reach controls, reducing operator fatigue during long work hours. The large windows not only provide excellent visibility but also enhance overall situational awareness, allowing operators to work confidently in busy environments.
Durability is another key characteristic of the RO 500. Built with high-quality materials and robust construction methods, this model can withstand the rigors of daily use in tough conditions. Its maintenance-friendly design ensures that routine checks and repairs can be carried out with minimal downtime, contributing to greater overall productivity.
In conclusion, the Liebherr RO 500,7081 457-00 represents a perfect blend of power, technology, and operator-centric design. With its formidable capabilities, advanced features, and commitment to safety and efficiency, it is a valuable asset for any material handling operation, making it highly regarded in the construction and industrial machinery market.