FIGURE 4 |
|
|
|
| 3” |
|
| 5 |
15 |
|
|
3/8 X 3” | 7 | 13 |
|
| 2 |
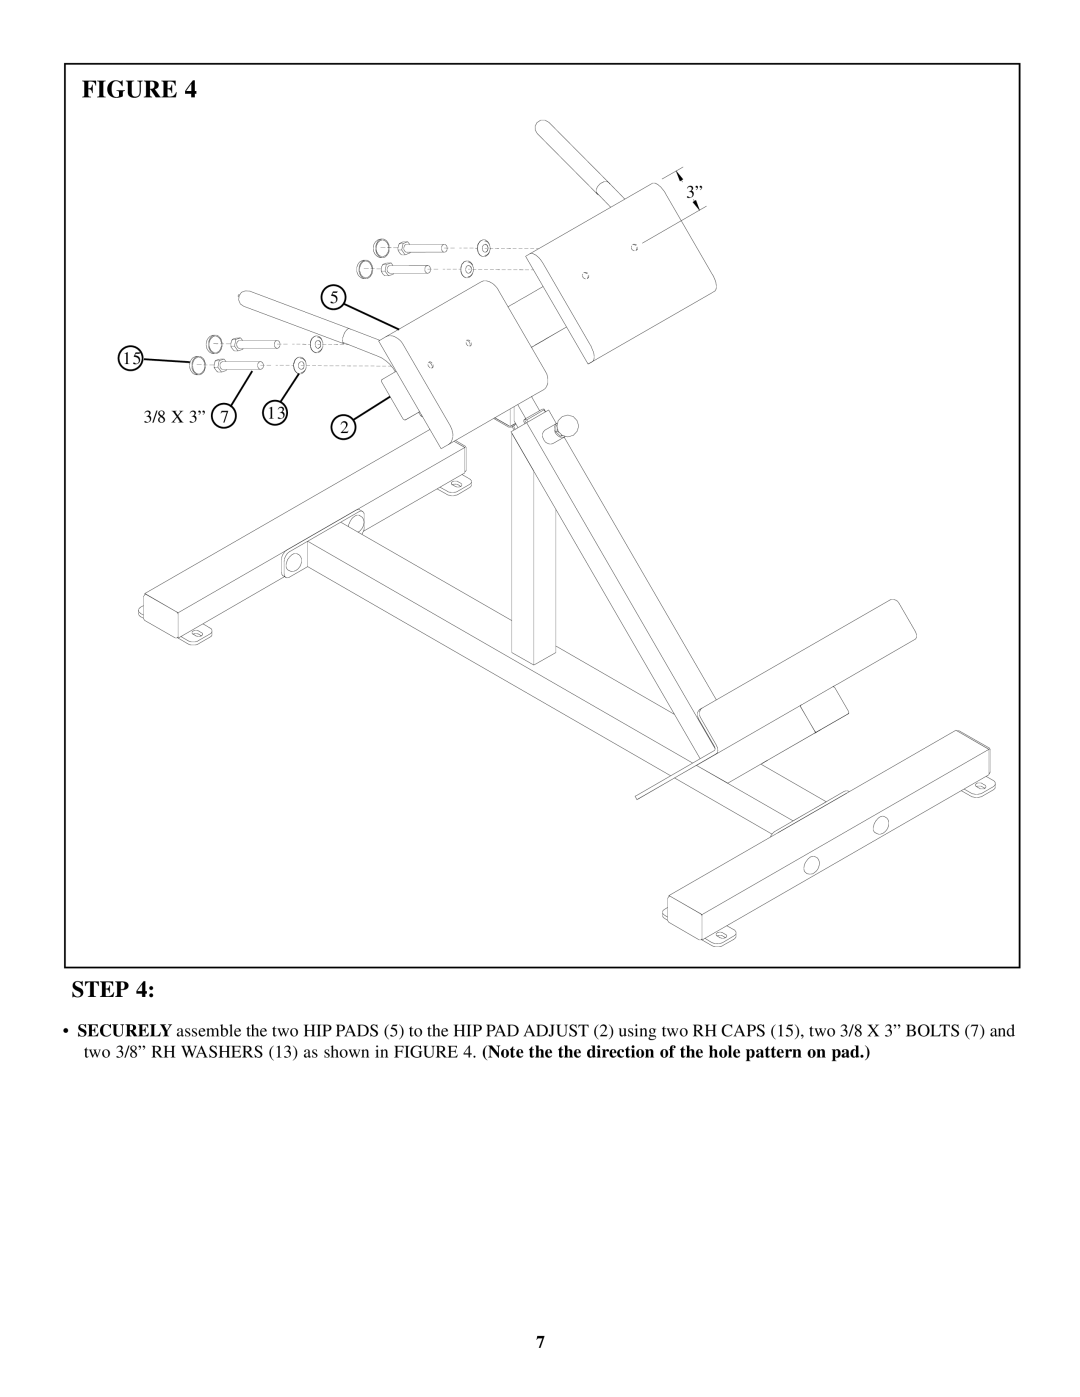
STEP 4:
•SECURELY assemble the two HIP PADS (5) to the HIP PAD ADJUST (2) using two RH CAPS (15), two 3/8 X 3” BOLTS (7) and two 3/8” RH WASHERS (13) as shown in FIGURE 4. (Note the the direction of the hole pattern on pad.)
7