[ | instruction | SHEET NO. | > |
|
INSTRUCTIONS FOR AITACHING LYTESPOT” TOIS:6280AZ
LYTESPAN@ TRACK
R0490
FOR USE WITH LYTESPAN@ TRACK SYSTEMS ONLY.
READ AND UNDERSTAND THESE INSTRUCTIONS BEFORE INSTALLING FIXTURE.
This | fixture | is | intended | for | installation | in accordance | with | the | National | Code | and local | regulations. | To | ||
assure | full | compliance | with | local | codes | and | regulations, |
| check | with | your local | electrical | inspector | before | |
installation. | To | prevent | electrical | shock, | turn | off electricity | at | fuse box before | proceeding. |
| |||||
Retain these instructions for maintenance reference.
INSTRUCTIONS FOR AITACHING LYTESPOT@ TO SINGLE CIRCUIT TRACK SYSTEM
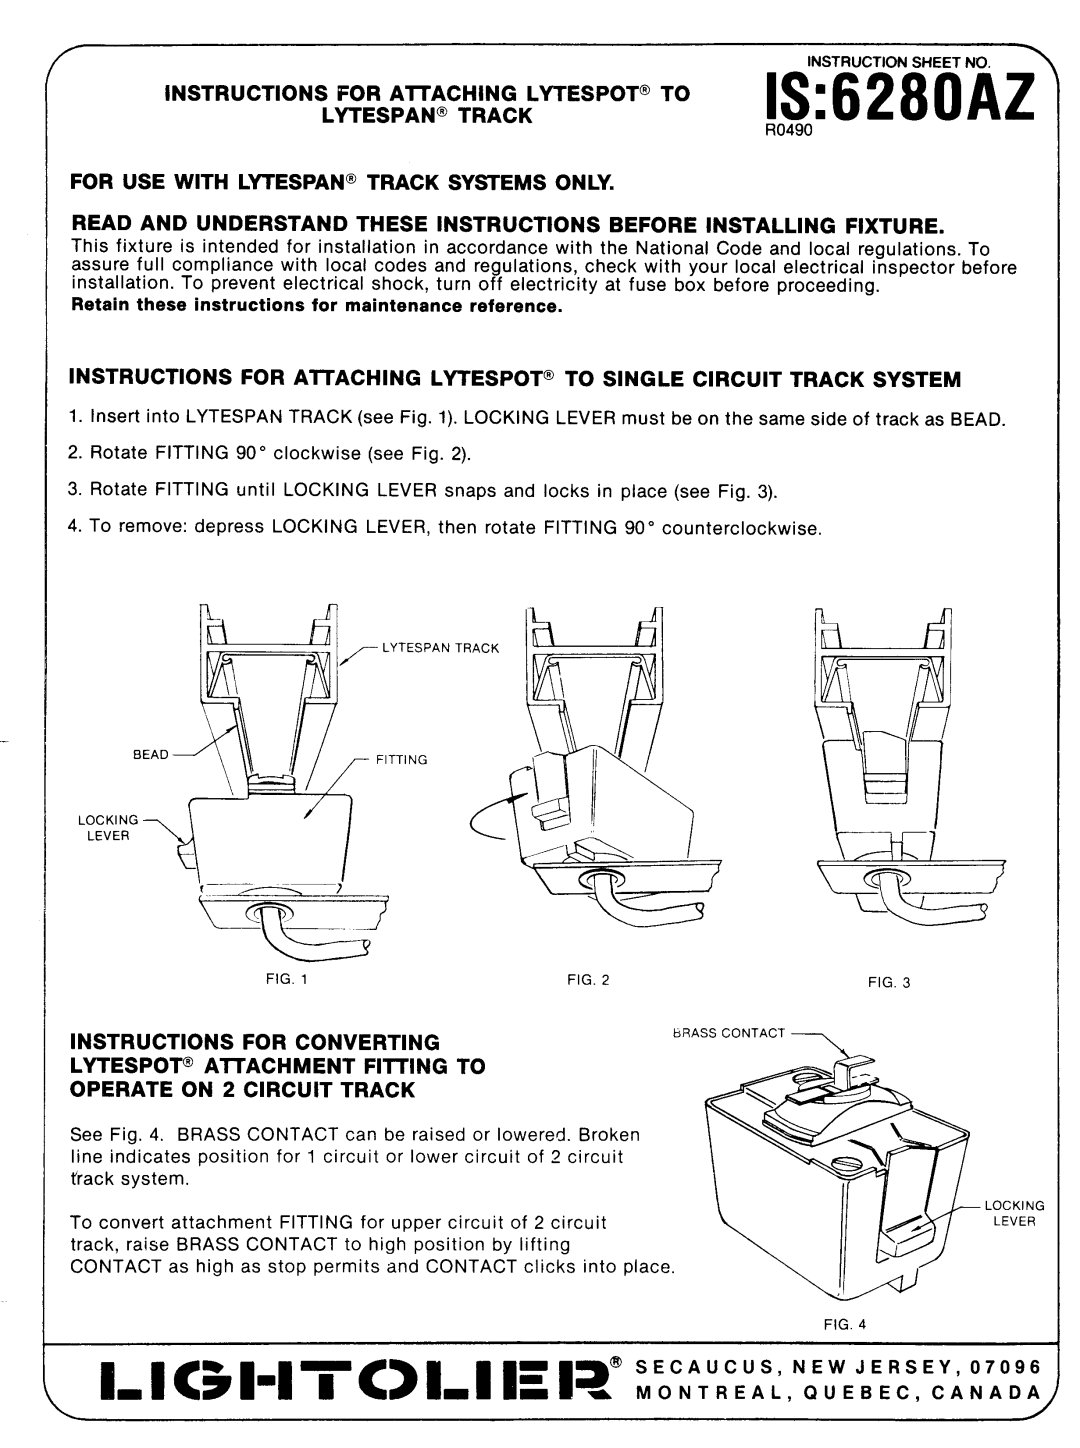
1.Insert into LYTESPAN TRACK (see Fig. 1). LOCKING LEVER must be on the same side of track as BEAD.
2.Rotate FITTING 90° clockwise (see Fig. 2).
3.Rotate FITTING until LOCKING LEVER snaps and locks in place (see Fig. 3).
4.To remove: depress LOCKING LEVER, then rotate FITTING 90° counterclockwise.
LYTESPAN
BEADITTING
LOCKING >
FIG. 1 | FIG. 2 |
INSTRUCTIONS FOR CONVERTING
LYTESPOT@ Attachment FITTING TO
OPERATE ON 2 CIRCUIT TRACK
See Fig. 4. BRASS CONTACT can be raised or lowered. Broken line indicates position for 1 circuit or lower circuit of 2 circuit track system.
To convert attachment FITTING for upper circuit of 2 circuit track, raise BRASS CONTACT to high position by lifting
CONTACT as high as stop permits and CONTACT clicks into place.
FIG. 3
t!RASS CONTACT
~@
LOCKING
LEVER
FIG. 4