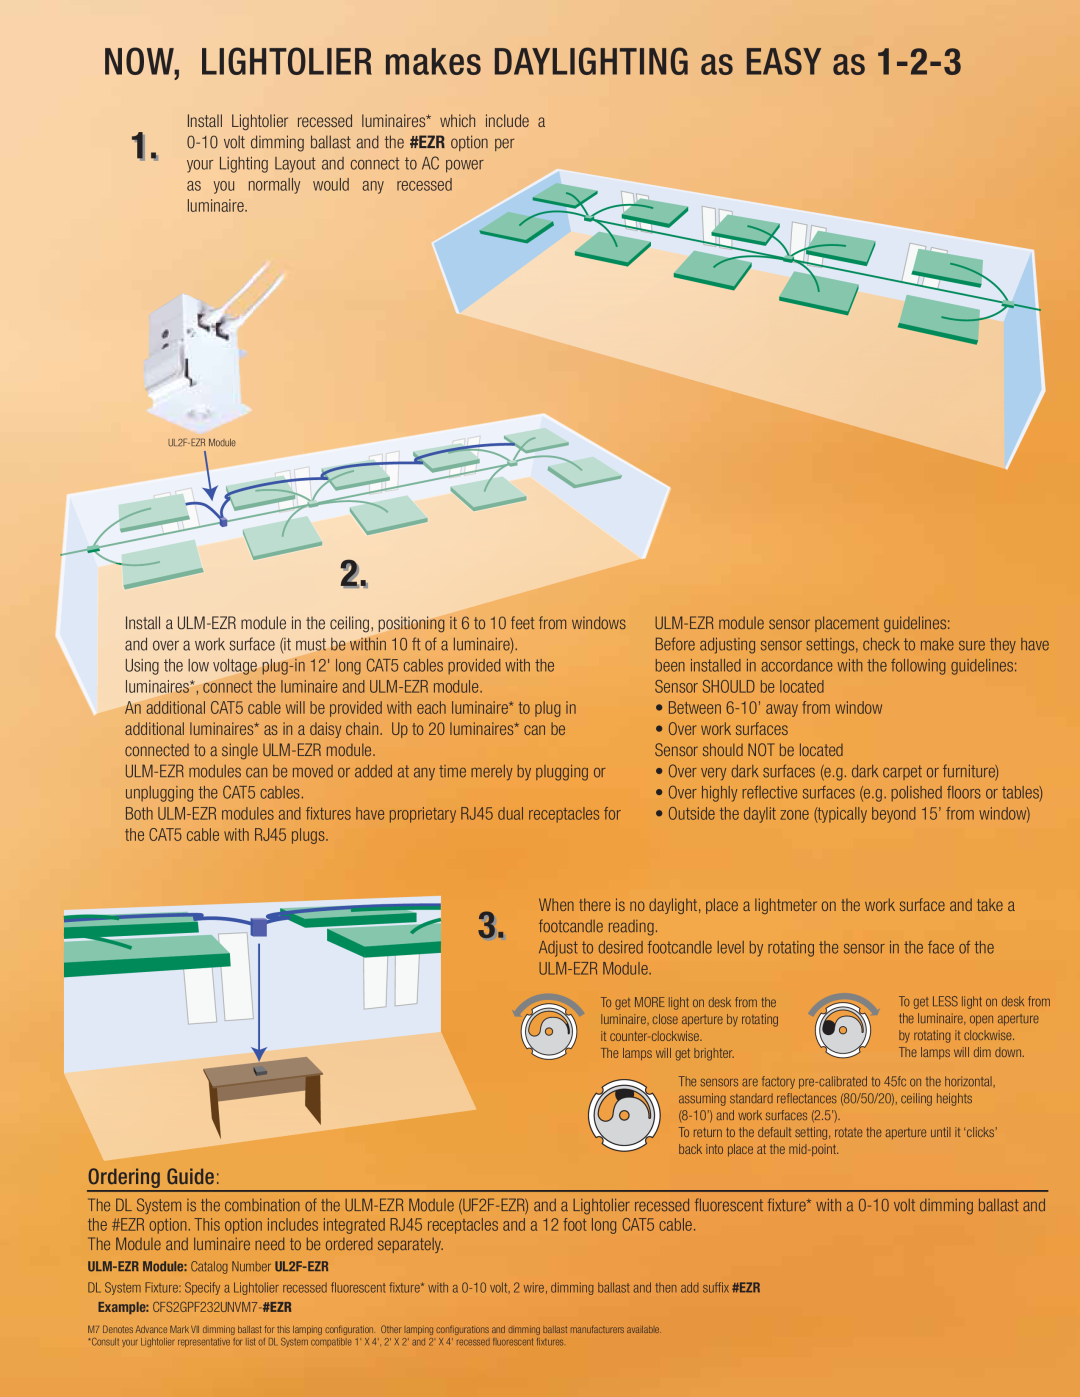
NOW, LIGHTOLIER makes DAYLIGHTING as EASY as 1-2-3
Install Lightolier recessed luminaires* which include a 1..
your Lighting Layout and connect to AC power as you normally would any recessed luminaire.
2..
Install a
Using the low voltage
An additional CAT5 cable will be provided with each luminaire* to plug in additional luminaires* as in a daisy chain. Up to 20 luminaires* can be connected to a single
Both
Before adjusting sensor settings, check to make sure they have been installed in accordance with the following guidelines: Sensor SHOULD be located
•Between
•Over work surfaces
Sensor should NOT be located
•Over very dark surfaces (e.g. dark carpet or furniture)
•Over highly reflective surfaces (e.g. polished floors or tables)
•Outside the daylit zone (typically beyond 15’ from window)
3..
Ordering Guide:
When there is no daylight, place a lightmeter on the work surface and take a footcandle reading.
Adjust to desired footcandle level by rotating the sensor in the face of the
To get MORE light on desk from the | To get LESS light on desk from |
luminaire, close aperture by rotating | the luminaire, open aperture |
it | by rotating it clockwise. |
The lamps will get brighter. | The lamps will dim down. |
The sensors are factory
To return to the default setting, rotate the aperture until it ‘clicks’ back into place at the
The DL System is the combination of the
The Module and luminaire need to be ordered separately.
DL System Fixture: Specify a Lightolier recessed fluorescent fixture* with a
Example:
M7 Denotes Advance Mark VII dimming ballast for this lamping configuration. Other lamping configurations and dimming ballast manufacturers available. *Consult your Lightolier representative for list of DL System compatible 1' X 4', 2' X 2' and 2' X 4' recessed fluorescent fixtures.