IS:6706 specifications
Lightolier IS:6706 is a cutting-edge lighting solution that combines efficiency, elegance, and versatility, making it an ideal choice for both residential and commercial spaces. This innovative fixture is designed to meet the diverse needs of modern lighting applications, delivering an exceptional balance of performance and aesthetics.One of the main features of the Lightolier IS:6706 is its advanced LED technology. Providing bright, uniform illumination while consuming significantly less energy than traditional fixtures, the IS:6706 not only reduces energy costs but also minimizes heat output. This energy-efficient design contributes to a smaller carbon footprint, making it an environmentally friendly option for eco-conscious users.
The IS:6706 comes with a sleek, contemporary design that fits seamlessly into various architectural styles. Available in multiple finishes such as matte white, brushed nickel, and black, this fixture enhances the visual appeal of any room, whether it’s a modern office space, a cozy home, or a retail environment. Its unobtrusive design ensures that it complements rather than competes with the existing décor.
Another notable characteristic of the Lightolier IS:6706 is its versatility. This fixture is suitable for a wide range of applications, including ambient, task, and accent lighting. With adjustable brightness levels, users can easily customize the lighting to suit the specific needs of the space, enhancing both functionality and comfort. The IS:6706 is compatible with various dimming technologies, allowing for seamless integration into smart home systems.
In terms of durability, the IS:6706 is built to last, featuring high-quality materials and construction that withstand the rigors of daily use. With a long operational lifespan, this fixture reduces the frequency and costs of replacements, making it a practical choice for any lighting project.
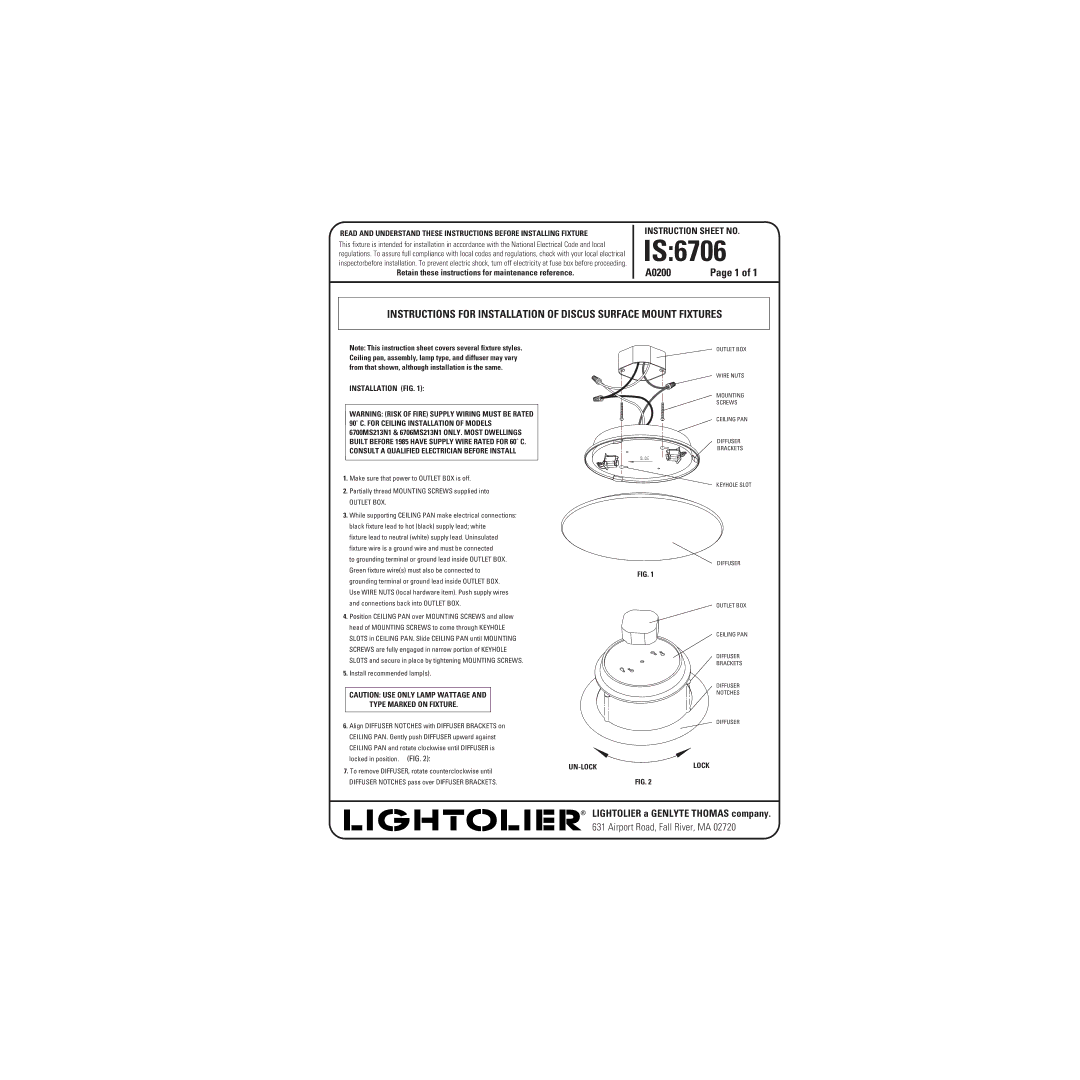
Furthermore, the Lightolier IS:6706 is designed with ease of installation in mind. Its user-friendly mounting system simplifies the installation process, allowing for quick and efficient setup without the need for specialized tools or extensive training.
In conclusion, the Lightolier IS:6706 stands out as an exemplary lighting solution, offering advanced LED technology, a modern aesthetic, and remarkable versatility. Its energy efficiency, durability, and ease of installation make it a top choice for those seeking a high-quality lighting option that meets the demands of today's dynamic environments.