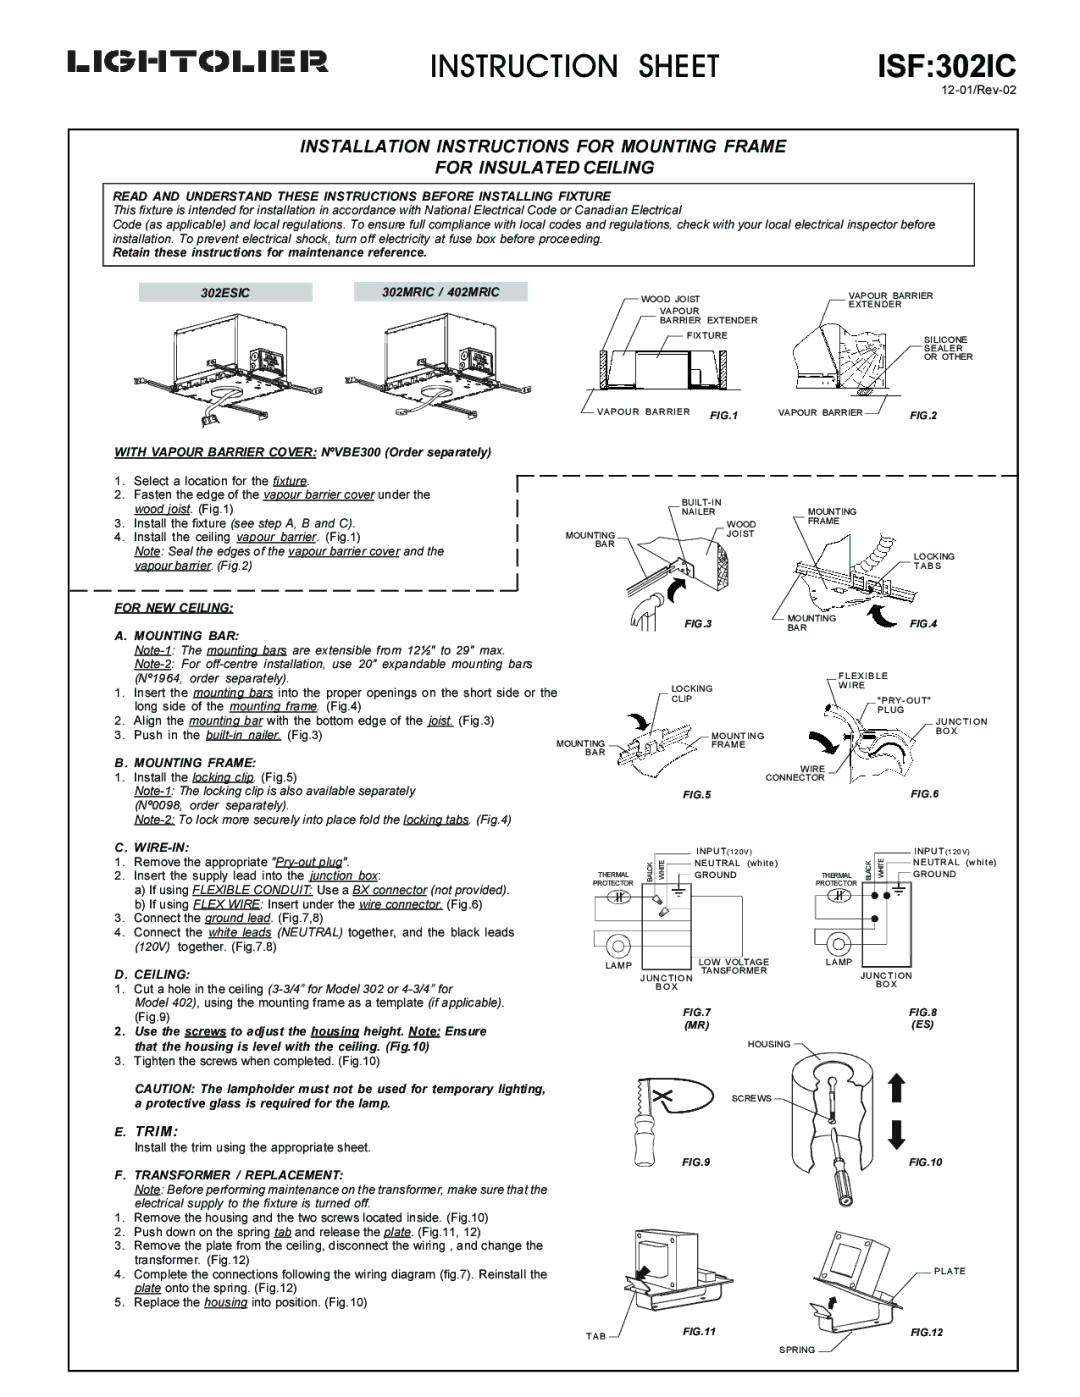
IS:F302IC specifications
The Lightolier IS:F302IC is a versatile and efficient recessed lighting fixture designed for both commercial and residential applications. Known for its innovative design and energy efficiency, this housing unit exemplifies the modern approach to lighting. It is engineered to deliver high-performance illumination while seamlessly integrating into various ceiling types.One of the standout features of the IS:F302IC is its airtight construction. This housing complies with the highest energy efficiency standards, minimizing air leakage and ensuring that conditioned air remains inside the living or working space. As a result, it contributes to lower energy bills and a reduced environmental footprint. The airtight design is particularly beneficial in energy-conscious building projects and retrofit applications.
The IS:F302IC supports a range of light sources, making it suitable for diverse lighting needs. It accommodates a variety of lamp types, including LED, CFL, and incandescent bulbs, giving users the flexibility to choose the best lighting solution for their specific requirements. The fixture’s compatibility with dimmable LEDs also allows for adjustable brightness levels, enabling users to create the perfect ambiance for any setting.
Lightolier employs advanced insulation contact (IC) technology in the IS:F302IC, allowing the fixture to be installed in direct contact with insulation. This feature not only enhances the safety of the installation but also provides peace of mind regarding potential fire risks.
In terms of installation, the IS:F302IC offers a quick and efficient setup process. It includes mounting brackets and a universal housing that fits between standard joists, making it easy for electricians to install in new construction as well as remodel projects. The adjustable trim options allow for tailored aesthetic choices, transforming the fixture into an integrated part of the ceiling design.
Another significant characteristic of the IS:F302IC is its robust construction. Designed for durability, this fixture can withstand the rigors of everyday use, ensuring longevity and reliability in high-traffic areas. Additionally, its sleek design and low-profile appearance make it an attractive choice for modern architectural aesthetics.
In conclusion, the Lightolier IS:F302IC is a highly functional recessed lighting solution that excels in energy efficiency, versatility, and ease of installation. Its combination of advanced technologies and thoughtful design makes it a favored option among industry professionals looking for dependable and innovative lighting fixtures. Whether upgrading an existing space or embarking on a new construction project, the IS:F302IC stands out as a top-tier choice in modern lighting solutions.