42867 specifications
The Lindy 42867 is a high-quality audio and video extender that is renowned for its versatility and remarkable performance in both residential and commercial settings. It is engineered to transfer HDMI signals over long distances, making it an ideal solution for scenarios where traditional cabling would be impractical, such as in large venues, conference rooms, or home theaters.One of the standout features of the Lindy 42867 is its ability to extend HDMI signals up to 50 meters, ensuring crystal-clear video and audio quality even over extensive distances. This is achieved through the use of advanced transmission technologies that utilize CAT cabling, specifically CAT 6 or higher. This capability allows users to maintain high-resolution signals, supporting resolutions up to 4K at 60Hz, which is becoming increasingly important as 4K content becomes more prevalent.
Additionally, the Lindy 42867 supports a range of audio formats, including multi-channel surround sound, providing an immersive audio experience that complements the stunning visuals. It is designed to be compatible with a wide array of devices, including Blu-ray players, gaming consoles, and modern laptops, ensuring broad applicability across different use cases.
Another significant technology integrated into the Lindy 42867 is EDID (Extended Display Identification Data) management, which facilitates seamless communication between the source and the display. This ensures that the best possible resolution and refresh rate are automatically configured, making setup and operation straightforward and hassle-free.
The Lindy 42867 also boasts robust build quality, designed to endure frequent use in various environments. It features a compact and lightweight design, making it easy to install and transport. Furthermore, the device incorporates features like LED indicators to provide real-time feedback on the status of the signal, enhancing user experience and troubleshooting.
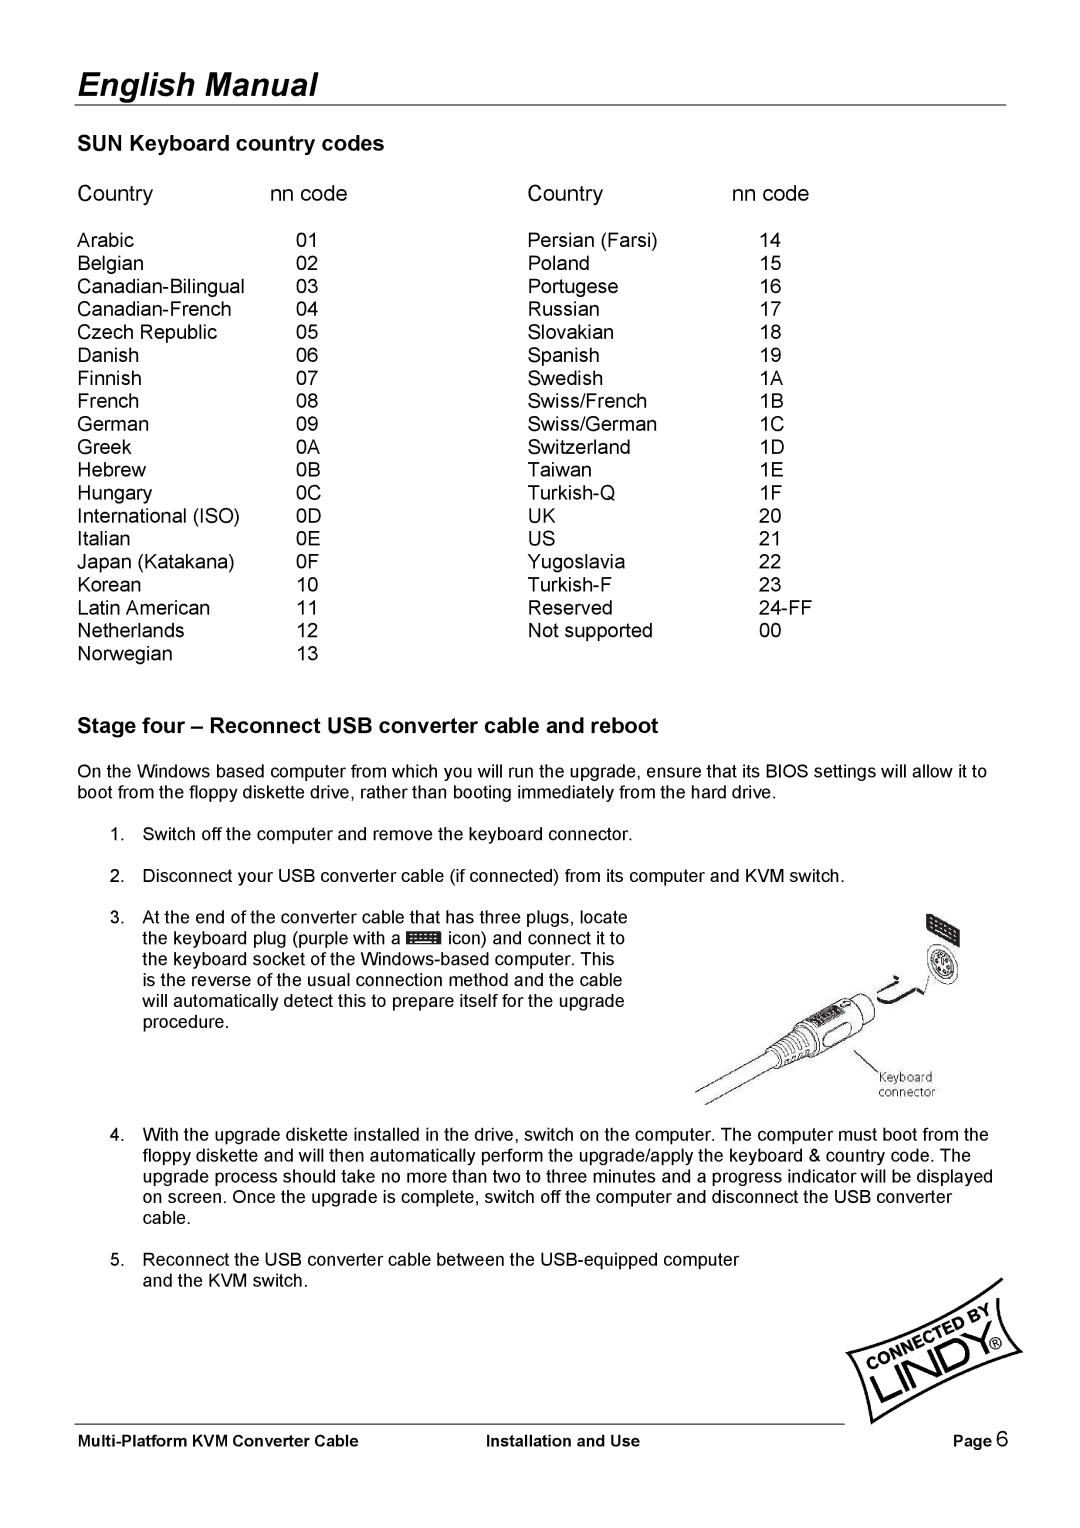
In terms of connectivity, the Lindy 42867 includes both input and output ports for HDMI connections, as well as additional ports for power supply, which ensures that users have all the necessary connections at their disposal. This sophisticated device not only enhances the viewing experience but also offers reliability and ease of use, making it a preferred choice for users looking to elevate their audio-visual setup.
Overall, the Lindy 42867 stands out as a premier solution for those seeking to extend HDMI signals without compromising quality, making it an invaluable asset for any serious audio-visual enthusiast or professional.