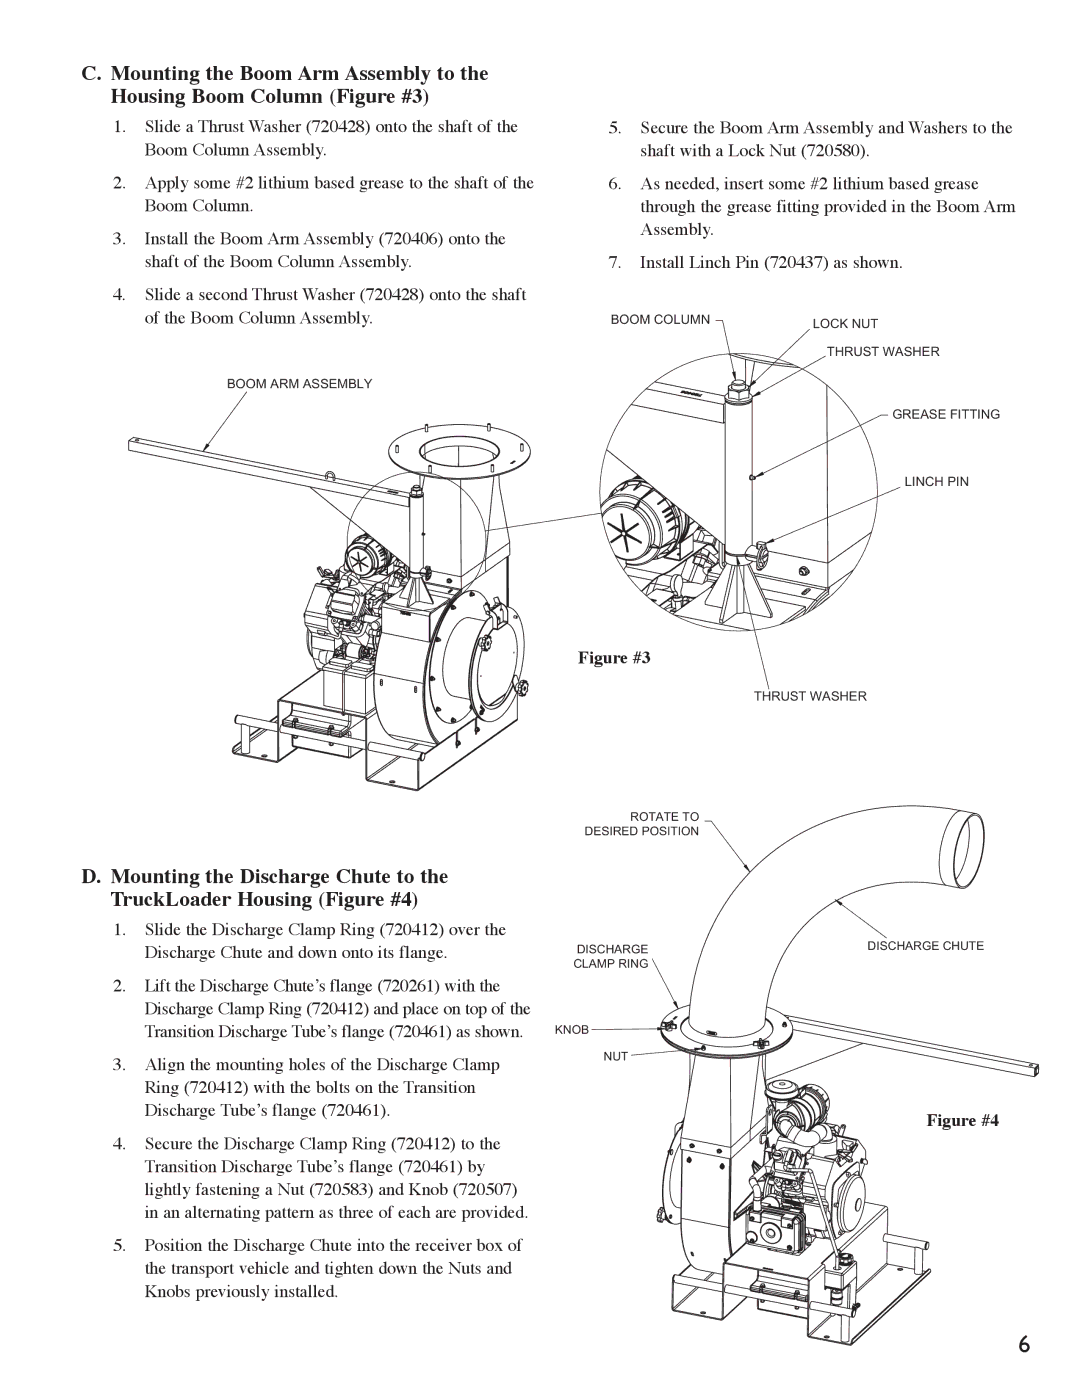
C.Mounting the Boom Arm Assembly to the Housing Boom Column (Figure #3)
1.Slide a Thrust Washer (720428) onto the shaft of the Boom Column Assembly.
2.Apply some #2 lithium based grease to the shaft of the Boom Column.
3.Install the Boom Arm Assembly (720406) onto the shaft of the Boom Column Assembly.
4.Slide a second Thrust Washer (720428) onto the shaft of the Boom Column Assembly.
BOOM ARM ASSEMBLY
5.Secure the Boom Arm Assembly and Washers to the shaft with a Lock Nut (720580).
6.As needed, insert some #2 lithium based grease through the grease fitting provided in the Boom Arm Assembly.
7.Install Linch Pin (720437) as shown.
BOOM COLUMN | LOCK NUT |
| |
| THRUST WASHER |
GREASE FITTING
LINCH PIN
Figure #3
THRUST WASHER
ROTATE TO
DESIRED POSITION
D.Mounting the Discharge Chute to the TruckLoader Housing (Figure #4)
1.Slide the Discharge Clamp Ring (720412) over the Discharge Chute and down onto its flange.
2.Lift the Discharge Chute’s flange (720261) with the Discharge Clamp Ring (720412) and place on top of the Transition Discharge Tube’s flange (720461) as shown.
3.Align the mounting holes of the Discharge Clamp Ring (720412) with the bolts on the Transition Discharge Tube’s flange (720461).
4.Secure the Discharge Clamp Ring (720412) to the Transition Discharge Tube’s flange (720461) by lightly fastening a Nut (720583) and Knob (720507) in an alternating pattern as three of each are provided.
5.Position the Discharge Chute into the receiver box of the transport vehicle and tighten down the Nuts and Knobs previously installed.
DISCHARGE CLAMP RING
KNOB
NUT
DISCHARGE CHUTE
Figure #4
FIGURE
6