1. Package Contents
1 x CVC6997HR Hi- Res
Color Day/Night IR
Camera
1 x Mounting Bracket /
Stand
1 x 60 ft. extension cable
1 x BNC to RCA Adaptors
1 x AC Power Adaptor
Features:
•High resolution 1/3” Color CCD Image Sensor (480 TV Lines and 380,000 effective pixels)
•23 High Intensity IR LEDs provide effective night vision range of over 100ft.*
•Weatherproof** Design (IP67) with Armor Cable: ideal for indoor and outdoor installations.
•Day/Night Mode: Picture automatically switches camera to B&W delivering better clarity in low light conditions
•Ceiling or Wall Mountable
*IR Illumination range of 100 ft under ideal conditions. Objects at or beyond this range may be partially or completely obscured, depending on the camera application.
**Not recommended for direct exposure to water, rain, or snow.
2.Installing the Video Camera
1.Attach the camera to the supplied stand.
2. Mount the camera stand to the desired mounting
The mounting stand is designed to permanently mount the camera to a surface.
3. Connect the 60ft Extension cable to the camera:
| BNC (VIDEO) | POWER | |||||
(Yellow Connector) | (Black Connector) | ||||||
|
|
|
|
|
|
|
|
|
|
|
|
|
|
|
|
|
|
|
|
|
|
|
|
|
|
|
|
|
|
|
|
VIDEO INPUT
CONNECTIONS: | CAMERA | |
CONNECTIONS: | ||
Connect the BNC cable to | ||
Connect the BNC | ||
the video input of the | ||
and Power cables to | ||
monitor, and connect the | ||
the Camera | ||
power adaptor to an | ||
| ||
outlet. |
|
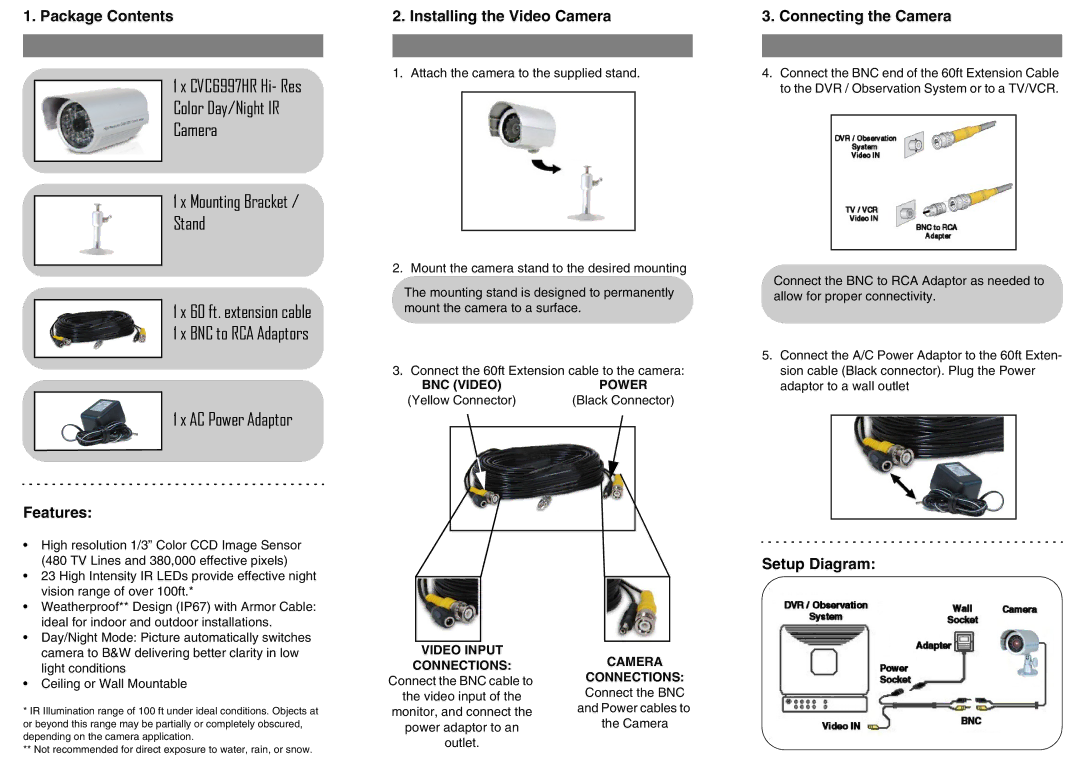
3.Connecting the Camera
4.Connect the BNC end of the 60ft Extension Cable
to the DVR / Observation System or to a TV/VCR.
Connect the BNC to RCA Adaptor as needed to allow for proper connectivity.
5.Connect the A/C Power Adaptor to the 60ft Exten- sion cable (Black connector). Plug the Power adaptor to a wall outlet