Dlink DI-624 specifications
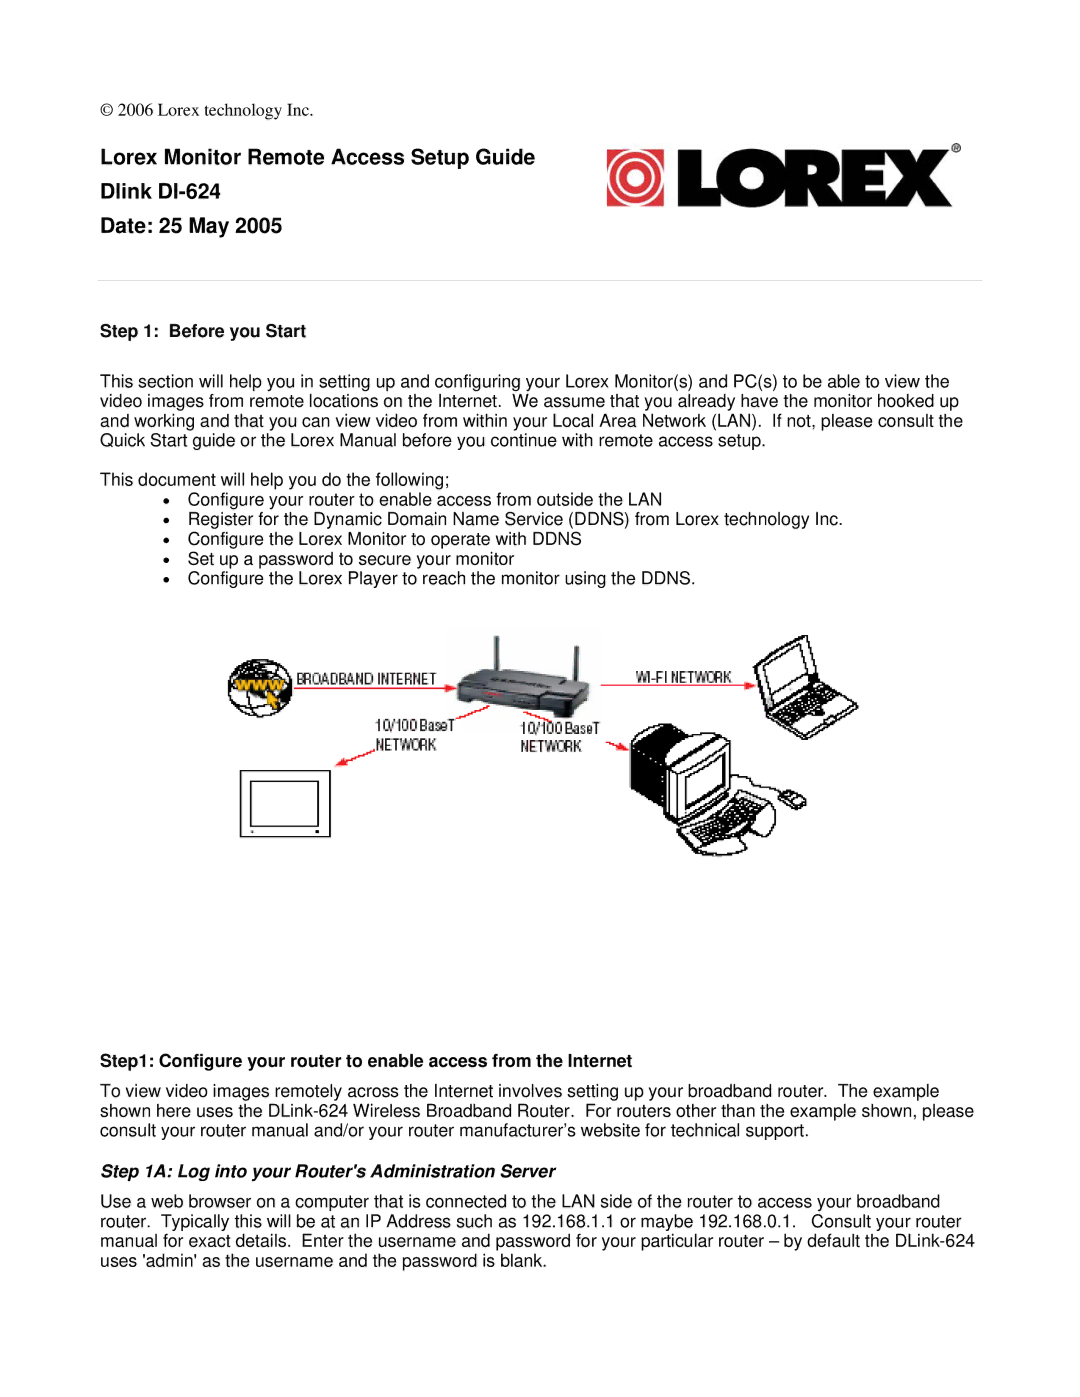
LOREX Technology has established itself as a prominent player in the surveillance and security industry, providing innovative solutions tailored to meet consumer and business needs. Among its diverse offerings, the D-Link DI-624 stands out as a versatile and powerful wireless router, ideal for home and small office use.The D-Link DI-624 is engineered to deliver seamless wireless connectivity through its advanced 802.11g technology, allowing users to achieve high-speed data transfer rates of up to 108 Mbps. This makes it suitable for activities such as streaming videos, online gaming, and large file downloads, thereby enhancing the overall internet experience.
One of the main features of the DI-624 is its robust security protocols. It supports WEP, WPA, and WPA2 encryption standards, which provide users with multiple layers of protection against unauthorized access. The router also includes a built-in firewall, adding an extra level of security to safeguard home networks from potential threats.
The DI-624 is designed with user convenience in mind. It offers an easy-to-navigate web-based interface, enabling users to configure settings and manage their networks effortlessly. Additionally, the router supports Advanced Encryption Standard (AES) encryption, ensuring that data transmitted over the network remains secure and confidential.
A noteworthy characteristic of the D-Link DI-624 is its ability to support multiple connections simultaneously. This multi-user capability is essential in today’s digital age where households often connect several devices, including computers, tablets, smartphones, and smart home devices.
Moreover, the DI-624 features Quality of Service (QoS) capabilities, allowing users to prioritize bandwidth for specific applications, which is particularly useful for maintaining a seamless experience during intensive online activities.
In terms of design, the D-Link DI-624 boasts a compact and sleek profile that can fit into various environments without being obtrusive. Its mounting options give users the flexibility to install it in convenient locations, optimizing wireless coverage throughout the premises.
Overall, the LOREX Technology D-Link DI-624 wireless router combines speed, security, and efficiency, making it an ideal choice for users looking to enhance their internet connectivity and protect their network without sacrificing performance.