1. Package Contents
1 x Micro Indoor/
Outdoor Camera
1 x Stand
1 x 60 ft. Extension Cable
1 x BNC to RCA Adaptor
1 x Power Adaptor
WARNING - REGULATED 12V DC 200mA power supply is REQUIRED for use with this camera. Use of a
Features:
2. Installing the Camera
1. Attach the camera to the supplied stand.
2.Mount the camera stand to the desired mounting surface (The mounting stand is designed to per- manently mount the camera to a surface.)
3.Connect the 60ft Extension cable to the camera:
BNC (VIDEO) | POWER | ||
(Yellow Connector) | (Black Connector) | ||
|
|
|
|
|
|
|
|
3.Connecting the Camera
4.Connect the BNC end of the 60ft Extension Cable
to the DVR / Observation System or to a TV/VCR.
Connect the BNC to RCA Adaptor as needed to allow for proper connectivity.
5.Connect the A/C Power Adaptor to the 60ft Exten- sion cable (Black connector). Plug the Power adaptor to a wall outlet
•Advanced micro image sensor provides High Resolution image (420 TV Lines)
•Weatherproof Indoor/Outdoor camera*
•Easily connects to any TV, VCR with RCA Composite A/V inputs
•60' of Cable included
•Excellent low light sensitivity (Min. 0.5 Lux)
•Ceiling and wall mounting bracket included
* Camera rated IP66 for resistance to snow and rain
NOTE: Test the camera prior to selecting a permanent mounting location by temporarily connecting the Cameras and cables to the TV, VCR, DVR or Observation System.
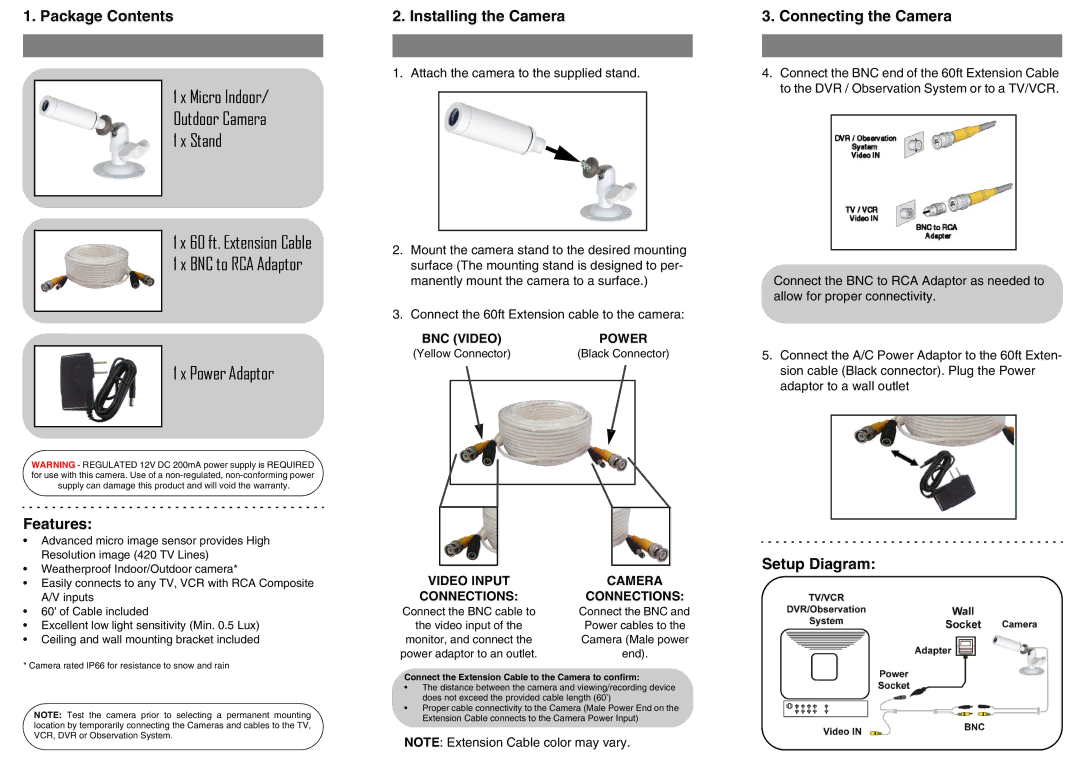
Setup Diagram:
VIDEO INPUT | CAMERA |
CONNECTIONS: | CONNECTIONS: |
Connect the BNC cable to | Connect the BNC and |
the video input of the | Power cables to the |
monitor, and connect the | Camera (Male power |
power adaptor to an outlet. | end). |
Connect the Extension Cable to the Camera to confirm:
•The distance between the camera and viewing/recording device does not exceed the provided cable length (60’)
•Proper cable connectivity to the Camera (Male Power End on the Extension Cable connects to the Camera Power Input)
NOTE: Extension Cable color may vary.
