These diagrams are provided for new installations or unreferenced wires.
INSTALLING BATTERIES/ MAINTENANCE
The unit requires batteries to operate your furnace and retain its memory. Replace the batteries when the LO BATT indicator appears in the display or at least once a year.
N O T E
If you have an electric system and the blower does not operate after installation, find the electric/gas heat selector on the back of the body. Move the selector to the ELEC position.
1. Remove fresh batteries from their carton.
2. Remove body of thermostat as described during installation.
3. | Remove the used batteries. | | Battery | | |
4. | Install two new Energizer® or | | Compartment |
| DURACELL® "AA" size alkaline | | | | | |
| batteries in the battery compartment. | | | | | |
| Observe the polarity marking | | | | | |
| shown in the compartment. | | | | | |
| | | REPLACE BATTERIES WHEN INDICATOR APPEARS |
| WARNING: Use Energizer® or | |
| | | | | | |
| DURACELL® | | | | | N O T E |
| Alkaline Batteries Only. | | | | When replacing batteries, you |
| | | | | have approximately 1 minute |
| | | | |
5. | Place the body back on the wall. Hook the bottom | before programs are lost. |
| of the body onto the base, swing the body up | | | |
| and snap the body onto the base. | | | | | |
Installation is now complete. Be sure to turn the power back on to your heating and/or air conditioning system. Within 90 seconds the thermostat will begin to display the room temperature.
6.Press either the TEMPERATURE UP or DOWN key in order to show the current
SET TEMPERATURE.
7.Press TEMPERATURE UP or DOWN keys again until your desired temperature is displayed. The display will show the current room temperature again after two seconds.
N O T E
If you have an electric system and the blower does not operate after installation, find the electric/gas heat jumper on the back of the body as indicated on the diagram below. Move the jumper from the pins on the far right to the pins on the far left.
•In the winter, set the system switch to HEAT to control your heating system.
•In the summer, set the switch to COOL to control your air conditioner.
•In spring and fall or when windows are open, you can set the system switch OFF.
•Setting the FAN switch to AUTO automatically runs your system’s fan during heating and cooling.
| • Setting the FAN switch to | N | O | T | E |
| ON runs your system’s fan |
| The FAN switch works only if your system |
| continuously even without |
| provides a wire for the UNIT’S “G” terminal. |
| heating or cooling. |
| | | | |
ADVANCED FEATURES
TEMPERATURE SWING
A thermostat works by turning your heating or cooling system on and off whenever the room temperature varies a certain number of degrees from the set-point temperature. This variation is the “swing.”
Your thermostat is carefully tuned to provide you with exceptional comfort as well as provide you with energy savings. Should you desire to have the temperature controlled even more tightly in your home at the expense of increased energy savings, you can change the swing value. Also users of forced hot water systems may find this setting more comfortable.
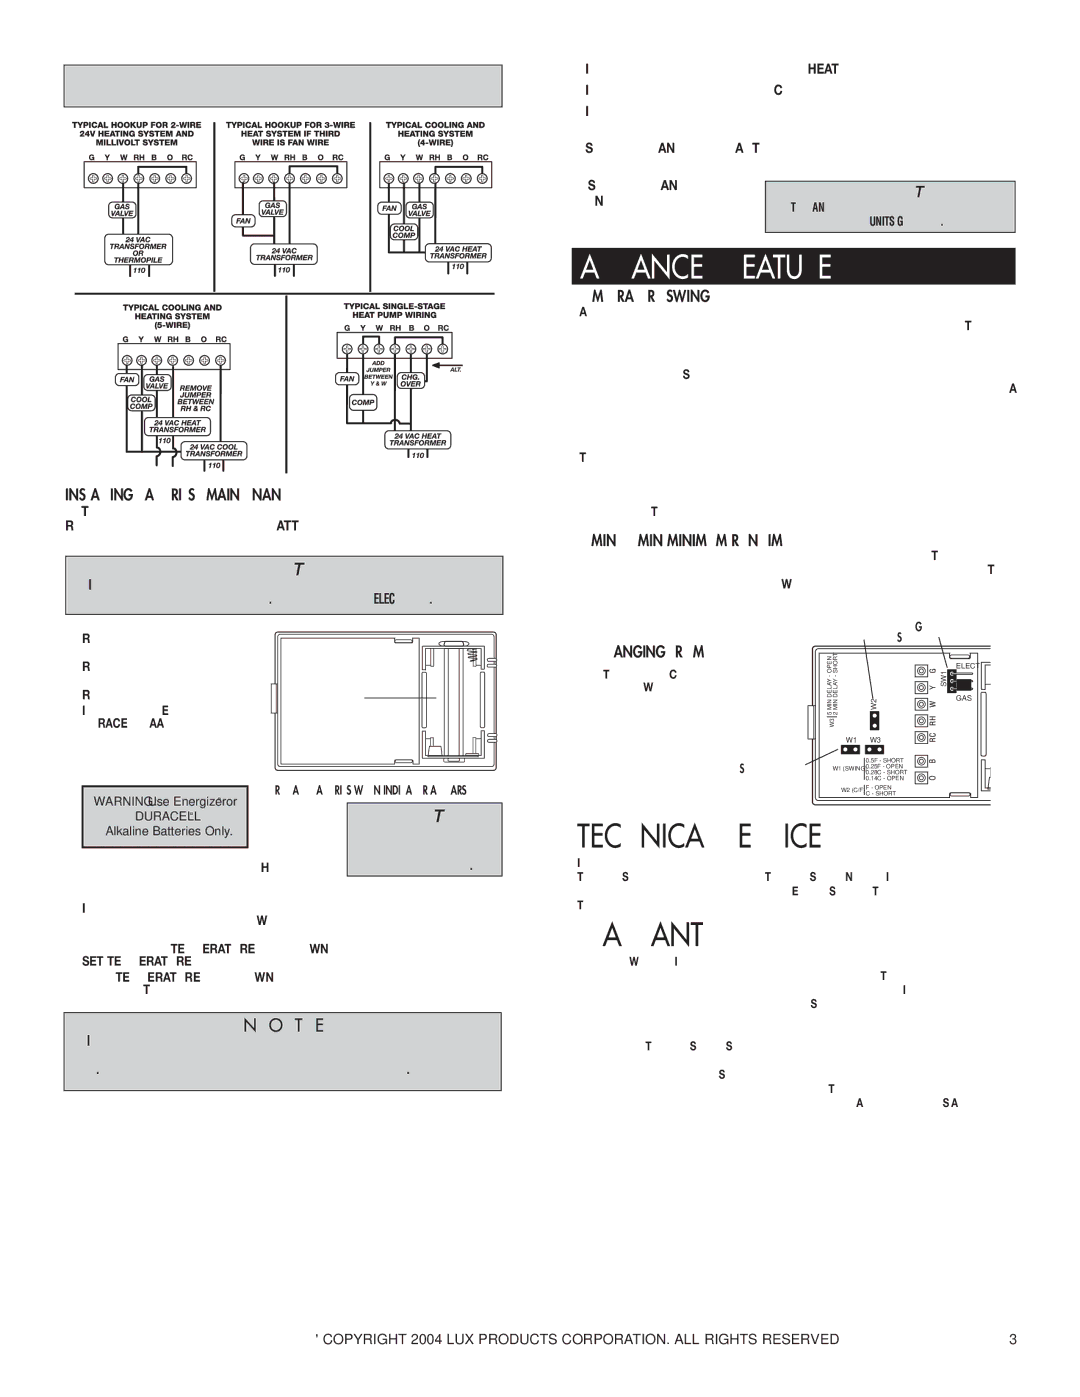
Located on the back of the thermostat body are three jumpers.
To change from 0.5 degree F control to 0.25 degree F control, remove the jumper indicated by 0.5 F / 0.25 F.
Press the small unmarked button on the front of the thermostat with a paper clip for the change to take effect. The unit will now control your home to 0.5 degrees.
5 MIN/2 MIN MINIMUM RUN TIME
Your thermostat has an internal timer built in to protect your compressor. The timer forces a minimum on-time of 5 minutes. You may change this minimum on-time to 2 minutes. To accomplish this, place the jumper labeled W3 over both pins. You must press the small unmarked button on the face of the thermostat for the changes to take effect.
| | C/F Jumper | | Elec/Gas |
| | | Selector |
| CHANGING FROM °F TO °C | | |
| OPEN-DELAY SHORT-DELAY | | SW1 |
| • To change to Celsius - place the jumper | | | ELECT |
| | | |
| labeled W2 over both pins. | | | GAS |
| • Press the small unmarked button on the | MIN MIN | W2 |
| |
| 5 2 | | |
| front of the thermostat for the changes | W3 | | |
| to take effect. | W1 | W3 | |
| | |
0.5F - SHORT
Swing Jumper W1 (SWING) 0.25F - OPEN 0.28C - SHORT
0.14C - OPEN
W2 (C/F) | F - OPEN |
| C - SHORT |
TECHNICAL SERVICE
If you have any problems installing or using this thermostat, please reread the instructions carefully. Technical Service is available through our Technical Service Number. If you require assistance, please call our offices between 8:00 a.m. and 4:30 p.m. Eastern Standard Time, Monday through Friday. The number is (856) 234-8803 or visit our online technical support at www.luxproducts.com.
WARRANTY
Limited Warranty: If this unit fails because of defects in materials or workmanship within one year of date of original purchase, LUX will, at its option, repair or replace it. This warranty does not cover damage by accident, misuse, or failure to follow installation instructions. Implied warranties are limited in duration to one year from date of original purchase. Some states do not allow limitations on how long an implied warranty lasts, so the above limitation may not apply to you. Please return malfunctioning or defective units to the participating retailer from which purchase was made, along with proof of purchase. Please refer to Technical Service Section before returning thermostat.
Purchaser assumes all risks and liability for incidental and consequential damage resulting from installation and use of this unit. Some states do not allow the exclusion of incidental or consequential damages, so the above exclusion may not apply to you. This warranty gives you specific legal rights and you may also have other rights which vary from state to state. Applicable in the U.S.A. only.