M3100CDUM .qxd 07/24/03 4:17 PM Page 8

Installation Procedure

Step 1: The radio chassis is designed to be “Sleeve Mounted” through a opening in the dashboard panel. The required opening size is 182mm (7-3/16") x 84mm (3-5/16"). Cut or enlarged an opening in the dashboard to accommodate the mounting sleeve.

Step 2: If you are replacing an existing factory installed radio, an adapter harness might be avail- able for your vehicle to eliminate the need for cut- ting your factory wiring. Contact Radio Shack or other car stereo installation centers for the availabil- ity of a harness for your vehicle.

Step 3: Insert the mounting sleeve into the hole in the dashboard. Bend the metal tabs on the sleeve to secure the mounting sleeve to the dashboard.

Step 4: Bring all wiring for the connection of the unit (including the antenna) through the center of the mounting sleeve. Connect the wiring as follows:

Yellow Wire (w/Fuse): Connect this wire to a con- stant +12 volt power source (a power source that is not controlled by the ignition key).

Red Wire: Connect this wire to a switched +12 volt power source (a power source turned on and off by the ignition key).

Blue Wire: Connect this wire to the (+) power antenna activation circuit. If no power antenna exists, tape-off the end of this wire to prevent short- ing out the unit.

Black Wire: Connect this wire to the frame of the vehicle (ground). This wire is the chassis grounding wire for the unit.

White Wire: Connect this wire to the Left Front Speaker (+) positive terminal or wire.

White Wire with Black Stripe: Connect this wire to the Left Front Speaker (-) negative terminal or wire.

Green Wire with Black Stripe: Connect this wire to the Left Rear Speaker (-) negative terminal or wire.

Green Wire: Connect this wire to the Left Rear Speaker (+) positive terminal or wire.

Gray Wire: Connect this wire to the Right Front Speaker (+) positive terminal or wire.

Gray Wire with Black Stripe: Connect this wire to the Right Front Speaker (-) negative terminal or wire.

Purple Wire with Black Stripe: Connect this wire to the Right Rear Speaker (-) negative terminal or wire.

Purple Wire: Connect this wire to the Right Rear Speaker (+) positive terminal or wire.

Gray Cable with Red/White RCA Connectors: Provides L/R Channel audio signal output to an additional amplifier.

Note: This unit is designed to connect to (4) four speakers. If the installation only requires (2) two speakers, use the White and Gray wire sets to con- nect the speakers.

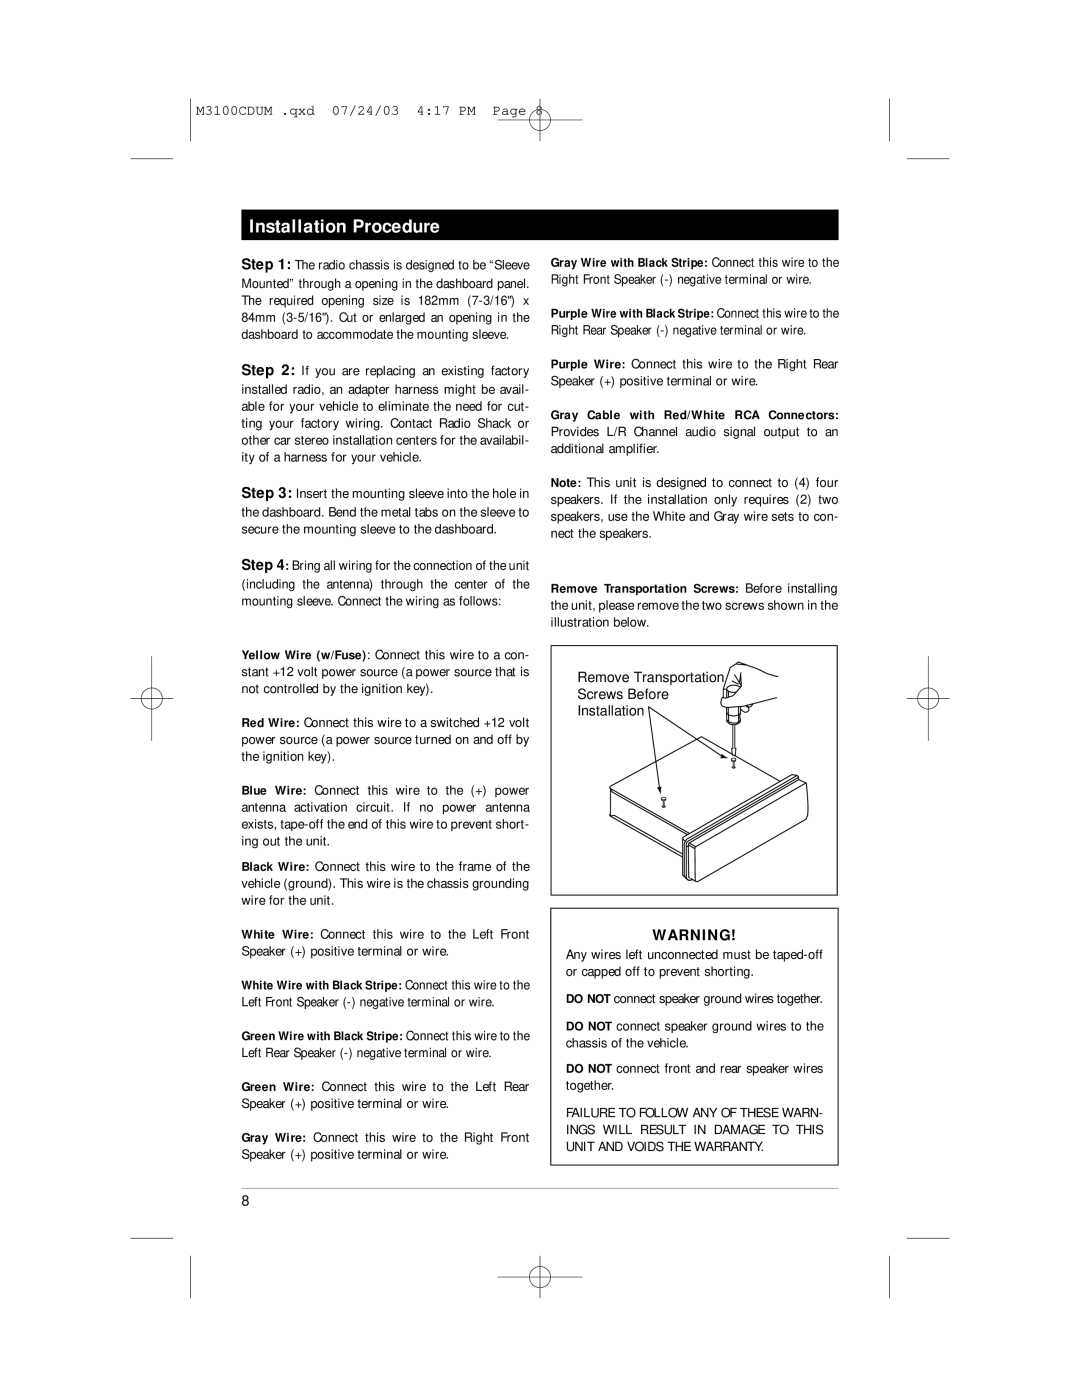
Remove Transportation Screws: Before installing the unit, please remove the two screws shown in the illustration below.

Remove Transportation

Screws Before

Installation

WARNING!

Any wires left unconnected must be taped-off or capped off to prevent shorting.

DO NOT connect speaker ground wires together.

DO NOT connect speaker ground wires to the chassis of the vehicle.

DO NOT connect front and rear speaker wires together.

FAILURE TO FOLLOW ANY OF THESE WARN- INGS WILL RESULT IN DAMAGE TO THIS UNIT AND VOIDS THE WARRANTY.

8

Page 8
Image 8
Magnadyne M3100CD manual Installation Procedure

M3100CD specifications

The Magnadyne M3100CD is a sophisticated multi-function audio system designed specifically for recreational vehicles, boats, and other mobile applications where high-quality sound and ease of use are paramount. This versatile device combines modern technology with user-friendly features, making it a popular choice among those seeking an enhanced audio experience.

One of the standout features of the M3100CD is its built-in CD player, which allows users to enjoy their favorite music collections without the need for external devices. In addition to CD playback, the unit supports various media formats, ensuring compatibility with a broad range of audio sources. The adjustable FM/AM radio tuner provides access to a wide variety of channels, keeping listeners entertained on long journeys.

The system also includes Bluetooth connectivity, enabling seamless wireless audio streaming from smartphones, tablets, and other Bluetooth-enabled devices. This feature allows users to easily play their favorite playlists or podcasts while keeping their devices safely stored away. Additionally, the M3100CD includes a USB port and auxiliary input, offering even more options for connecting external devices for playback.

The Magnadyne M3100CD features a robust and durable design, tailored for the rigors of outdoor use. It is built to withstand the challenging conditions often found in RVs and marine environments, ensuring longevity and reliable performance. The unit's weather-resistant casing protects it from moisture and dust, making it a dependable choice for adventures on the water or in the wilderness.

Another notable characteristic is its intuitive user interface, equipped with a large, easy-to-read display. The controls are designed for quick operation, allowing users to adjust settings without distraction. The remote control functionality further enhances convenience, enabling users to manage music playback from a distance.

Equipped with powerful internal amplifiers, the M3100CD delivers clear sound quality, even in noisy environments. Users can easily adjust bass and treble settings for a fully customizable audio experience. Overall, the Magnadyne M3100CD stands out as an ideal audio solution for those seeking reliable performance and versatility in their mobile sound system. Its combination of modern features, durable construction, and excellent sound quality makes it a preferred choice for many outdoor enthusiasts.