For tool without lock button and
To start the tool, simply pull the switch trigger. Release the switch trigger to stop.
For tool with lock button
To start the tool, simply pull the switch trigger. Release the switch trigger to stop.
For continuous operation, pull the switch trigger and then push in the lock button.
To stop the tool from the locked position, pull the switch trigger fully, then release it.
For tool with lock-off button
To prevent the switch trigger from being accidentally pulled, a
To start the tool, depress the
ASSEMBLY
![]() CAUTION:
CAUTION:
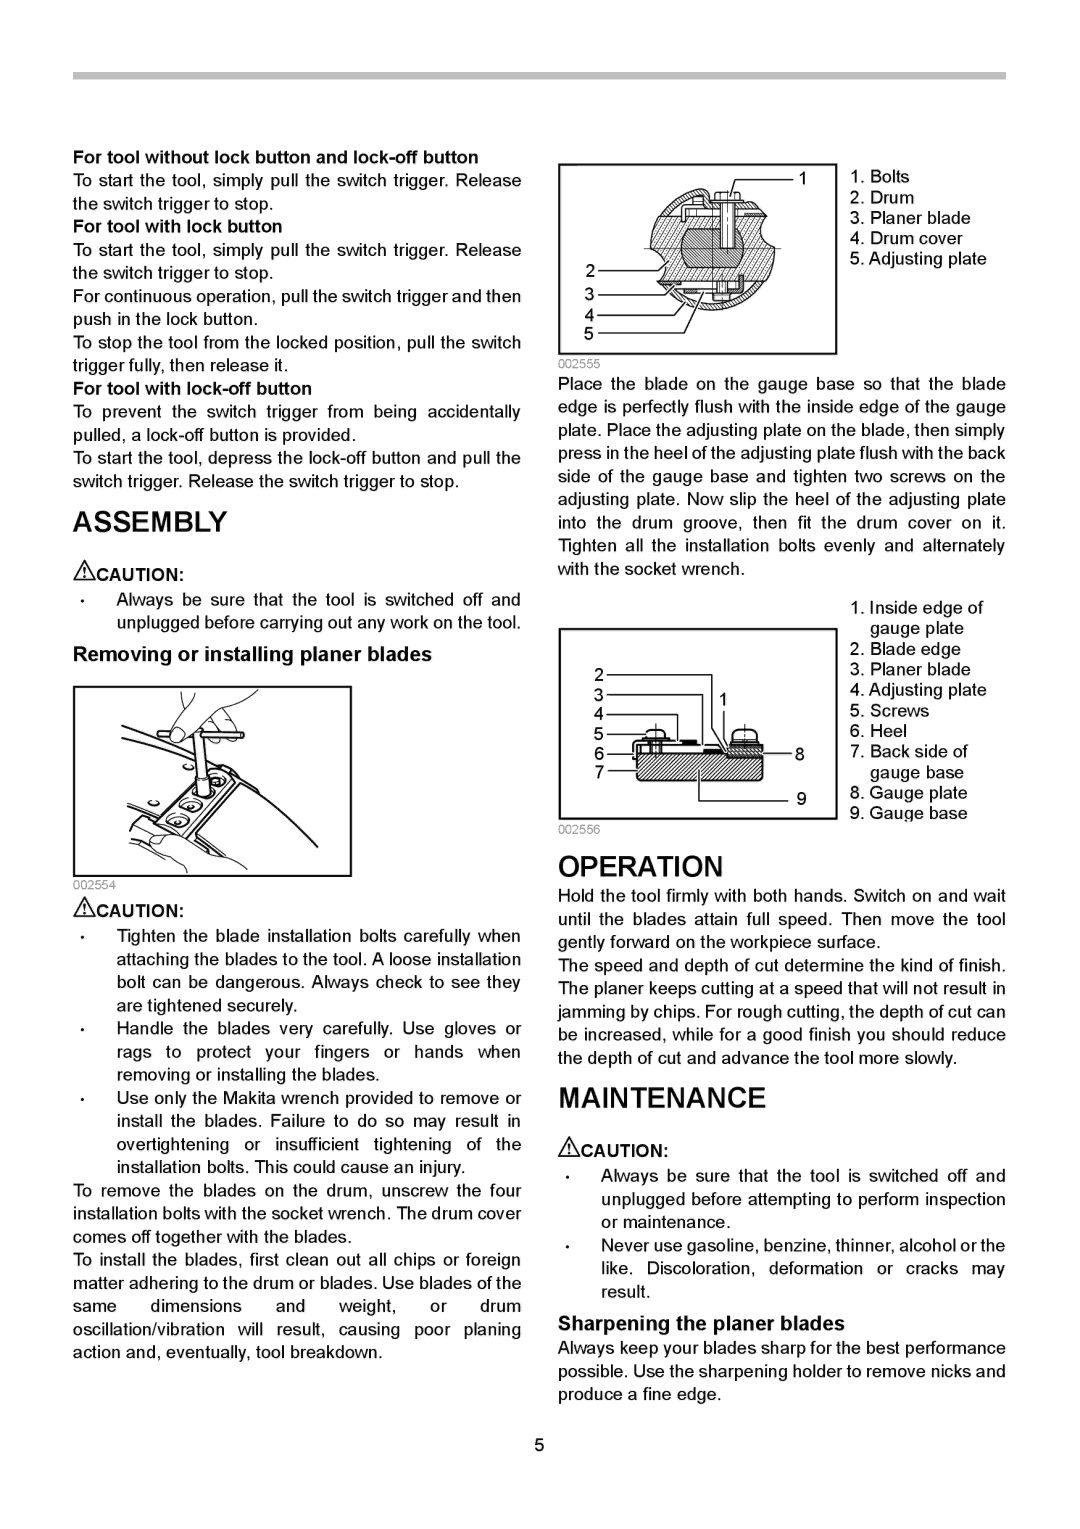
1 | 1. | Bolts |
| 2. | Drum |
| 3. | Planer blade |
| 4. | Drum cover |
2 | 5. Adjusting plate | |
|
| |
3 |
|
|
4 |
|
|
5 |
|
|
002555 |
|
|
Place the blade on the gauge base so that the blade edge is perfectly flush with the inside edge of the gauge plate. Place the adjusting plate on the blade, then simply press in the heel of the adjusting plate flush with the back side of the gauge base and tighten two screws on the adjusting plate. Now slip the heel of the adjusting plate into the drum groove, then fit the drum cover on it. Tighten all the installation bolts evenly and alternately with the socket wrench.
•Always be sure that the tool is switched off and unplugged before carrying out any work on the tool.
Removing or installing planer blades
2
3
4
5
6
7
002556
1
8
9
1.Inside edge of gauge plate
2.Blade edge
3.Planer blade
4.Adjusting plate
5.Screws
6.Heel
7.Back side of gauge base
8.Gauge plate
9.Gauge base
002554
![]() CAUTION:
CAUTION:
•Tighten the blade installation bolts carefully when attaching the blades to the tool. A loose installation bolt can be dangerous. Always check to see they are tightened securely.
•Handle the blades very carefully. Use gloves or rags to protect your fingers or hands when removing or installing the blades.
•Use only the Makita wrench provided to remove or install the blades. Failure to do so may result in overtightening or insufficient tightening of the
installation bolts. This could cause an injury.
To remove the blades on the drum, unscrew the four installation bolts with the socket wrench. The drum cover comes off together with the blades.
To install the blades, first clean out all chips or foreign matter adhering to the drum or blades. Use blades of the same dimensions and weight, or drum oscillation/vibration will result, causing poor planing action and, eventually, tool breakdown.
OPERATION
Hold the tool firmly with both hands. Switch on and wait until the blades attain full speed. Then move the tool gently forward on the workpiece surface.
The speed and depth of cut determine the kind of finish. The planer keeps cutting at a speed that will not result in jamming by chips. For rough cutting, the depth of cut can be increased, while for a good finish you should reduce the depth of cut and advance the tool more slowly.
MAINTENANCE
![]() CAUTION:
CAUTION:
•Always be sure that the tool is switched off and unplugged before attempting to perform inspection or maintenance.
•Never use gasoline, benzine, thinner, alcohol or the like. Discoloration, deformation or cracks may result.
Sharpening the planer blades
Always keep your blades sharp for the best performance possible. Use the sharpening holder to remove nicks and produce a fine edge.
5