Removing or installing planer blades
CAUTION:
Always be sure that the tool is switched off and unplugged before removing or installing the blade.
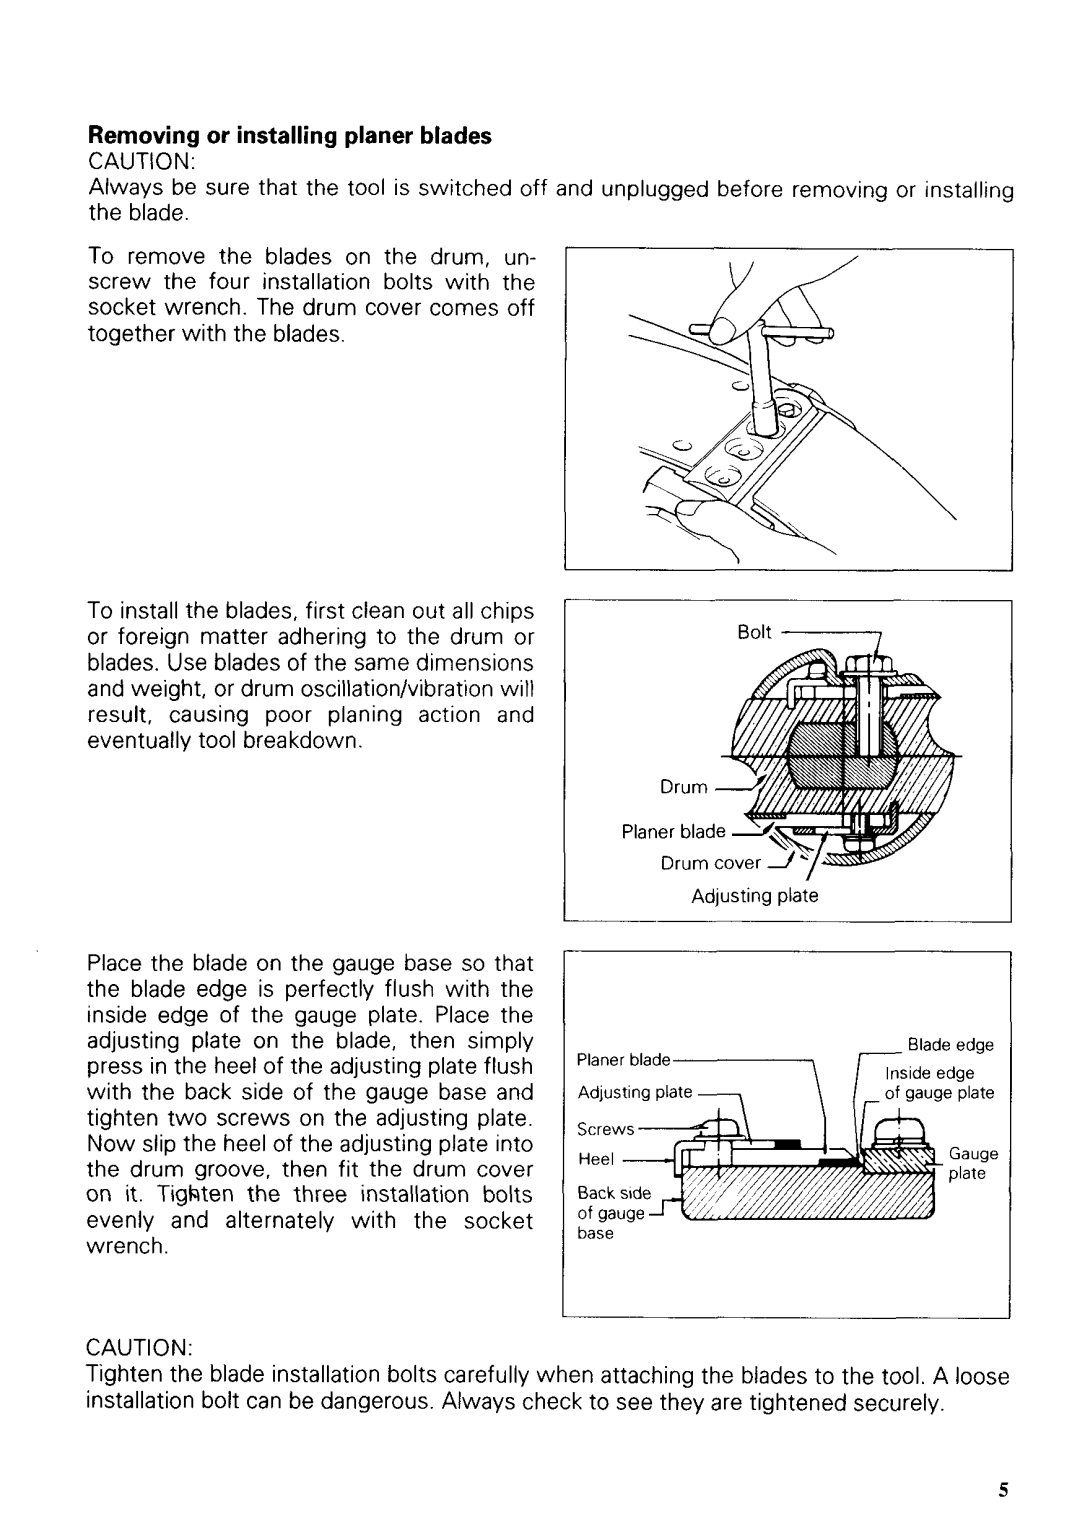
To remove the blades on the drum, un- screw the four installation bolts with the socket wrench. The drum cover comes off together with the blades.
|
| \ |
To install the blades, first clean out all chips | I | Bolt I |
or foreign matter adhering to the drum or | ||
blades. Use blades of the same dimensions |
|
|
and weight, or drum oscillation/vibration will |
|
|
result, causing poor planing action and |
|
|
eventually tool breakdown. |
|
|
|
| Drum |
Place the blade on the gauge base so that the blade edge is perfectly flush with the inside edge of the gauge plate. Place the adjusting plate on the blade, then simply press in the heel of the adjusting plate flush with the back side of the gauge base and tighten two screws on the adjusting plate. Now slip the heel of the adjusting plate into the drum groove, then fit the drum cover on it. Tigkten the three installation bolts evenly and alternately with the socket wrench.
Planer blac
Drum
I Adjusting plate
I Adjustingplate - \ /
I base
CAUTION:
Tighten the blade installation bolts carefully when attaching the blades to the tool. A loose installation bolt can be dangerous. Always check to see they are tightened securely.
5