ASSEMBLY
CAUTION:
•Always be sure that the tool is switched off and the battery cartridge is removed before carrying out any work on the tool.
002498
1
2
3
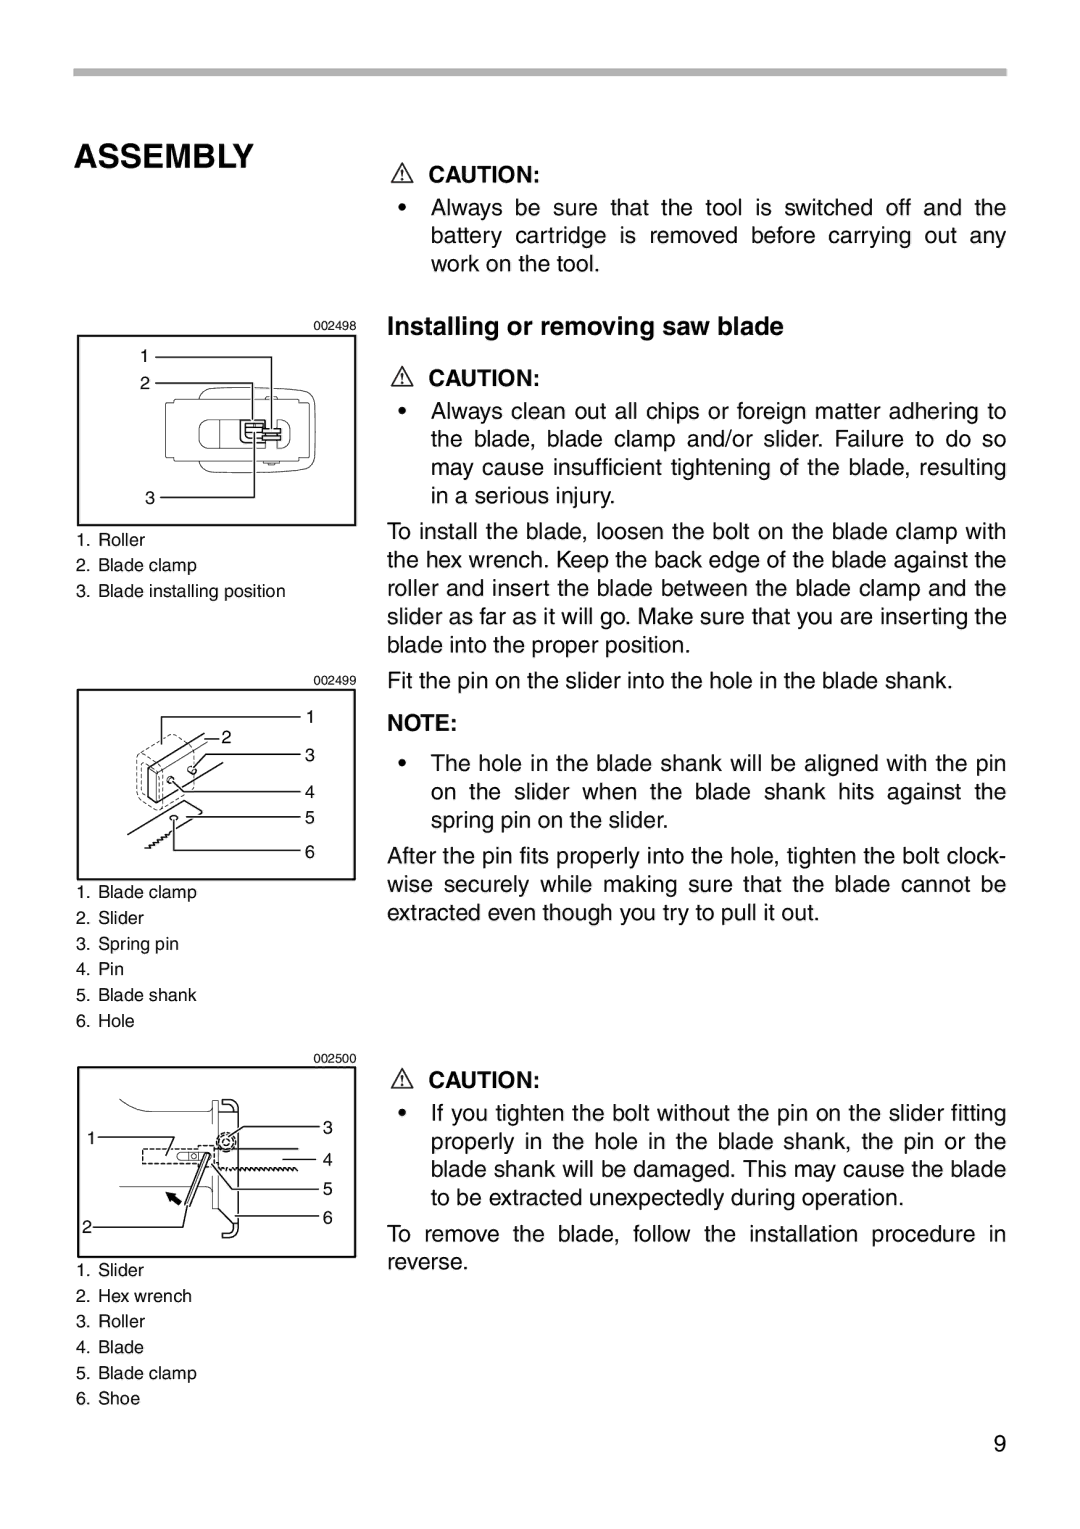
1.Roller
2.Blade clamp
3.Blade installing position
002499
1
2
3
4
5
6
1.Blade clamp
2.Slider
3.Spring pin
4.Pin
5.Blade shank
6.Hole
| 002500 |
1 | 3 |
| |
| 4 |
| 5 |
2 | 6 |
|
1.Slider
2.Hex wrench
3.Roller
4.Blade
5.Blade clamp
6.Shoe
Installing or removing saw blade
CAUTION:
•Always clean out all chips or foreign matter adhering to the blade, blade clamp and/or slider. Failure to do so may cause insufficient tightening of the blade, resulting in a serious injury.
To install the blade, loosen the bolt on the blade clamp with the hex wrench. Keep the back edge of the blade against the roller and insert the blade between the blade clamp and the slider as far as it will go. Make sure that you are inserting the blade into the proper position.
Fit the pin on the slider into the hole in the blade shank.
NOTE:
•The hole in the blade shank will be aligned with the pin on the slider when the blade shank hits against the spring pin on the slider.
After the pin fits properly into the hole, tighten the bolt clock- wise securely while making sure that the blade cannot be extracted even though you try to pull it out.
CAUTION:
•If you tighten the bolt without the pin on the slider fitting properly in the hole in the blade shank, the pin or the blade shank will be damaged. This may cause the blade to be extracted unexpectedly during operation.
To remove the blade, follow the installation procedure in reverse.
9