FUNCTIONAL DESCRIPTION
![]() CAUTION:
CAUTION:
•Always be sure that the tool is switched off and unplugged before adjusting or checking function on the tool.
Switch action
rotation before the tool stops may damage the tool.
ASSEMBLY
![]() CAUTION:
CAUTION:
•Always be sure that the tool is switched off and unplugged before carrying out any work on the tool.
Installing or removing drill bit
1![]()
2
003554
![]() CAUTION:
CAUTION:
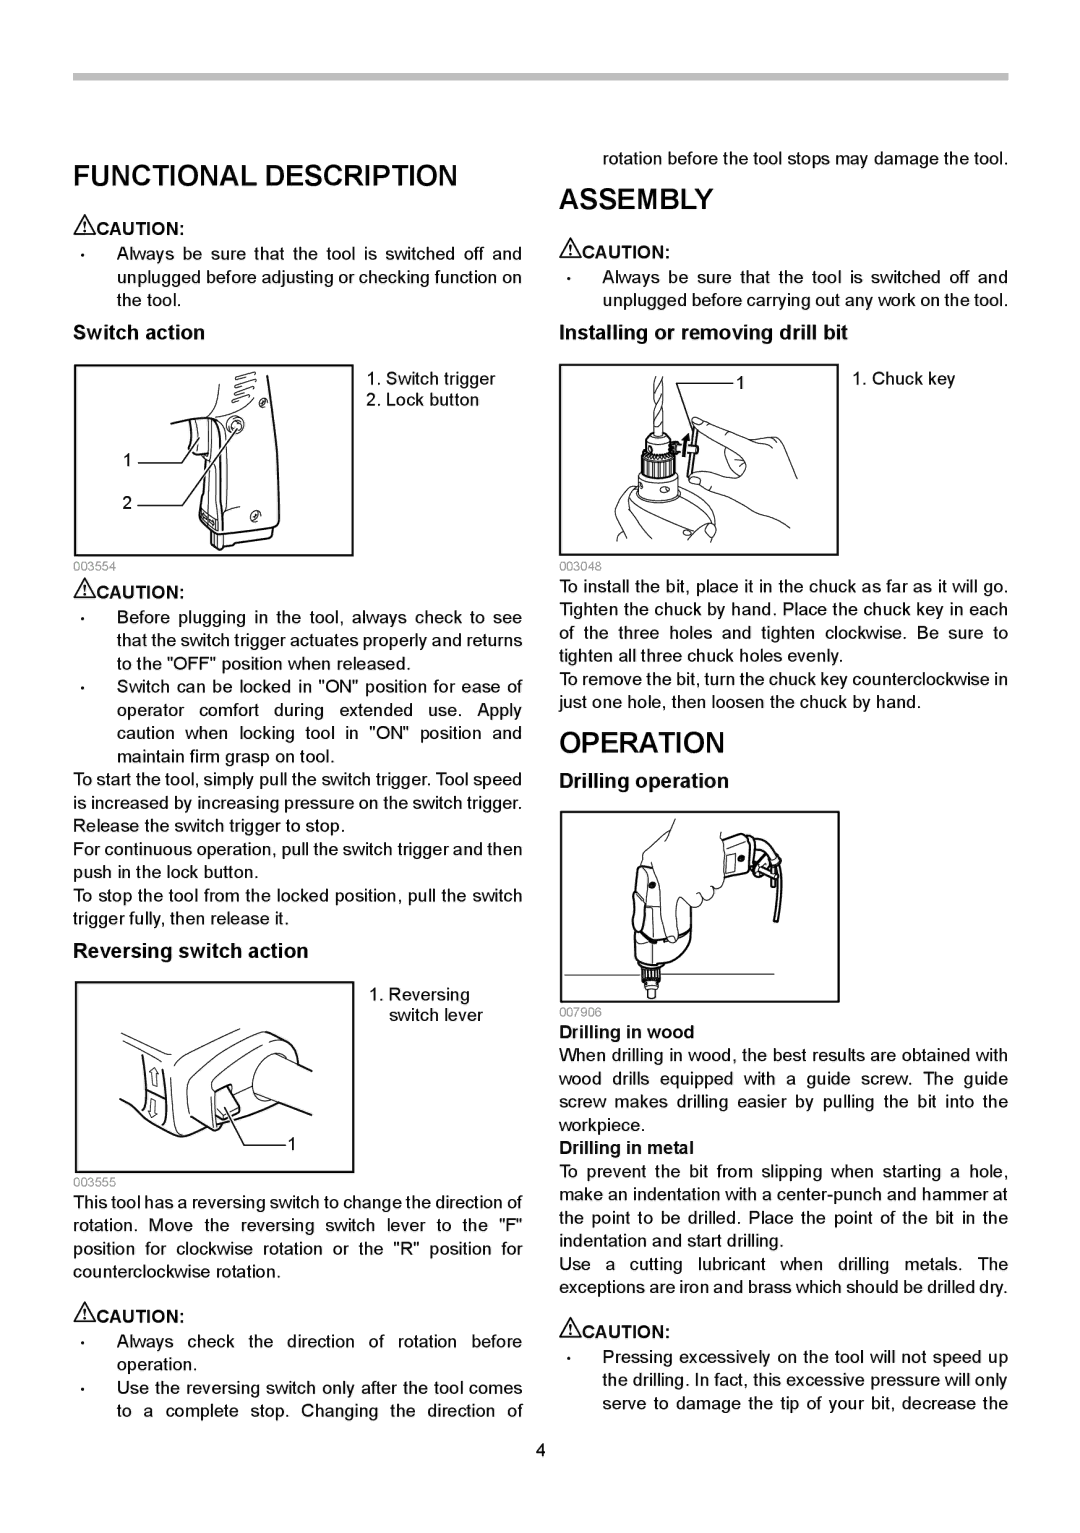
1.Switch trigger
2.Lock button
11. Chuck key
003048
To install the bit, place it in the chuck as far as it will go.
•Before plugging in the tool, always check to see that the switch trigger actuates properly and returns to the "OFF" position when released.
•Switch can be locked in "ON" position for ease of
operator comfort during extended use. Apply caution when locking tool in "ON" position and maintain firm grasp on tool.
To start the tool, simply pull the switch trigger. Tool speed is increased by increasing pressure on the switch trigger. Release the switch trigger to stop.
For continuous operation, pull the switch trigger and then push in the lock button.
To stop the tool from the locked position, pull the switch trigger fully, then release it.
Reversing switch action
Tighten the chuck by hand. Place the chuck key in each of the three holes and tighten clockwise. Be sure to tighten all three chuck holes evenly.
To remove the bit, turn the chuck key counterclockwise in just one hole, then loosen the chuck by hand.
OPERATION
Drilling operation
![]() 1
1
003555
1.Reversing switch lever
Drilling in wood
When drilling in wood, the best results are obtained with wood drills equipped with a guide screw. The guide screw makes drilling easier by pulling the bit into the workpiece.
Drilling in metal
To prevent the bit from slipping when starting a hole,
This tool has a reversing switch to change the direction of rotation. Move the reversing switch lever to the "F" position for clockwise rotation or the "R" position for counterclockwise rotation.
![]() CAUTION:
CAUTION:
•Always check the direction of rotation before operation.
•Use the reversing switch only after the tool comes to a complete stop. Changing the direction of
make an indentation with a
Use a cutting lubricant when drilling metals. The exceptions are iron and brass which should be drilled dry.
![]() CAUTION:
CAUTION:
•Pressing excessively on the tool will not speed up the drilling. In fact, this excessive pressure will only serve to damage the tip of your bit, decrease the
4
