Repair
[3]DISASSEMBLY/ASSEMBLY (cont.)
[3]-1. Armature
DISASSEMBLY
1)Remove Handle cover by loosening 4x18 Tapping screws, and then remove Carbon brushes with Brush holders.
2)Remove Armature, Gear housing cover and Gear housing by loosening 4x30 Tapping screws and striking Motor housing with plastic hammer.
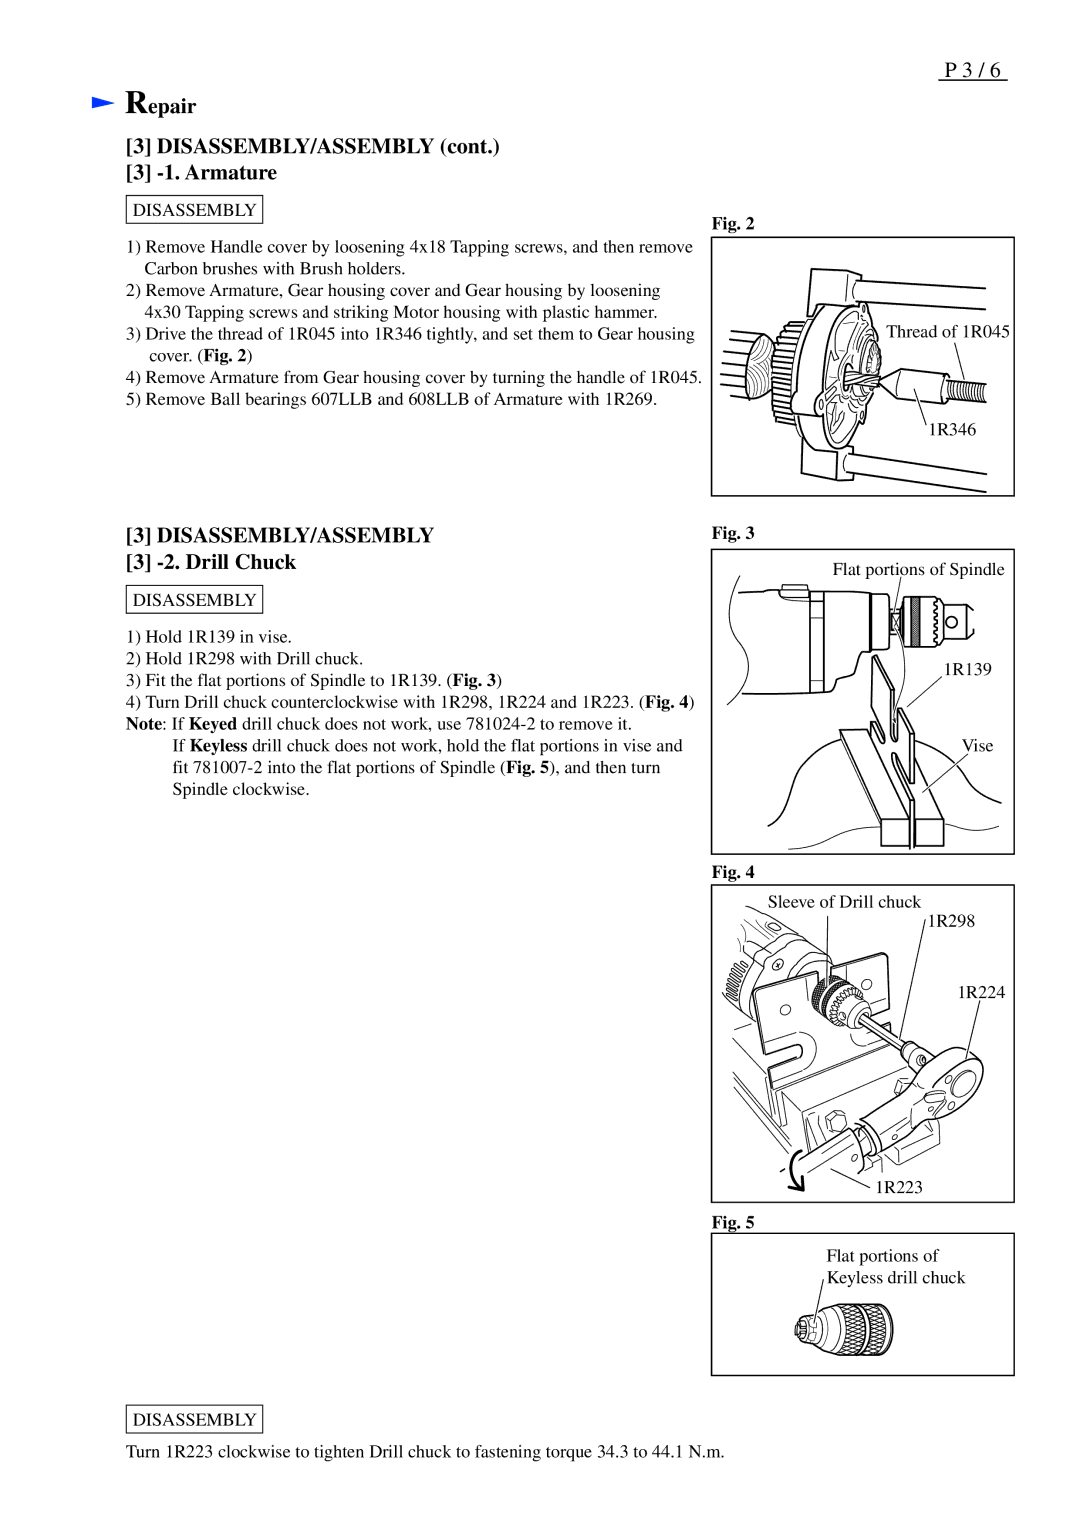
3)Drive the thread of 1R045 into 1R346 tightly, and set them to Gear housing cover. (Fig. 2)
4)Remove Armature from Gear housing cover by turning the handle of 1R045.
5)Remove Ball bearings 607LLB and 608LLB of Armature with 1R269.
P 3 / 6
Fig. 2
Thread of 1R045 |
1R346 |
[3]DISASSEMBLY/ASSEMBLY
[3]-2. Drill Chuck
DISASSEMBLY
1)Hold 1R139 in vise.
2)Hold 1R298 with Drill chuck.
3)Fit the flat portions of Spindle to 1R139. (Fig. 3)
4)Turn Drill chuck counterclockwise with 1R298, 1R224 and 1R223. (Fig. 4) Note: If Keyed drill chuck does not work, use
If Keyless drill chuck does not work, hold the flat portions in vise and fit
Fig. 3
Flat portions of Spindle
1R139
Vise
Fig. 4
Sleeve of Drill chuck |
1R298 |
1R224 |
1R223 |
Fig. 5
Flat portions of
Keyless drill chuck
DISASSEMBLY
Turn 1R223 clockwise to tighten Drill chuck to fastening torque 34.3 to 44.1 N.m.