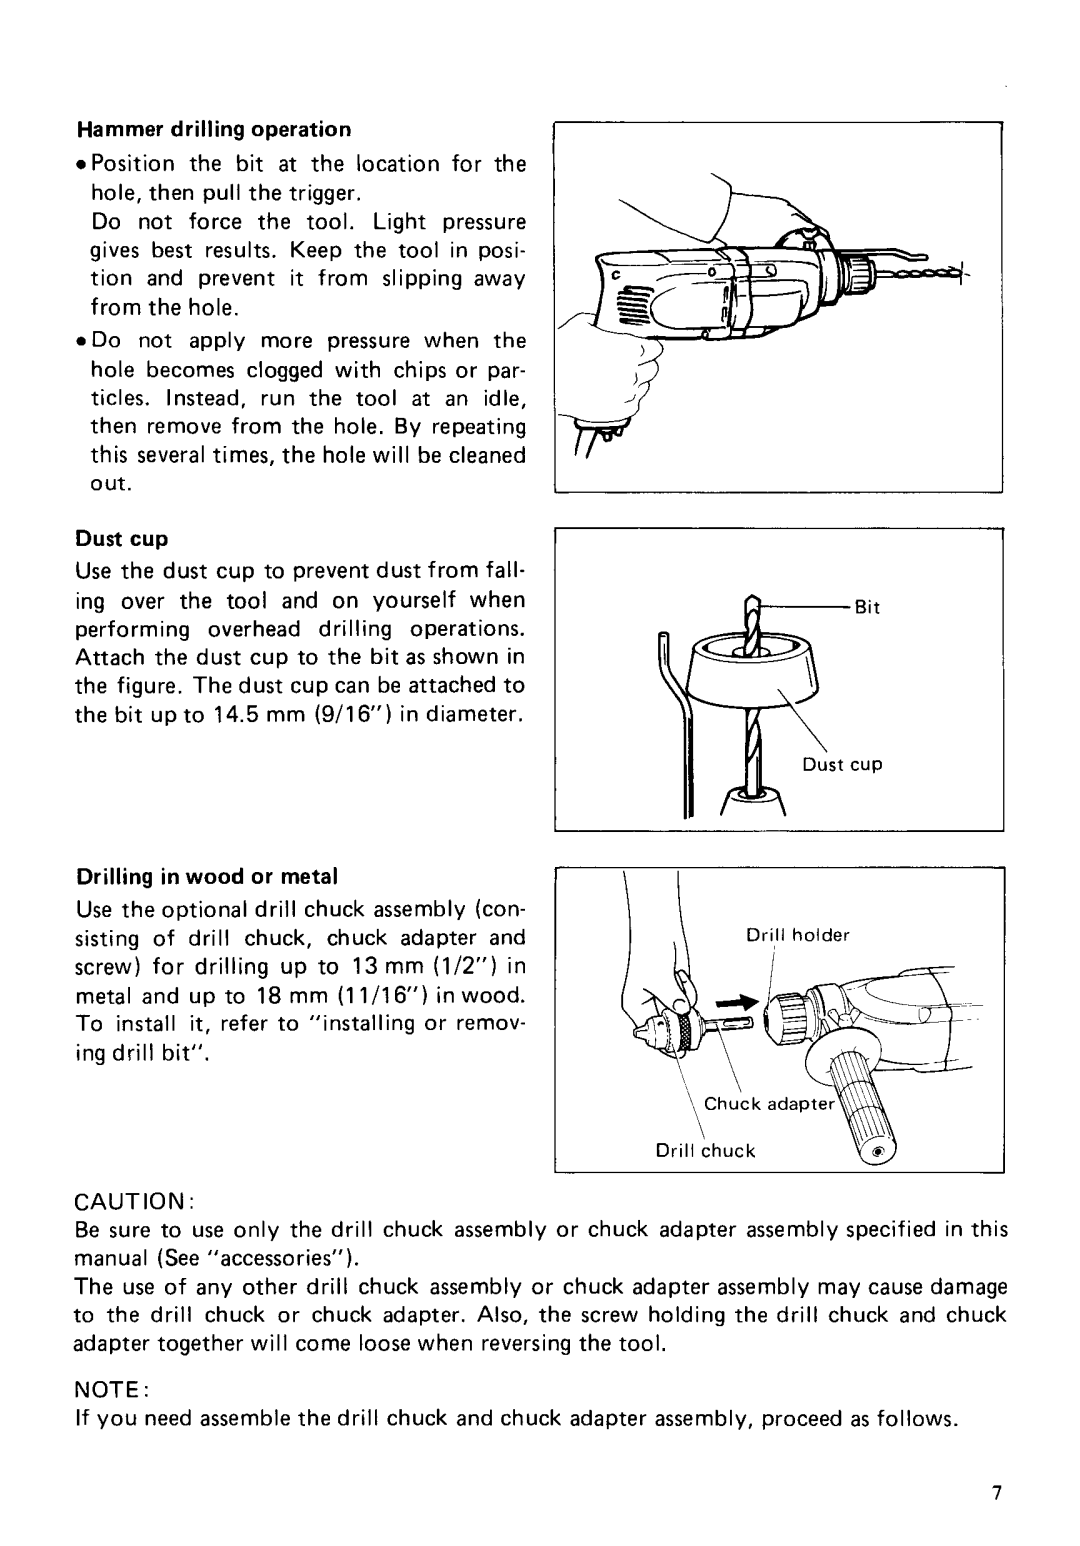
Hammer drilling operation |
|
|
|
*Position the bit at the location for the | . | ||
hole, then pull the trigger. |
| ||
Do not force the tool. Light pressure |
|
| |
gives best results. Keep the tool in posi- |
|
| |
tion and prevent it from slipping away |
|
| |
from the hole. |
| / |
|
*Do not apply more pressure when the |
| ||
|
| ||
hole becomes clogged with chips or par- |
|
| |
ticles. Instead, run the tool a t | an idle, |
|
|
then remove from the hole. By repeating this several times, the hole will be cleaned out.
Dust cup
Use the dust cup to prevent dust from fall-
ing over the tool and on yourself when- Bit performing overhead drilling operations.
Attach the dust cup to the bit as shown in the figure. The dust cup can be attached to the bit up to 14.5 mm (9/16') in diameter.
C U P
Drilling in wood or metal
Use the optional drill chuck assembly (con- sisting of drill chuck, chuck adapter and screw) for drilling up to 13 mm (1/2") in metal and up to 18 mm (11/16") in wood. To install it, refer to "installing or remov- ing drill bit".
Drill chuck
CAUTION :
Be sure to use only the drill chuck assembly or chuck adapter assembly specified in this manuaI (See "accessories" ).
The use of any other drill chuck assembly or chuck adapter assembly may cause damage to the drill chuck or chuck adapter. Also, the screw holding the drill chuck and chuck adapter together will come loose when reversing the tool.
NOTE :
If you need assemble the drill chuck and chuck adapter assembly, proceed as follows.
7
