Removing or installing mini planer blades
CAUTION :
Always be sure that the tool is switched off and unplugged before removing or installing the blade.
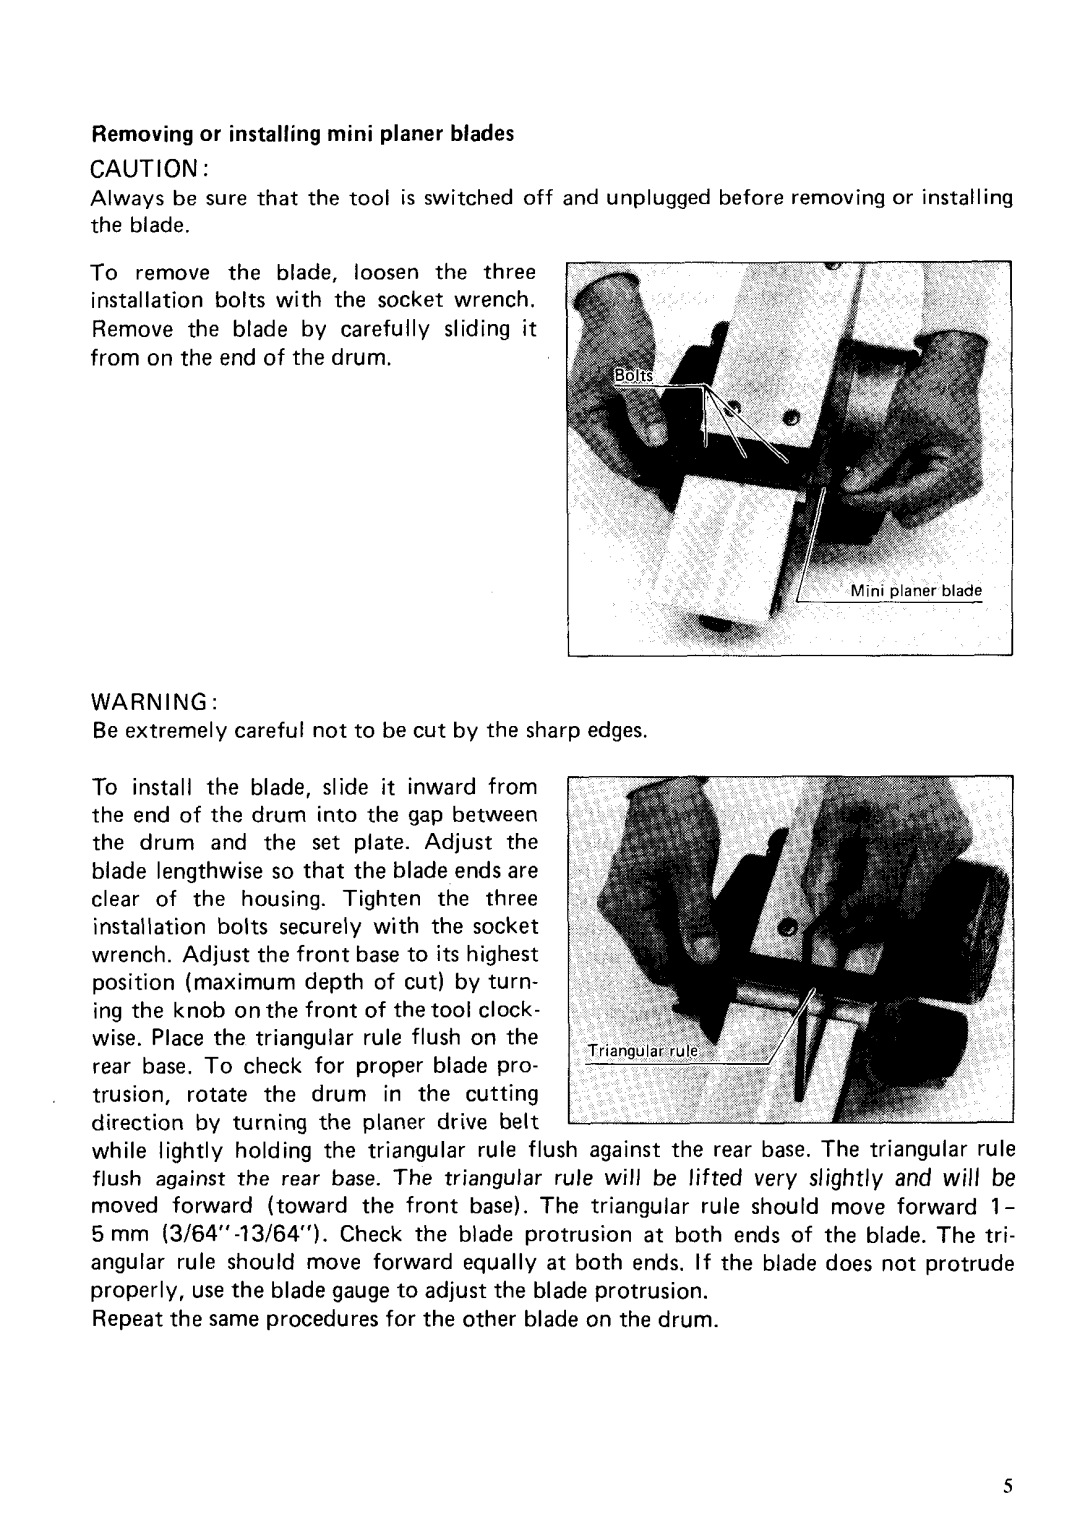
To remove the blade, loosen the three installation bolts with the socket wrench. Remove the blade by carefully sliding it from on the end of the drum.
WARNING:
Be extremely careful not to be cut by the sharp edges.
To install the blade, slide it inward from the end of the drum into the gap between the drum and the set plate. Adjust the blade lengthwise so that the blade ends are clear of the housing. Tighten the three installation bolts securely with the socket wrench. Adjust the front base to i t s highest position (maximum depth of cut) by turn- ing the knob on the front of the tool clock- wise. Place the triangular rule flush on the rear base. To check for proper blade pro- trusion, rotate the drum in the cutting direction by turning the planer drive belt
while lightly holding the triangular rule flush against the rear base. The triangular rule flush against the rear base. The triangular rule will be lifted very slightly and will be moved forward (toward the front base). The triangular rule should move forward 1 - 5 mm
Repeat the same proceduresfor the other blade on the drum.
5