ASSEMBLY
![]() CAUTION:
CAUTION:
•Always be sure that the tool is switched off and unplugged before carrying out any work on the tool.
Installing or removing application tool (optional accessory)
![]() WARNING:
WARNING:
•Do not install application tool upside down. Installing application tool upside down may damage the tool and cause serious personal injury.
•Install attachment tool in the correct direction according to your work. Application tool can be installed at an angle of every 30 degree.
![]() CAUTION:
CAUTION:
•Be careful when closing the lock lever. The lock lever may close suddenly and pinch your finger.
•Clean up dust and perform lubrication on the moving part of the lock lever from time to time. Otherwise dust may accumulate in the moving part of the lock lever and hinder its smooth movement.
•Do not start the tool while the lever opens. The tool may be damaged.
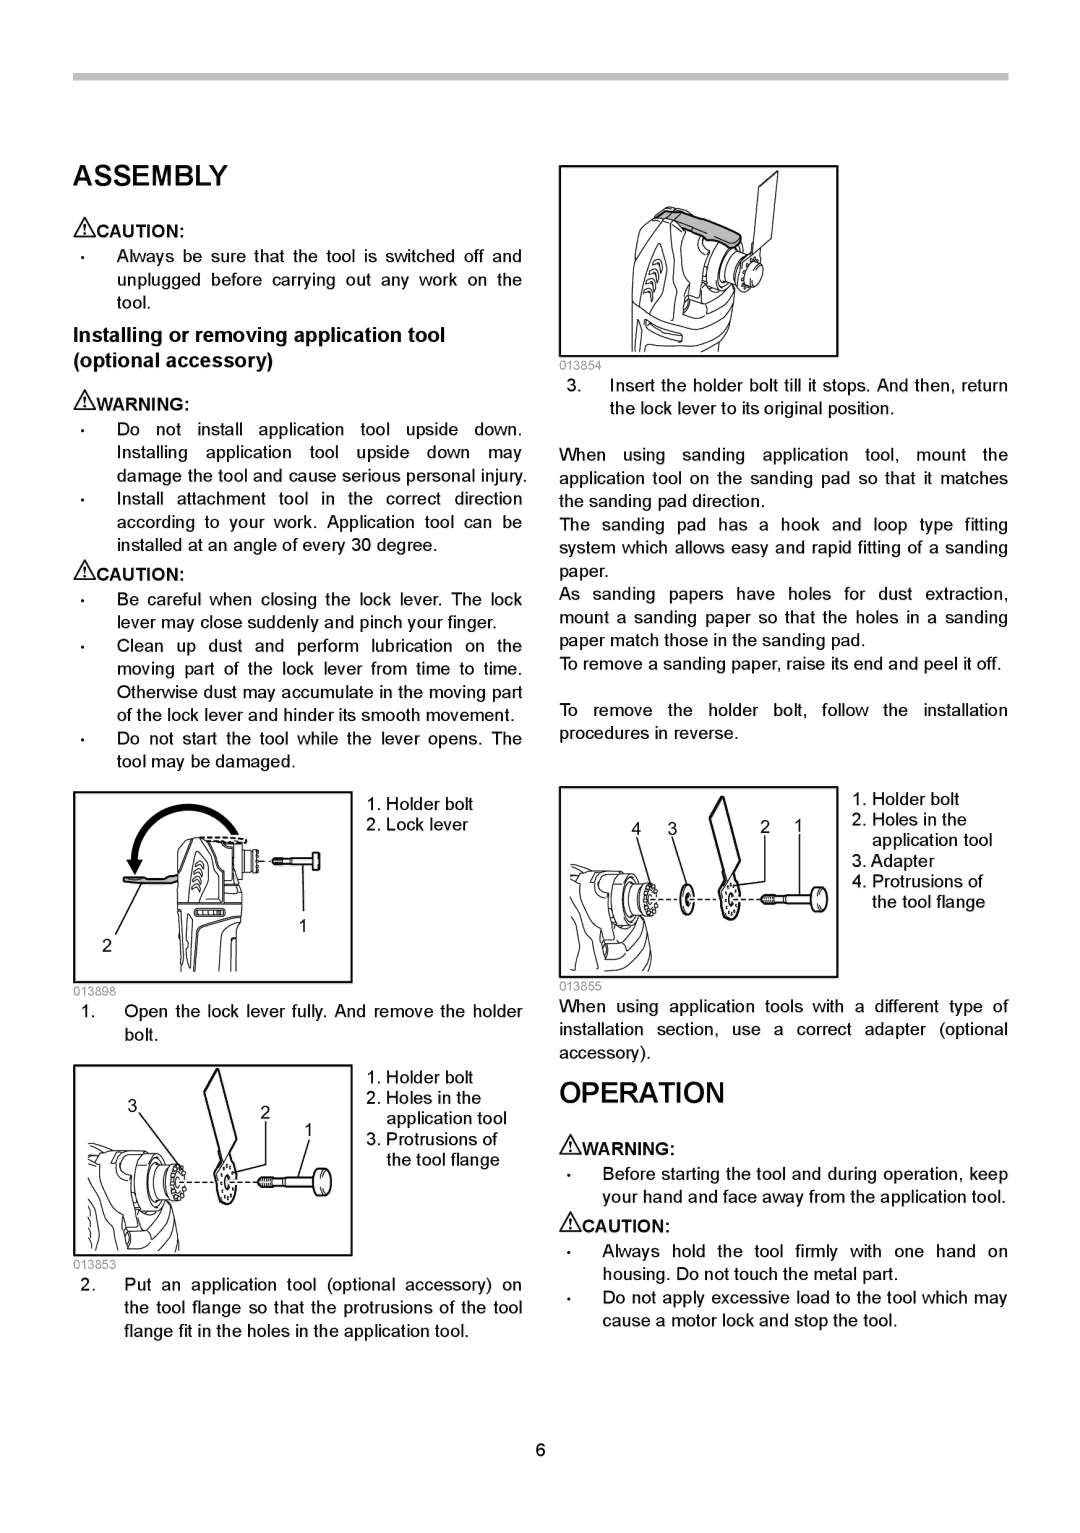
013854
3.Insert the holder bolt till it stops. And then, return the lock lever to its original position.
When using sanding application tool, mount the application tool on the sanding pad so that it matches the sanding pad direction.
The sanding pad has a hook and loop type fitting system which allows easy and rapid fitting of a sanding paper.
As sanding papers have holes for dust extraction, mount a sanding paper so that the holes in a sanding paper match those in the sanding pad.
To remove a sanding paper, raise its end and peel it off.
To remove the holder bolt, follow the installation procedures in reverse.
1
2
013898
1.Holder bolt
2.Lock lever
|
|
|
| 1. | Holder bolt |
4 | 3 | 2 | 1 | 2. | Holes in the |
| application tool | ||||
|
|
|
|
| |
|
|
|
| 3. Adapter | |
|
|
|
| 4. | Protrusions of |
|
|
|
|
| the tool flange |
013855 |
|
|
|
|
|
1. | Open the lock lever fully. And remove the holder | ||||
| bolt. |
|
|
|
|
|
|
|
| 1. | Holder bolt |
| 3 | 2 |
| 2. | Holes in the |
|
|
| application tool | ||
|
| 1 |
| ||
|
|
| 3. | Protrusions of | |
|
|
|
| ||
|
|
|
|
| the tool flange |
013853 |
|
|
|
|
|
2. | Put an application tool (optional accessory) on | ||||
| the tool flange so that the protrusions of the tool | ||||
| flange fit in the holes in the application tool. | ||||
When using application tools with a different type of installation section, use a correct adapter (optional accessory).
OPERATION
![]() WARNING:
WARNING:
•Before starting the tool and during operation, keep your hand and face away from the application tool.
![]() CAUTION:
CAUTION:
•Always hold the tool firmly with one hand on housing. Do not touch the metal part.
•Do not apply excessive load to the tool which may cause a motor lock and stop the tool.
6