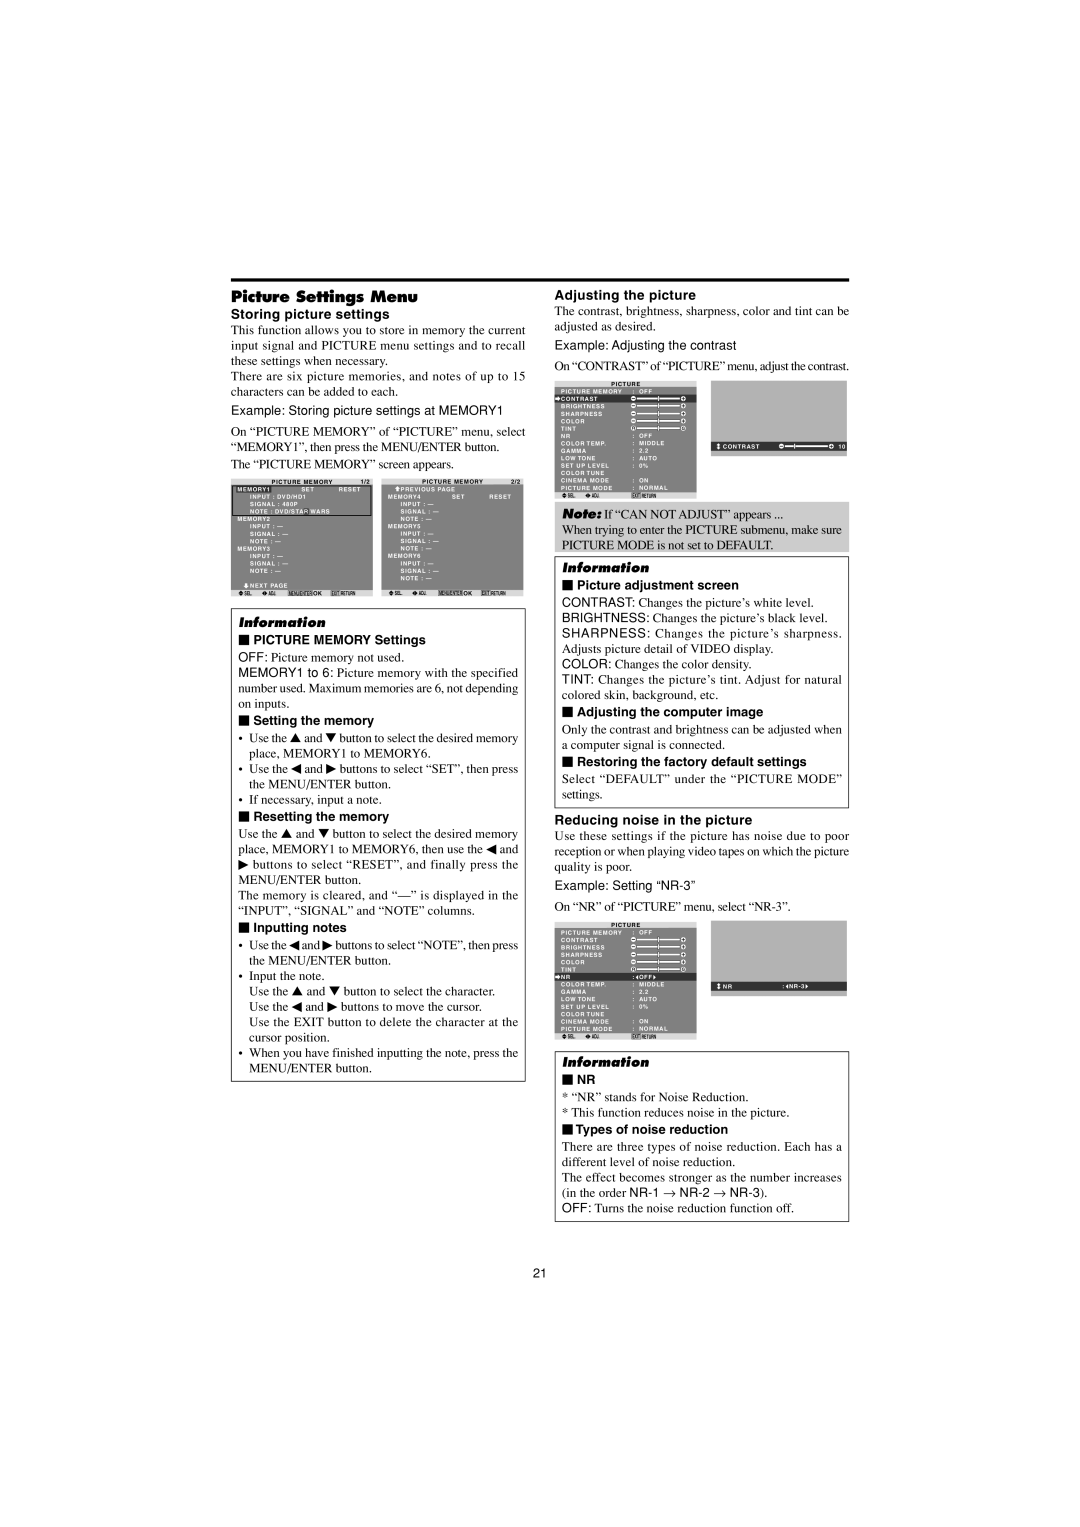
Picture Settings Menu

Storing picture settings

This function allows you to store in memory the current input signal and PICTURE menu settings and to recall these settings when necessary.

There are six picture memories, and notes of up to 15 characters can be added to each.

Example: Storing picture settings at MEMORY1

On “PICTURE MEMORY” of “PICTURE” menu, select “MEMORY1”, then press the MENU/ENTER button.

The “PICTURE MEMORY” screen appears.

Adjusting the picture

The contrast, brightness, sharpness, color and tint can be adjusted as desired.

Example: Adjusting the contrast

On “CONTRAST” of “PICTURE” menu, adjust the contrast.

PICTURE


PICTURE MEMORY

: OFF


CONTRAST


BRIGHTNESS


SHARPNESS


COLOR


TINT

R


G


NR

: OFF


COLOR TEMP.

: MIDDLE


CONTRAST


10

GAMMA

:

2 . 2


LOW TONE

: AUTO


SET UP LEVEL

:

0%


COLOR TUNE


PICTURE MEMORY

1/2


MEMORY1


SET

RESET


INPUT : DVD/HD1


SIGNAL : 480P


NOTE : DVD/STA

R

WARS


MEMORY2


INPUT : —


SIGNAL : —


NOTE : —


MEMORY3


INPUT : —


SIGNAL : —


NOTE : —


NEXT PAGE


SEL.

ADJ.

MENU/ENTER

OK EXIT RETURN


PICTURE MEMORY

2/2

PREVIOUS PAGE


MEMORY4

SET

RESET


INPUT : —


SIGNAL : —


NOTE : —


MEMORY5


INPUT : —


SIGNAL : —


NOTE : —


MEMORY6


INPUT : —


SIGNAL : —


NOTE : —


SEL.

ADJ.


OK

EXIT RETURN


MENU/ENTER


CINEMA MODE

: ON

PICTURE MODE

: NORMAL

SEL.

ADJ.

EXIT RETURN

Note: If “CAN NOT ADJUST” appears ...

When trying to enter the PICTURE submenu, make sure PICTURE MODE is not set to DEFAULT.

Information

 Picture adjustment screen

CONTRAST: Changes the picture’s white level.

Information

PICTURE MEMORY Settings

OFF: Picture memory not used.

MEMORY1 to 6: Picture memory with the specified number used. Maximum memories are 6, not depending on inputs.

Setting the memory

Use the and button to select the desired memory place, MEMORY1 to MEMORY6.

Use the  and  buttons to select “SET”, then press the MENU/ENTER button.

If necessary, input a note.

Resetting the memory

Use the and button to select the desired memory place, MEMORY1 to MEMORY6, then use the  and

buttons to select “RESET”, and finally press the MENU/ENTER button.

The memory is cleared, and “—” is displayed in the “INPUT”, “SIGNAL” and “NOTE” columns.

 Inputting notes

• Use the  and  buttons to select “NOTE”, then press the MENU/ENTER button.

• Input the note.

Use the and button to select the character. Use the  and  buttons to move the cursor.

Use the EXIT button to delete the character at the cursor position.

• When you have finished inputting the note, press the MENU/ENTER button.

BRIGHTNESS: Changes the picture’s black level.

SHARPNESS: Changes the picture’s sharpness.

Adjusts picture detail of VIDEO display.

COLOR: Changes the color density.

TINT: Changes the picture’s tint. Adjust for natural

colored skin, background, etc.

 Adjusting the computer image

Only the contrast and brightness can be adjusted when a computer signal is connected.

Restoring the factory default settings

Select “DEFAULT” under the “PICTURE MODE” settings.

Reducing noise in the picture

Use these settings if the picture has noise due to poor reception or when playing video tapes on which the picture quality is poor.

Example: Setting “NR-3”

On “NR” of “PICTURE” menu, select “NR-3”.


PICTURE


PICTURE MEMORY

: OFF


CONTRAST


BRIGHTNESS


SHARPNESS


COLOR


TINT


R


G


NR


: OFF


COLOR TEMP.

: MIDDLE


NR

: NR - 3

GAMMA


:

2 . 2


LOW TONE

: AUTO


SET UP LEVEL

:

0%


COLOR TUNE


CINEMA MODE

: ON


PICTURE MODE

: NORMAL


SEL.

ADJ.

EXIT RETURN


Information

NR

*“NR” stands for Noise Reduction.

*This function reduces noise in the picture.

 Types of noise reduction

There are three types of noise reduction. Each has a different level of noise reduction.

The effect becomes stronger as the number increases (in the order NR-1NR-2NR-3).

OFF: Turns the noise reduction function off.

21

Page 22
Image 22
Marantz PD4230V Picture Settings Menu, Storing picture settings, Adjusting the picture, Reducing noise in the picture

PD4230V specifications

The Marantz PD4230V is a remarkable product that reflects the superior engineering and design prowess of Marantz, a brand known for its premium audio and visual solutions. This unit stands out for its perfect blend of advanced technology, user-friendly features, and sleek aesthetics, making it an ideal choice for audiophiles and home theater enthusiasts alike.

One of the main features of the Marantz PD4230V is its stunning display capabilities. Designed for larger viewing experiences, the PD4230V boasts a 42-inch screen size with a high-resolution capacity that delivers crisp and vibrant visuals. Users can enjoy their favorite movies, shows, and presentations in authentic detail, thanks to advanced picture processing technology that enhances color accuracy and contrast, ensuring that every frame is captivating.

In terms of audio performance, the PD4230V truly shines. It incorporates Marantz's proprietary audio technologies to provide exceptional sound quality that complements the stunning visuals. With built-in high-fidelity speakers, the unit delivers immersive audio that fills the room, creating a complete home entertainment experience. This integration of audio and visual technology is one of the many reasons why Marantz remains a leader in the industry.

Connecting the PD4230V to external devices is made effortless with its multiple input options, including HDMI, component, and composite connections. This versatility allows users to hook up various devices, from gaming consoles to Blu-ray players, ensuring compatibility with a wide range of media sources. Additionally, the PD4230V supports various video formats, allowing for flexibility in viewing options.

Users will also appreciate the PD4230V's user-friendly interface, which simplifies navigation and setup. The comprehensive on-screen menu makes it easy to adjust settings, such as picture modes, audio levels, and connectivity preferences, enabling tailored customization for individual viewing experiences.

Moreover, durability and design are carefully considered in the PD4230V's construction. With a sleek, modern look, it fits seamlessly within any home décor while providing a robust build quality designed for long-lasting performance.

In summary, the Marantz PD4230V embodies the synergy of elite performance and convenience, featuring top-notch display and audio capabilities, diverse connectivity options, and a commitment to user experience. It represents the essence of Marantz's legacy, making it a valuable addition to any home entertainment setup.