On-Screen Menu (continued)
VIDEO CONFIGURATION SUBMENU (continued)
■Aspect Ratio Settings
Use to switch between 4:3 and 16:9 aspect ratios.
As the
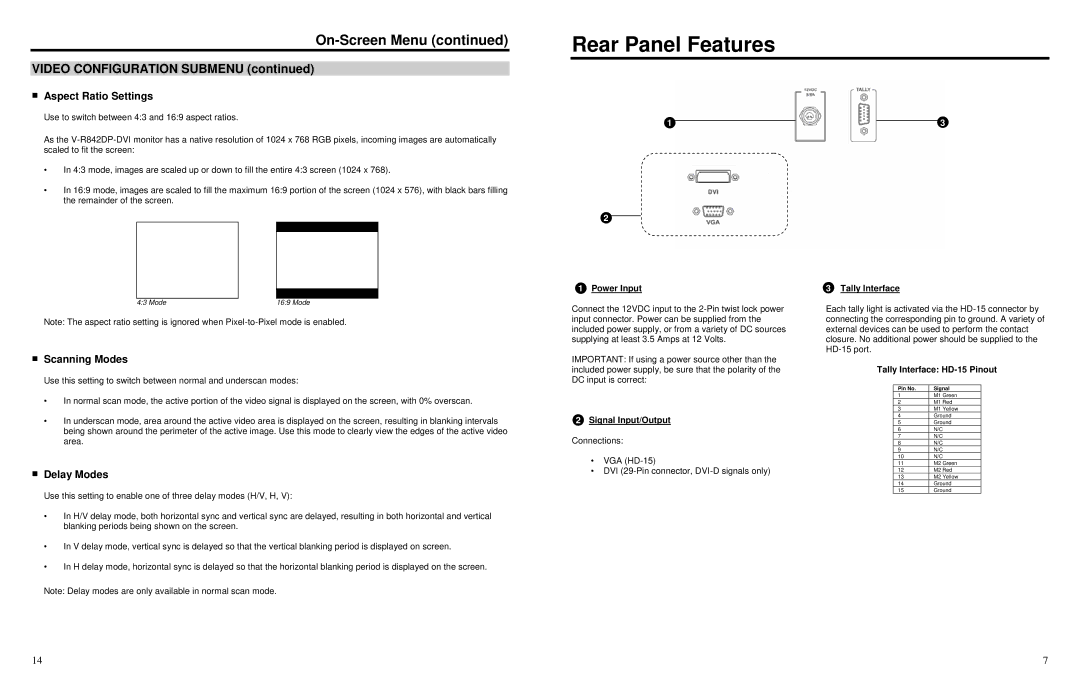
•In 4:3 mode, images are scaled up or down to fill the entire 4:3 screen (1024 x 768).
•In 16:9 mode, images are scaled to fill the maximum 16:9 portion of the screen (1024 x 576), with black bars filling the remainder of the screen.
Rear Panel Features
1 | 3 |
2
1 Power Input | 3 Tally Interface |
4:3 Mode | 16:9 Mode |
Note: The aspect ratio setting is ignored when
■Scanning Modes
Use this setting to switch between normal and underscan modes:
•In normal scan mode, the active portion of the video signal is displayed on the screen, with 0% overscan.
•In underscan mode, area around the active video area is displayed on the screen, resulting in blanking intervals being shown around the perimeter of the active image. Use this mode to clearly view the edges of the active video area.
■Delay Modes
Use this setting to enable one of three delay modes (H/V, H, V):
•In H/V delay mode, both horizontal sync and vertical sync are delayed, resulting in both horizontal and vertical blanking periods being shown on the screen.
•In V delay mode, vertical sync is delayed so that the vertical blanking period is displayed on screen.
•In H delay mode, horizontal sync is delayed so that the horizontal blanking period is displayed on the screen.
Note: Delay modes are only available in normal scan mode.
Connect the 12VDC input to the
IMPORTANT: If using a power source other than the included power supply, be sure that the polarity of the DC input is correct:
2Signal Input/Output
Connections:
•VGA
•DVI
Each tally light is activated via the
Tally Interface:
Pin No. | Signal |
1 | M1 Green |
2 | M1 Red |
3 | M1 Yellow |
4 | Ground |
5 | Ground |
6 | N/C |
7 | N/C |
8 | N/C |
9 | N/C |
10 | N/C |
11 | M2 Green |
12 | M2 Red |
13 | M2 Yellow |
14 | Ground |
15 | Ground |
14 | 7 |
