
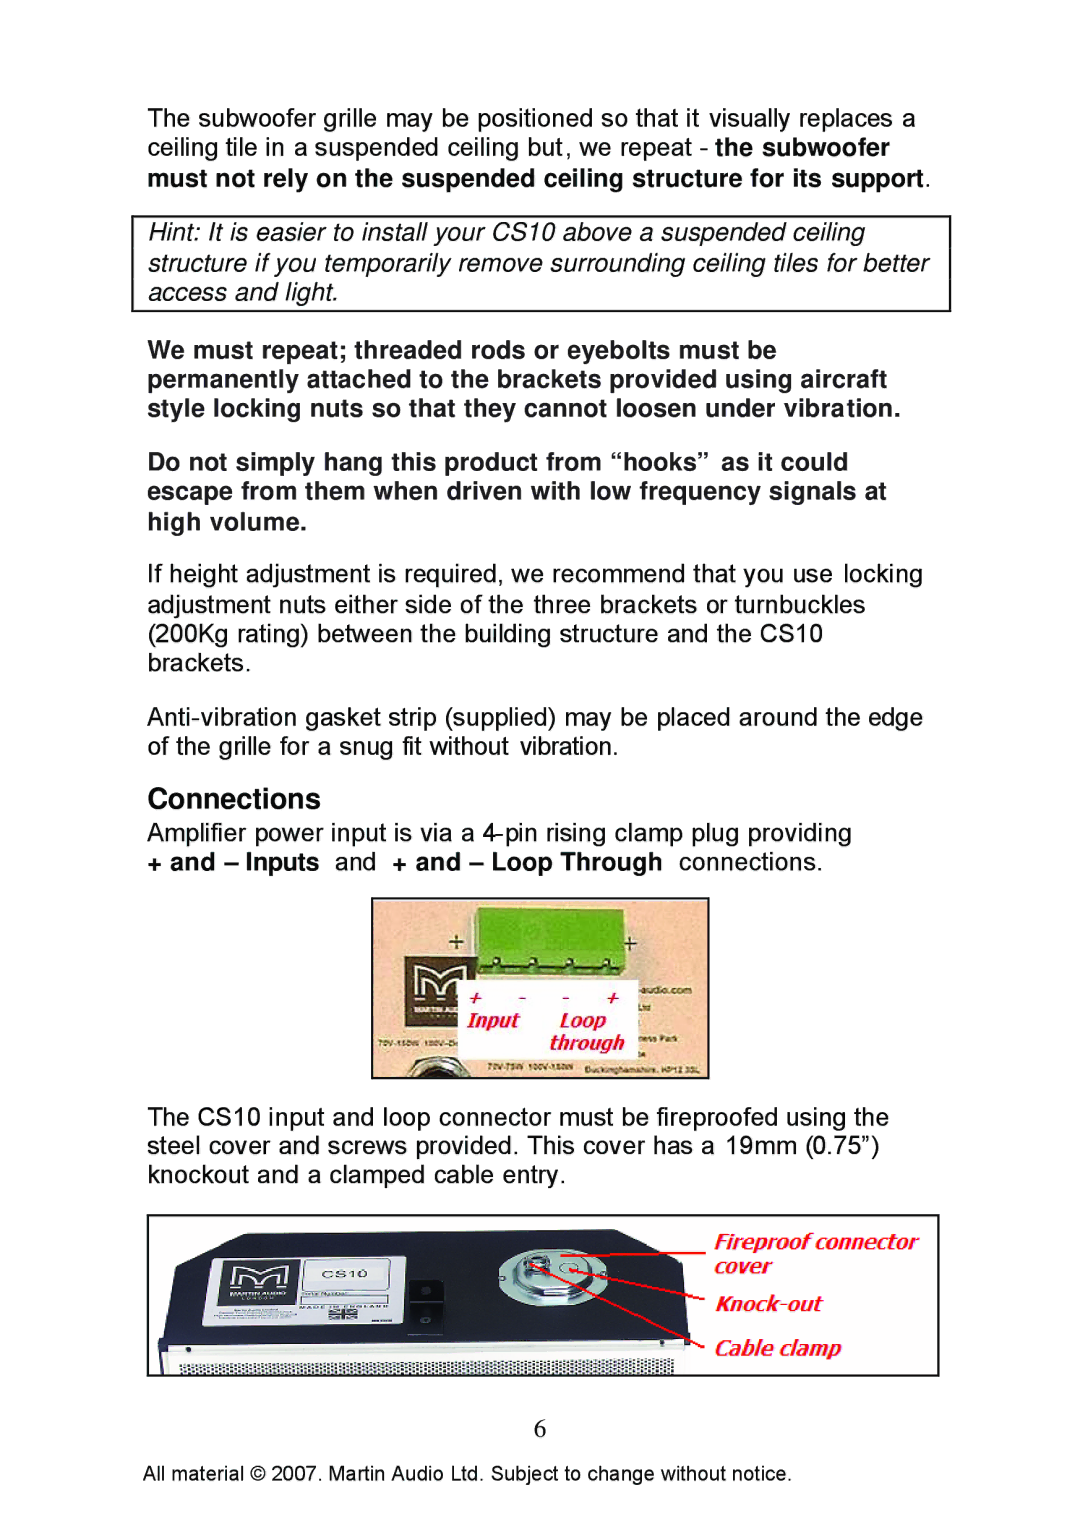
C10.1R, CS10, C10.1C, CS10T specifications
Martin Audio, known for its commitment to excellence in sound reinforcement, offers a distinguished range of loudspeakers designed for various applications. The CS10T, C10.1C, CS10, and C10.1R stand out as exceptional solutions, each with unique features and technologies tailored for superior performance.The CS10T is a versatile ceiling loudspeaker that impresses with its ability to deliver high-quality audio in a compact design. Its innovative design features a 10-inch woofer, which ensures deep, powerful bass response alongside crisp high frequencies. The CS10T incorporates a coaxial driver configuration, allowing for wide dispersion and uniform coverage, making it ideal for installations in auditoriums, retail spaces, and transportation hubs. The weather-resistant construction enhances its durability in challenging environments, ensuring consistent performance.
The C10.1C complements the CS10T by offering advanced capabilities in a compact format. This circular loudspeaker is designed for unobtrusive installation in commercial spaces, providing high-fidelity audio without detracting from the aesthetic. Its 10-inch driver and neodymium magnet improve efficiency while reducing distortion. The C10.1C features integrated transformers for 70V/100V line operation, making it an excellent choice for distributed sound systems in larger venues.
The CS10 is another remarkable addition to Martin Audio's lineup. This loudspeaker utilizes a robust 10-inch woofer paired with a high-frequency driver, ensuring a balanced sound profile suitable for both speech and music. Featuring a high sensitivity rating, the CS10 minimizes power requirements while delivering impressive sound levels. Its rugged construction and versatility make it suitable for both portable and fixed installations.
Lastly, the C10.1R offers rich audio performance with a unique design focused on residential and smaller commercial applications. This loudspeaker utilizes a similar 10-inch driver combined with advanced acoustic engineering, ensuring detailed sound reproduction. The C10.1R is designed for easy integration into various environments, providing an aesthetically pleasing solution for those seeking high-quality audio without compromise.
In summary, Martin Audio's CS10T, C10.1C, CS10, and C10.1R exemplify the company's dedication to innovation and quality. With features such as coaxial driver configurations, weather-resistant designs, and versatile installation options, these loudspeakers cater to a range of applications, all while delivering exceptional sound performance that can be relied upon in any setting.