ASSEMBLY
ASSEMBLY
•BEFORE ASSEMBLY READ ALL INSTRUCTIONS CAREFULLY.
•ASSEMBLE UNIT ON A CLEAN, FLAT SURFACE.
•TOOLS NEEDED: ADJUSTABLE WRENCH, PHILLIPS HEAD SCREWDRIVER
A
STEP 3
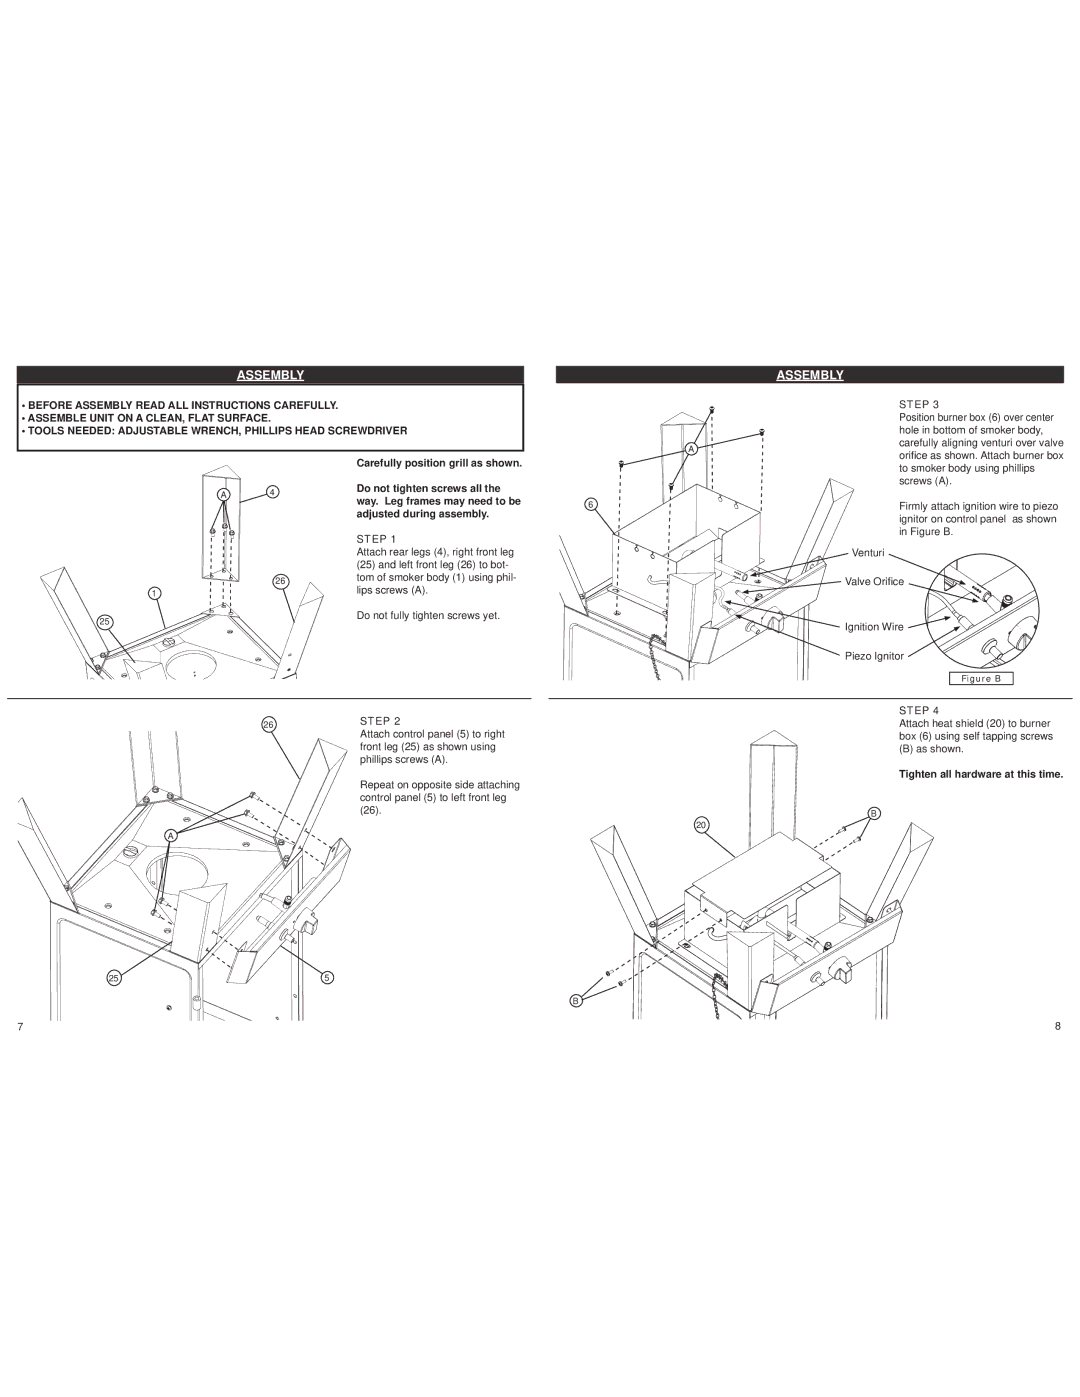
Position burner box (6) over center hole in bottom of smoker body, carefully aligning venturi over valve orifice as shown. Attach burner box
A 4
Carefully position grill as shown.
Do not tighten screws all the way. Leg frames may need to be adjusted during assembly.
STEP 1
Attach rear legs (4), right front leg
6
Venturi
to smoker body using phillips screws (A).
Firmly attach ignition wire to piezo ignitor on control panel as shown in Figure B.
26
1
25
(25)and left front leg (26) to bot- tom of smoker body (1) using phil- lips screws (A).
Do not fully tighten screws yet.
Valve Orifice
Ignition Wire
Piezo Ignitor
Figure B
26STEP 2
Attach control panel (5) to right
front leg (25) as shown using phillips screws (A).
Repeat on opposite side attaching control panel (5) to left front leg (26).
A
25 | 5 |
7
STEP 4
Attach heat shield (20) to burner box (6) using self tapping screws
(B) as shown.
Tighten all hardware at this time.
B
20
B ![]()
8
