• Attach the flexible cable controls (3) and (4). These cable controls are secured in place with a firm tightening of the thumbscrew located at the end of each cable.
• Holding the counterweight (5) firmly in one hand, slip the counterweight onto the counterweight shaft (6). Attach the counterweight (5) and counterweight shaft (6), by supporting the unlocked (7) counterweight firmly in one hand, while threading the counterweight shaft into the base of the Declination axis of the telescope’s equatorial mount with the other (see Fig. 1). Once firmly attached, slide the counterweight to the midpoint on the counterweight shaft and secure it in place with the lock knob (7) of the counterweight. Note: If the counterweight ever slips, the secured threaded safety washer/knob (8) will not let the weight slide entirely off the counterweight shaft. Be certain that this safety washer/knob is always in place.
• Release the latitude lock (9) of the equatorial mount, and tilt the polar axis (10) of the telescope to roughly a 45° angle by turning the latitude adjustment knob (11). With the polar axis thus tilted, firmly re-tighten the latitude lock.
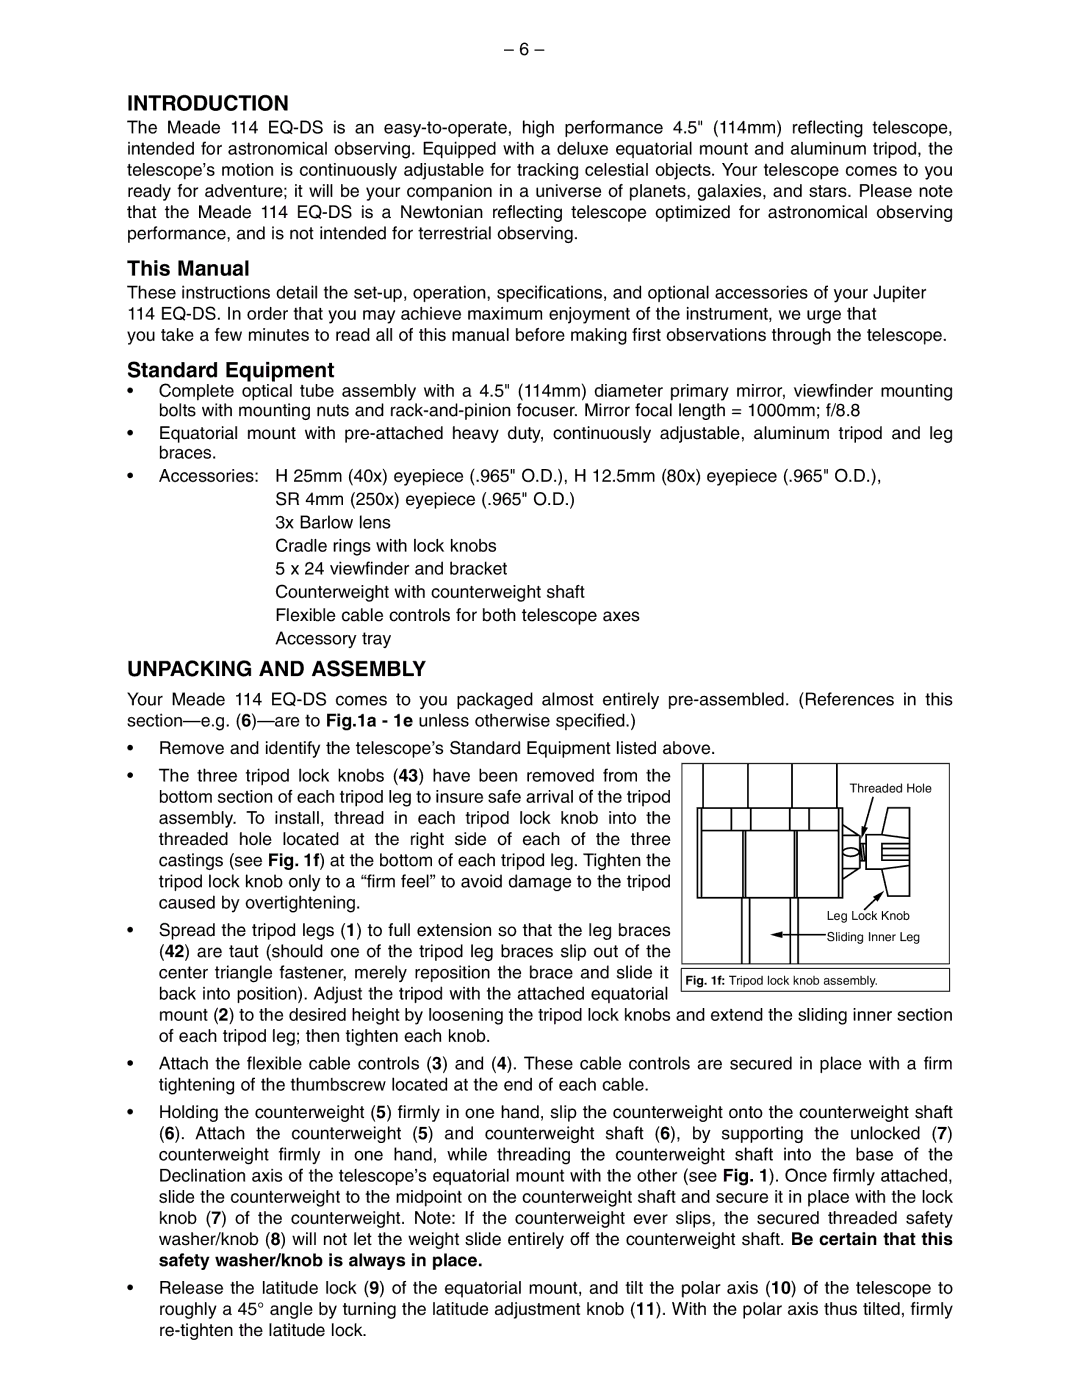
Fig. 1f: Tripod lock knob assembly.
Partie intérieure Sliding Inner Leg
coulissante
• Spread the tripod legs (1) to full extension so that the leg braces (42) are taut (should one of the tripod leg braces slip out of the
center triangle fastener, merely reposition the brace and slide it back into position). Adjust the tripod with the attached equatorial
mount (2) to the desired height by loosening the tripod lock knobs and extend the sliding inner section of each tripod leg; then tighten each knob.
ThreadedoutaraudHoleé
LegBoutLockn deKnobblocage
• Remove and identify the telescope’s Standard Equipment listed above.
• The three tripod lock knobs (43) have been removed from the bottom section of each tripod leg to insure safe arrival of the tripod assembly. To install, thread in each tripod lock knob into the threaded hole located at the right side of each of the three castings (see Fig. 1f) at the bottom of each tripod leg. Tighten the tripod lock knob only to a “firm feel” to avoid damage to the tripod caused by overtightening.
– 6 –
INTRODUCTION
The Meade 114 EQ-DS is an easy-to-operate, high performance 4.5" (114mm) reflecting telescope, intended for astronomical observing. Equipped with a deluxe equatorial mount and aluminum tripod, the telescope’s motion is continuously adjustable for tracking celestial objects. Your telescope comes to you ready for adventure; it will be your companion in a universe of planets, galaxies, and stars. Please note that the Meade 114 EQ-DS is a Newtonian reflecting telescope optimized for astronomical observing performance, and is not intended for terrestrial observing.
This Manual
These instructions detail the set-up, operation, specifications, and optional accessories of your Jupiter 114 EQ-DS. In order that you may achieve maximum enjoyment of the instrument, we urge that
you take a few minutes to read all of this manual before making first observations through the telescope.
Standard Equipment
• Complete optical tube assembly with a 4.5" (114mm) diameter primary mirror, viewfinder mounting bolts with mounting nuts and rack-and-pinion focuser. Mirror focal length = 1000mm; f/8.8
• Equatorial mount with pre-attached heavy duty, continuously adjustable, aluminum tripod and leg braces.
• Accessories: H 25mm (40x) eyepiece (.965" O.D.), H 12.5mm (80x) eyepiece (.965" O.D.), SR 4mm (250x) eyepiece (.965" O.D.)
3x Barlow lens
Cradle rings with lock knobs
5 x 24 viewfinder and bracket Counterweight with counterweight shaft Flexible cable controls for both telescope axes Accessory tray
UNPACKING AND ASSEMBLY
Your Meade 114 EQ-DS comes to you packaged almost entirely pre-assembled. (References in this section—e.g. (6)—are to Fig.1a - 1e unless otherwise specified.)