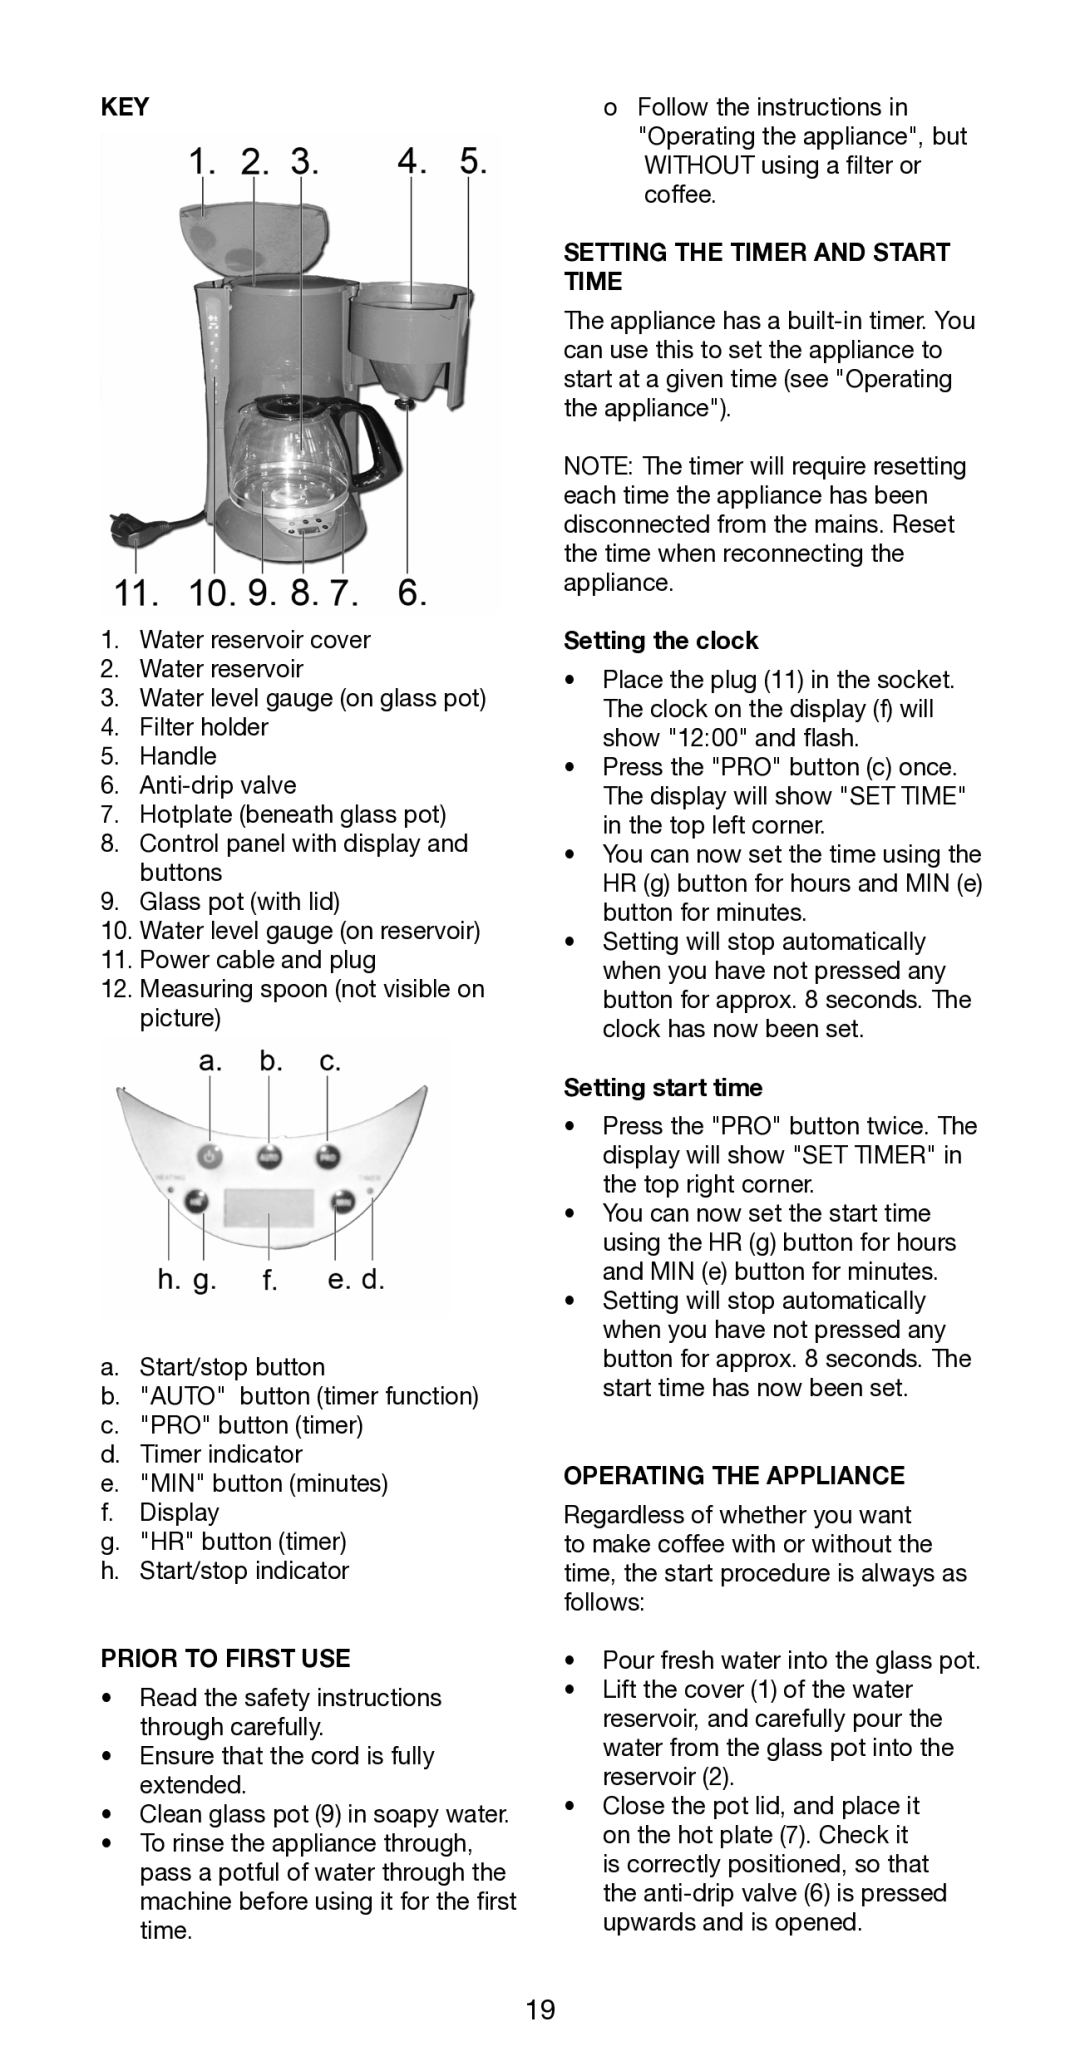
KEY
1.Water reservoir cover
2.Water reservoir
3.Water level gauge (on glass pot)
4.Filter holder
5.Handle
6.
7.Hotplate (beneath glass pot)
8.Control panel with display and buttons
9.Glass pot (with lid)
10.Water level gauge (on reservoir)
11.Power cable and plug
12.Measuring spoon (not visible on picture)
a.Start/stop button
b."AUTO" button (timer function)
c."PRO" button (timer)
d.Timer indicator
e."MIN" button (minutes)
f.Display
g."HR" button (timer)
h.Start/stop indicator
PRIOR TO FIRST USE
•Read the safety instructions through carefully.
•Ensure that the cord is fully extended.
•Clean glass pot (9) in soapy water.
•To rinse the appliance through, pass a potful of water through the machine before using it for the first time.
oFollow the instructions in
"Operating the appliance", but WITHOUT using a filter or coffee.
SETTING THE TIMER AND START TIME
The appliance has a
NOTE: The timer will require resetting each time the appliance has been disconnected from the mains. Reset the time when reconnecting the appliance.
Setting the clock
•Place the plug (11) in the socket.
The clock on the display (f) will show "12:00" and flash.
•Press the "PRO" button (c) once. The display will show "SET TIME" in the top left corner.
•You can now set the time using the HR (g) button for hours and MIN (e) button for minutes.
•Setting will stop automatically when you have not pressed any button for approx. 8 seconds. The clock has now been set.
Setting start time
•Press the "PRO" button twice. The display will show "SET TIMER" in the top right corner.
•You can now set the start time using the HR (g) button for hours and MIN (e) button for minutes.
•Setting will stop automatically when you have not pressed any button for approx. 8 seconds. The start time has now been set.
OPERATING THE APPLIANCE
Regardless of whether you want to make coffee with or without the time, the start procedure is always as follows:
•Pour fresh water into the glass pot.
•Lift the cover (1) of the water reservoir, and carefully pour the water from the glass pot into the reservoir (2).
•Close the pot lid, and place it on the hot plate (7). Check it is correctly positioned, so that the
19
