UK
INTRODUCTION
To get the best out of your fan, please read these instructions carefully before using it for the first time.
We also recommend that you keep the instructions for future reference, so that you can remind yourself of the functions of the fan.
IMPORTANT SAFETY MEASURES
•Please ensure that the voltage of the fan corresponds to the mains voltage.
•Use the fan only for the purpose(s) defined in the user guide.
•Never insert your fingers, pencils or other objects through the cage during operation.
•Switch the fan off before moving or cleaning it.
•The fan should be set up on a stable and level surface to avoid it being knocked over.
•Do not expose the fan to excessive heat or humidity, as this can cause damage to the electrical components.
•Do not immerse in any form of liquid.
•It is not advisable to expose people, in particular babies and the elderly, to a continuous stream of cold air.
•The fan should be kept out of the reach of children.
•Ensure that the cable does not get caught beneath the device, in drawers, behind shelves etc.
•Do not run the cable under carpets, rugs, etc.
•Ensure the cable is kept away from busy areas to avoid anyone tripping over it.
•Do not use if the device or cable becomes damaged. Take it to a specialist for repair.
•For indoor use only.
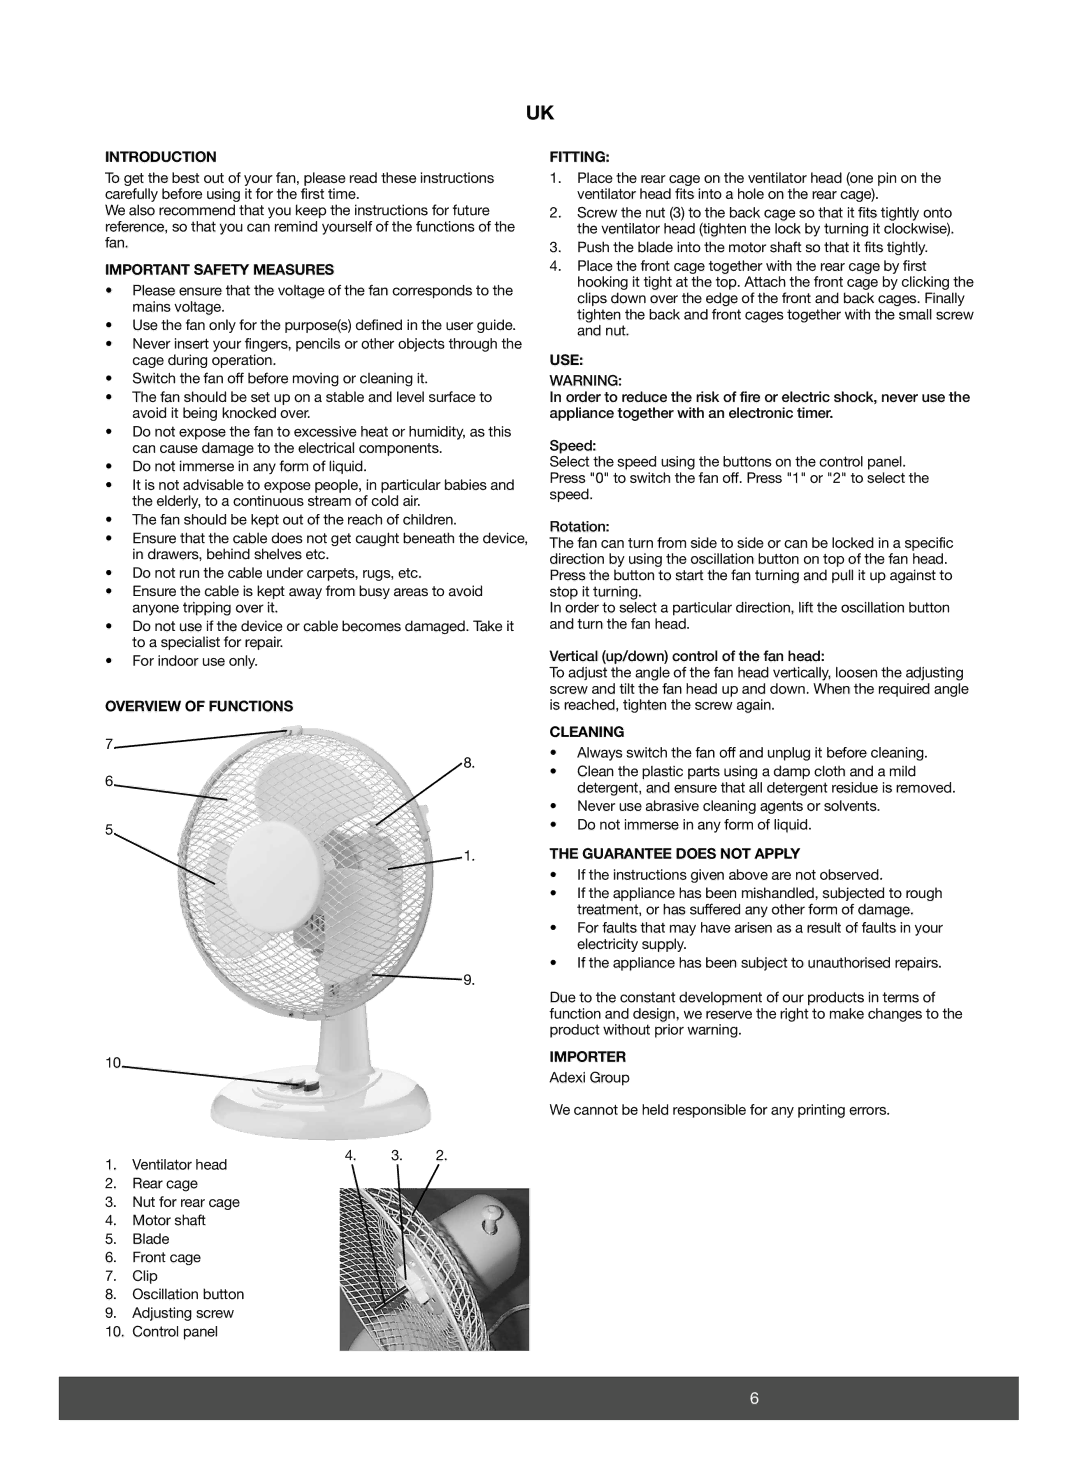
OVERVIEW OF FUNCTIONS
7.![]()
FITTING:
1.Place the rear cage on the ventilator head (one pin on the ventilator head fits into a hole on the rear cage).
2.Screw the nut (3) to the back cage so that it fits tightly onto the ventilator head (tighten the lock by turning it clockwise).
3.Push the blade into the motor shaft so that it fits tightly.
4.Place the front cage together with the rear cage by first hooking it tight at the top. Attach the front cage by clicking the clips down over the edge of the front and back cages. Finally tighten the back and front cages together with the small screw and nut.
USE:
WARNING:
In order to reduce the risk of fire or electric shock, never use the appliance together with an electronic timer.
Speed:
Select the speed using the buttons on the control panel. Press "0" to switch the fan off. Press "1" or "2" to select the speed.
Rotation:
The fan can turn from side to side or can be locked in a specific direction by using the oscillation button on top of the fan head. Press the button to start the fan turning and pull it up against to stop it turning.
In order to select a particular direction, lift the oscillation button and turn the fan head.
Vertical (up/down) control of the fan head:
To adjust the angle of the fan head vertically, loosen the adjusting screw and tilt the fan head up and down. When the required angle is reached, tighten the screw again.
CLEANING
• Always switch the fan off and unplug it before cleaning. |
6.
5.
10.
1. Ventilator head
2. Rear cage
8.
1.
![]() 9.
9.
4. 3. 2.
• Clean the plastic parts using a damp cloth and a mild | |
| detergent, and ensure that all detergent residue is removed. |
• | Never use abrasive cleaning agents or solvents. |
• | Do not immerse in any form of liquid. |
THE GUARANTEE DOES NOT APPLY
•If the instructions given above are not observed.
•If the appliance has been mishandled, subjected to rough treatment, or has suffered any other form of damage.
•For faults that may have arisen as a result of faults in your electricity supply.
•If the appliance has been subject to unauthorised repairs.
Due to the constant development of our products in terms of function and design, we reserve the right to make changes to the product without prior warning.
IMPORTER
Adexi Group
We cannot be held responsible for any printing errors.
3. Nut for rear cage
4. Motor shaft
5. Blade
6. Front cage
7. Clip
8. Oscillation button
9. Adjusting screw
10. Control panel
6