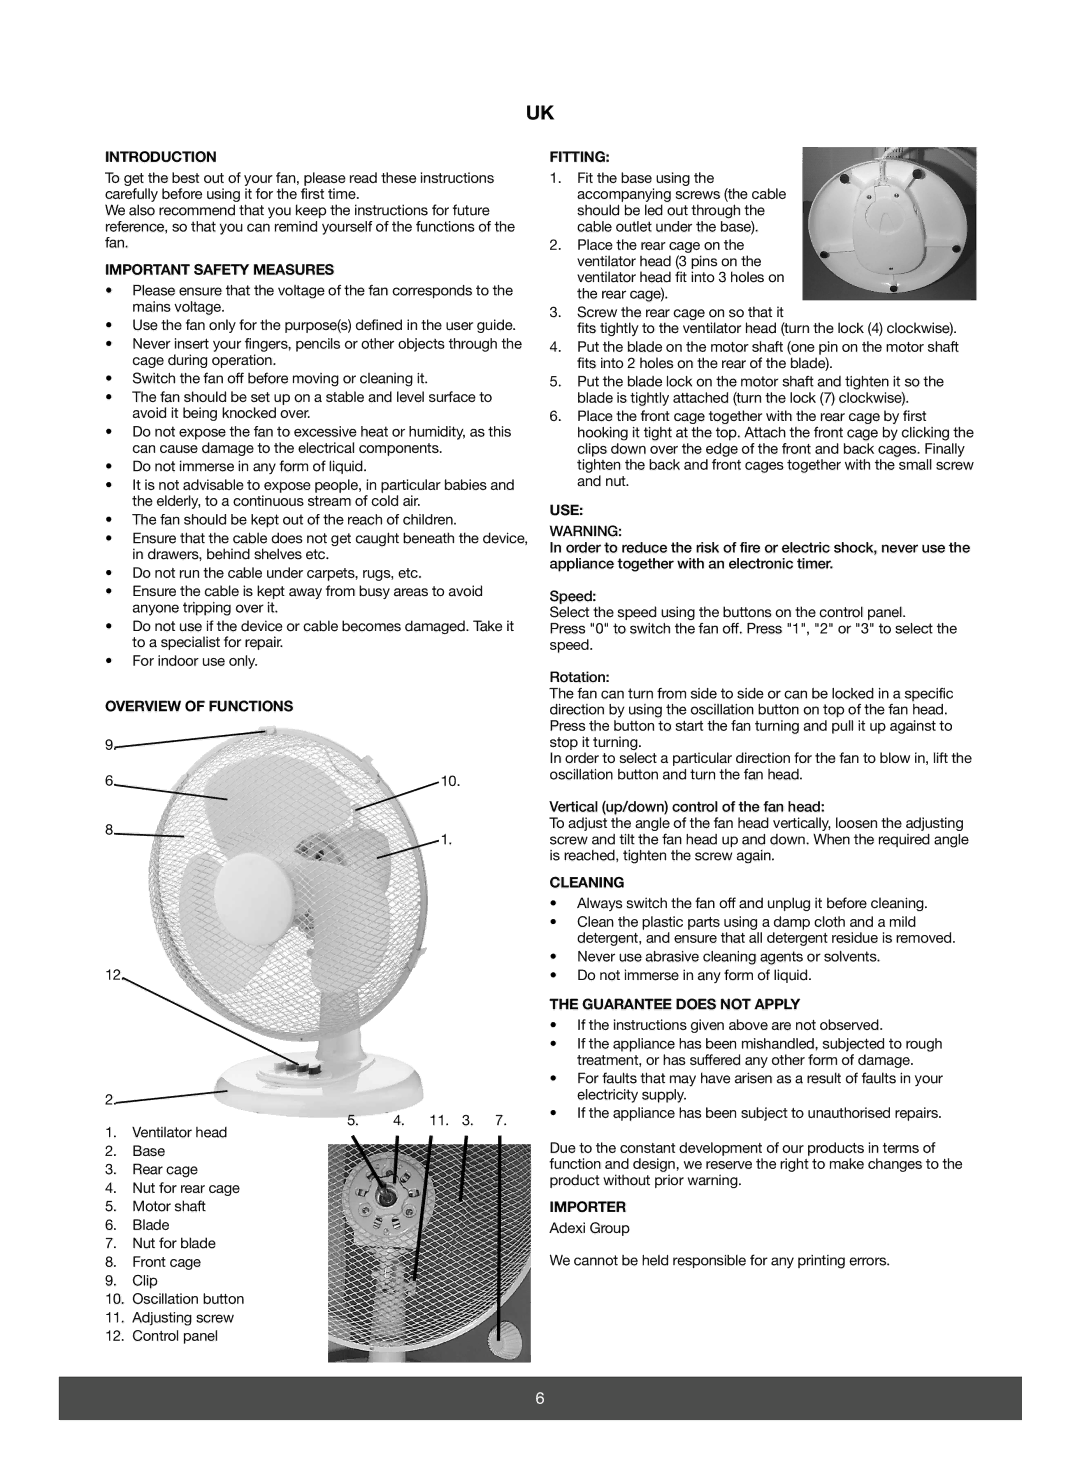
671-106 specifications
Melissa 671-106 is an innovative and advanced synthetic material that has gained significant attention in various industrial applications. Renowned for its impressive mechanical properties and versatility, this material stands out among its peers in terms of reliability and performance.One of the main features of Melissa 671-106 is its exceptional durability, which allows it to withstand harsh environmental conditions. Whether subjected to extreme temperatures, corrosive chemicals, or heavy wear and tear, Melissa 671-106 maintains structural integrity, making it an ideal choice for demanding applications.
The technology behind Melissa 671-106 involves a unique polymer blend that enhances its strength and flexibility. This proprietary composition offers a remarkable balance between rigidity and elasticity, enabling it to absorb shocks without permanent deformation. As a result, products utilizing Melissa 671-106 can ensure longevity even in challenging situations.
Another characteristic that sets Melissa 671-106 apart is its lightweight nature. Compared to traditional materials such as metals or ceramics, this synthetic compound is significantly lighter, which can lead to reduced energy consumption in transportation and manufacturing processes. This lightweight aspect also makes it easier to handle and process, further increasing its appeal to engineers and manufacturers.
Furthermore, Melissa 671-106 exhibits excellent thermal stability. This feature allows it to maintain performance in high-temperature environments, making it suitable for applications in industries such as automotive, aerospace, and electronics. The material's heat resistance ensures that it does not degrade or lose functionality when exposed to elevated temperatures.
Another notable quality of Melissa 671-106 is its ease of fabrication. It can be molded, extruded, or processed using a variety of techniques, offering great flexibility for manufacturers. This adaptability lends itself to producing components of different shapes and sizes, catering to specific requirements across different sectors.
Finally, Melissa 671-106 is designed with sustainability in mind. Many variants of the material are produced using eco-friendly methods and can be recycled at the end of their lifecycle, minimizing environmental impact.
In summary, Melissa 671-106 is a highly durable, lightweight, and versatile synthetic material characterized by its thermal stability, ease of fabrication, and sustainability. These attributes make it an essential component across various industries, driving innovation and efficiency in product design and manufacturing.