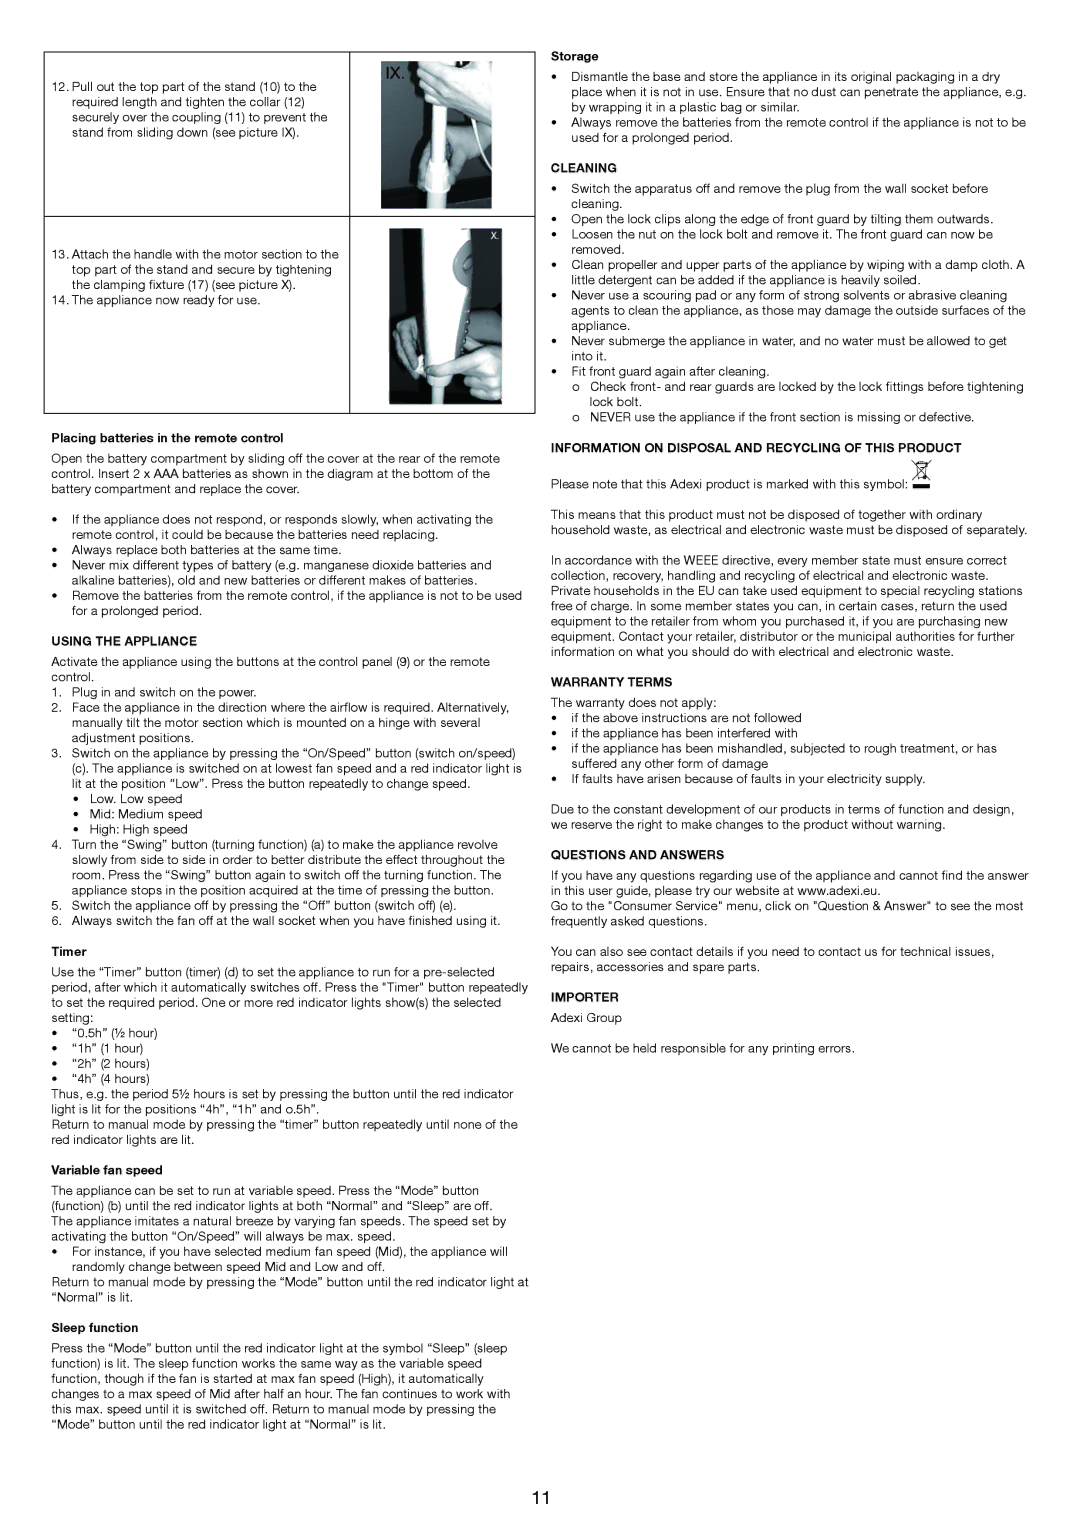
12.Pull out the top part of the stand (10) to the required length and tighten the collar (12) securely over the coupling (11) to prevent the stand from sliding down (see picture IX).
13.Attach the handle with the motor section to the top part of the stand and secure by tightening the clamping fixture (17) (see picture X).
14.The appliance now ready for use.
Placing batteries in the remote control
Open the battery compartment by sliding off the cover at the rear of the remote control. Insert 2 x AAA batteries as shown in the diagram at the bottom of the battery compartment and replace the cover.
•If the appliance does not respond, or responds slowly, when activating the remote control, it could be because the batteries need replacing.
•Always replace both batteries at the same time.
•Never mix different types of battery (e.g. manganese dioxide batteries and alkaline batteries), old and new batteries or different makes of batteries.
•Remove the batteries from the remote control, if the appliance is not to be used for a prolonged period.
USING THE APPLIANCE
Activate the appliance using the buttons at the control panel (9) or the remote control.
1.Plug in and switch on the power.
2.Face the appliance in the direction where the airflow is required. Alternatively, manually tilt the motor section which is mounted on a hinge with several adjustment positions.
3.Switch on the appliance by pressing the “On/Speed” button (switch on/speed)
(c). The appliance is switched on at lowest fan speed and a red indicator light is lit at the position “Low”. Press the button repeatedly to change speed.
•Low. Low speed
•Mid: Medium speed
•High: High speed
4.Turn the “Swing” button (turning function) (a) to make the appliance revolve slowly from side to side in order to better distribute the effect throughout the room. Press the “Swing” button again to switch off the turning function. The appliance stops in the position acquired at the time of pressing the button.
5.Switch the appliance off by pressing the “Off” button (switch off) (e).
6.Always switch the fan off at the wall socket when you have finished using it.
Timer
Use the “Timer” button (timer) (d) to set the appliance to run for a pre-selected period, after which it automatically switches off. Press the "Timer" button repeatedly to set the required period. One or more red indicator lights show(s) the selected setting:
•“0.5h” (½ hour)
•“1h” (1 hour)
•“2h” (2 hours)
•“4h” (4 hours)
Thus, e.g. the period 5½ hours is set by pressing the button until the red indicator light is lit for the positions “4h”, “1h” and o.5h”.
Return to manual mode by pressing the “timer” button repeatedly until none of the red indicator lights are lit.
Variable fan speed
The appliance can be set to run at variable speed. Press the “Mode” button (function) (b) until the red indicator lights at both “Normal” and “Sleep” are off. The appliance imitates a natural breeze by varying fan speeds. The speed set by activating the button “On/Speed” will always be max. speed.
•For instance, if you have selected medium fan speed (Mid), the appliance will randomly change between speed Mid and Low and off.
Return to manual mode by pressing the “Mode” button until the red indicator light at “Normal” is lit.
Sleep function
Press the “Mode” button until the red indicator light at the symbol “Sleep” (sleep function) is lit. The sleep function works the same way as the variable speed function, though if the fan is started at max fan speed (High), it automatically changes to a max speed of Mid after half an hour. The fan continues to work with this max. speed until it is switched off. Return to manual mode by pressing the “Mode” button until the red indicator light at “Normal” is lit.
Storage
•Dismantle the base and store the appliance in its original packaging in a dry place when it is not in use. Ensure that no dust can penetrate the appliance, e.g. by wrapping it in a plastic bag or similar.
•Always remove the batteries from the remote control if the appliance is not to be used for a prolonged period.
CLEANING
•Switch the apparatus off and remove the plug from the wall socket before cleaning.
•Open the lock clips along the edge of front guard by tilting them outwards.
•Loosen the nut on the lock bolt and remove it. The front guard can now be removed.
•Clean propeller and upper parts of the appliance by wiping with a damp cloth. A little detergent can be added if the appliance is heavily soiled.
•Never use a scouring pad or any form of strong solvents or abrasive cleaning agents to clean the appliance, as those may damage the outside surfaces of the appliance.
•Never submerge the appliance in water, and no water must be allowed to get into it.
•Fit front guard again after cleaning.
o Check front- and rear guards are locked by the lock fittings before tightening lock bolt.
o NEVER use the appliance if the front section is missing or defective.
INFORMATION ON DISPOSAL AND RECYCLING OF THIS PRODUCT
Please note that this Adexi product is marked with this symbol: 
This means that this product must not be disposed of together with ordinary household waste, as electrical and electronic waste must be disposed of separately.
In accordance with the WEEE directive, every member state must ensure correct collection, recovery, handling and recycling of electrical and electronic waste. Private households in the EU can take used equipment to special recycling stations free of charge. In some member states you can, in certain cases, return the used equipment to the retailer from whom you purchased it, if you are purchasing new equipment. Contact your retailer, distributor or the municipal authorities for further information on what you should do with electrical and electronic waste.
WARRANTY TERMS
The warranty does not apply:
•if the above instructions are not followed
•if the appliance has been interfered with
•if the appliance has been mishandled, subjected to rough treatment, or has suffered any other form of damage
•If faults have arisen because of faults in your electricity supply.
Due to the constant development of our products in terms of function and design, we reserve the right to make changes to the product without warning.
QUESTIONS AND ANSWERS
If you have any questions regarding use of the appliance and cannot find the answer in this user guide, please try our website at www.adexi.eu.
Go to the "Consumer Service" menu, click on "Question & Answer" to see the most frequently asked questions.
You can also see contact details if you need to contact us for technical issues, repairs, accessories and spare parts.
IMPORTER
Adexi Group
We cannot be held responsible for any printing errors.