DIAGRAM 4
DIAGRAM 5
DIAGRAM 6
STEP 5 - THE FINISHING TOUCH
1.Finally, use the blade without an attachment comb for close trimming around the base of the neck, the sides of the neck and the ears.
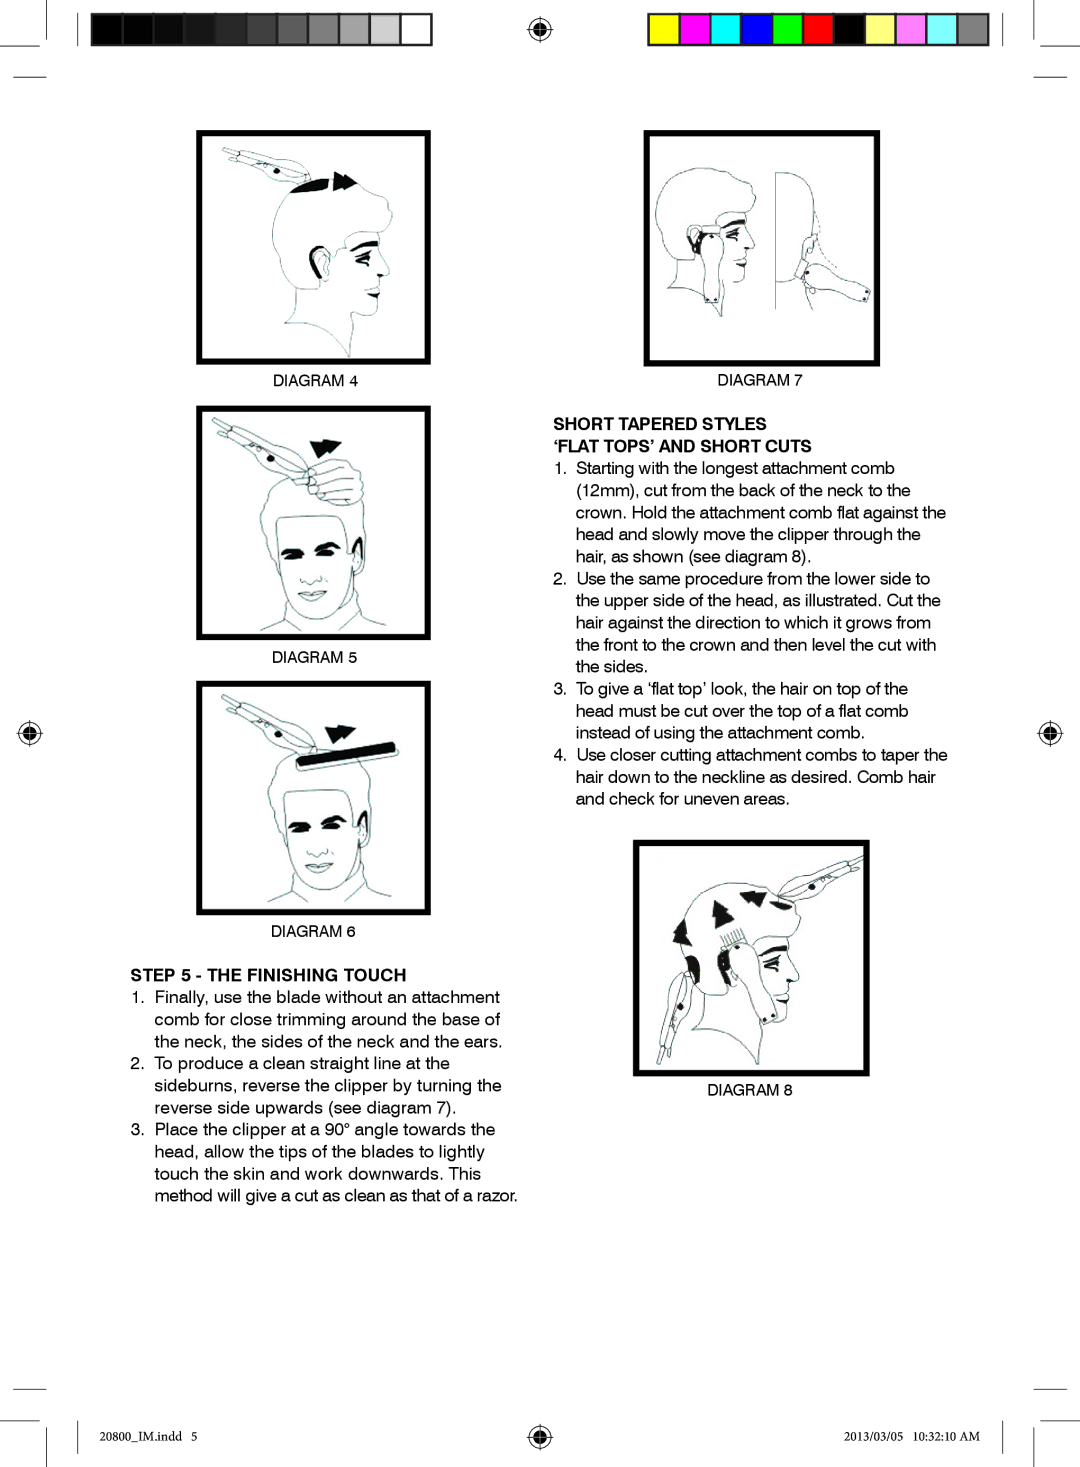
2.To produce a clean straight line at the sideburns, reverse the clipper by turning the reverse side upwards (see diagram 7).
3.Place the clipper at a 90° angle towards the head, allow the tips of the blades to lightly touch the skin and work downwards. This method will give a cut as clean as that of a razor.
20800_IM.indd 5
DIAGRAM 7
SHORT TAPERED STYLES ‘FLAT TOPS’ AND SHORT CUTS
1.Starting with the longest attachment comb (12mm), cut from the back of the neck to the crown. Hold the attachment comb flat against the head and slowly move the clipper through the hair, as shown (see diagram 8).
2.Use the same procedure from the lower side to the upper side of the head, as illustrated. Cut the hair against the direction to which it grows from the front to the crown and then level the cut with the sides.
3.To give a ‘flat top’ look, the hair on top of the head must be cut over the top of a flat comb instead of using the attachment comb.
4.Use closer cutting attachment combs to taper the hair down to the neckline as desired. Comb hair and check for uneven areas.
DIAGRAM 8
2013/03/05 10:32:10 AM
