ENGLISH
pressors, pressure vessels and air tools.
ADanger by vibration!
•Vibrations are tansmitted to the entire body, particularly to arms and hands. Very heavy vibrations may cause nerve and vascular disorder.
A Caution!
•Protect the tool, air inlet and operat- ing elements in particular, from dust and dirt.
•Make sure that the max. permissible working pressure stated in the Tech- nical Specifications is not exceeded. The working pressure must be adjusted by a pressure regulator.
•Do no overload the tool:
−use it only within the range of capacity stated in the Technical Specifications;
−avoid impacts to the work piece;
−avoid lateral load on the cutting- off wheel.
•Let tool run idle for a short time only.
3.3Symbols on the Machine
Danger!
Disregard of the following warnings may lead to serious personal injury or material damage.
Read instructions.
Wear protective spectacle.
Wear ear protection.
Maximum permissible working pressure: 6.3 bar.
Speed n0: 11000 rpm
4. Operation
4.1Before Initial Operation
•Install plug.
4.2Installation of Grinding Disc or Cutoff Wheel
ADanger!
•Use only grinding dics and cutoff wheels intended by the manufac- turer for this tool.
•Always disconnect tool from air supply before servicing.
10
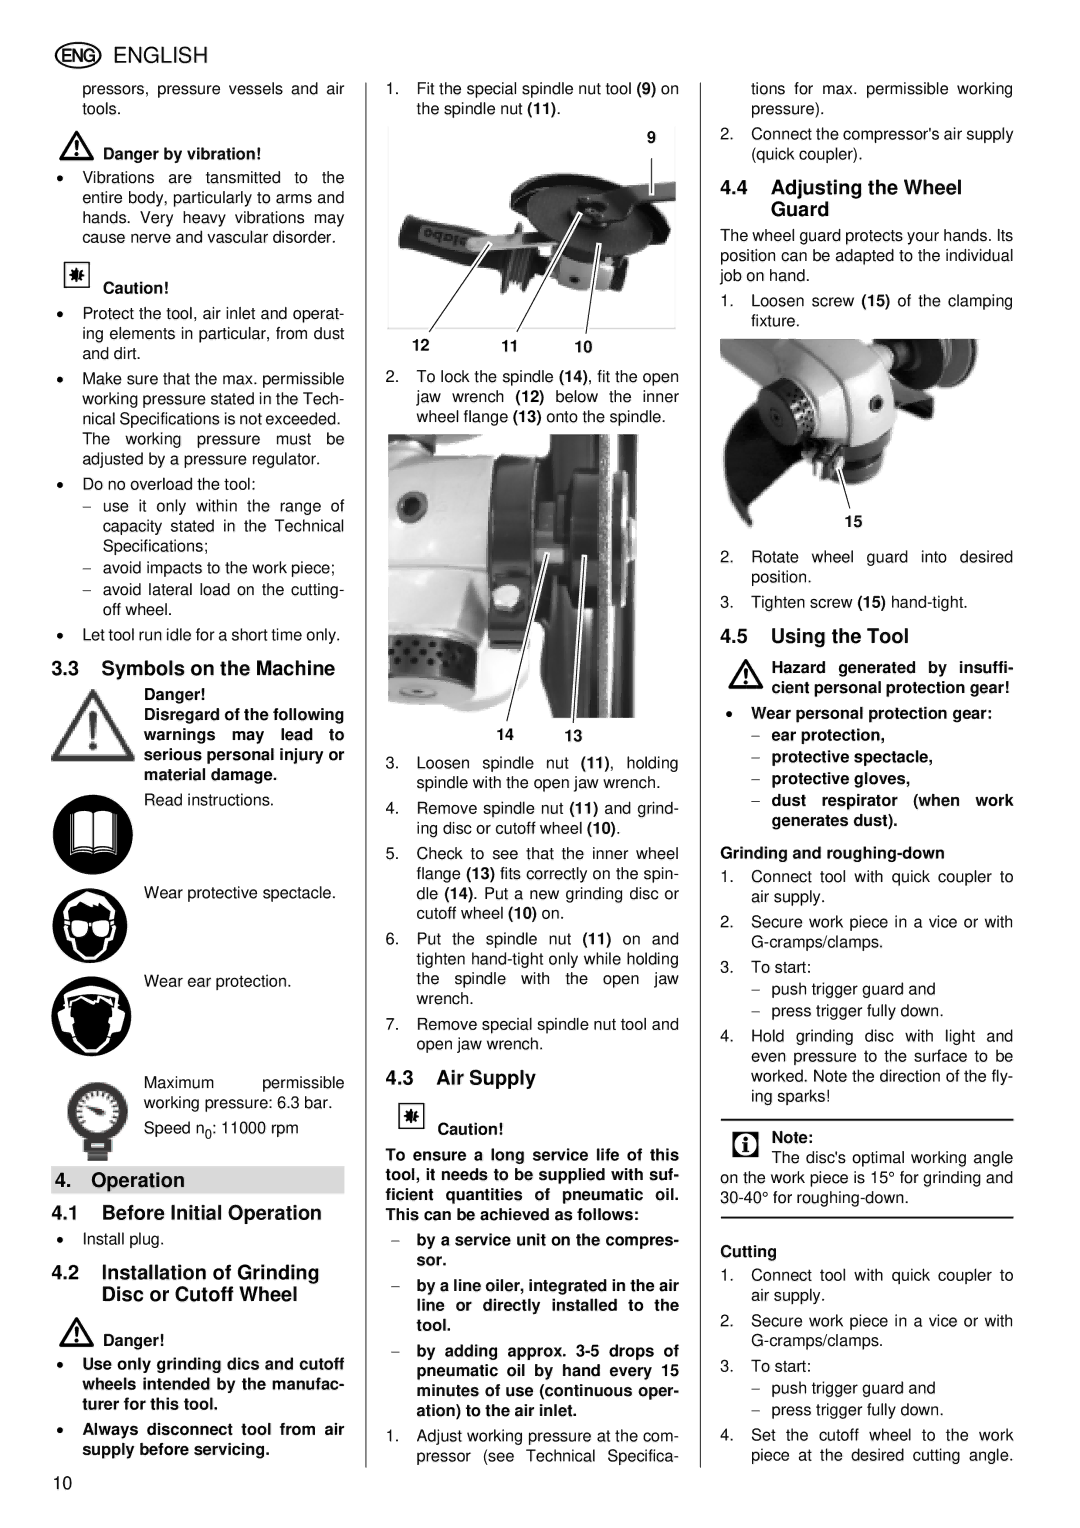
1.Fit the special spindle nut tool (9) on the spindle nut (11).
9
12 | 11 | 10 |
2.To lock the spindle (14), fit the open jaw wrench (12) below the inner wheel flange (13) onto the spindle.
1413
3.Loosen spindle nut (11), holding spindle with the open jaw wrench.
4.Remove spindle nut (11) and grind- ing disc or cutoff wheel (10).
5.Check to see that the inner wheel flange (13) fits correctly on the spin- dle (14). Put a new grinding disc or cutoff wheel (10) on.
6.Put the spindle nut (11) on and tighten
7.Remove special spindle nut tool and open jaw wrench.
4.3Air Supply
A Caution!
To ensure a long service life of this tool, it needs to be supplied with suf- ficient quantities of pneumatic oil. This can be achieved as follows:
−by a service unit on the compres- sor.
−by a line oiler, integrated in the air line or directly installed to the tool.
−by adding approx.
1.Adjust working pressure at the com- pressor (see Technical Specifica-
tions for max. permissible working pressure).
2.Connect the compressor's air supply (quick coupler).
4.4Adjusting the Wheel Guard
The wheel guard protects your hands. Its position can be adapted to the individual job on hand.
1.Loosen screw (15) of the clamping fixture.
15
2.Rotate wheel guard into desired position.
3.Tighten screw (15)
4.5Using the Tool
AHazard generated by insuffi- cient personal protection gear!
•Wear personal protection gear:
−ear protection,
−protective spectacle,
−protective gloves,
−dust respirator (when work generates dust).
Grinding and
1.Connect tool with quick coupler to air supply.
2.Secure work piece in a vice or with
3.To start:
−push trigger guard and
−press trigger fully down.
4.Hold grinding disc with light and even pressure to the surface to be worked. Note the direction of the fly- ing sparks!
3 Note:The disc's optimal working angle on the work piece is 15° for grinding and
Cutting
1.Connect tool with quick coupler to air supply.
2.Secure work piece in a vice or with
3.To start:
−push trigger guard and
−press trigger fully down.
4.Set the cutoff wheel to the work piece at the desired cutting angle.