Model GXT300/325/310/400/450 Series | ® |
LCD DISPLAY
1
2
3
4
5
CONTROLS
11
12
13
14
15
16
17
18
19
20
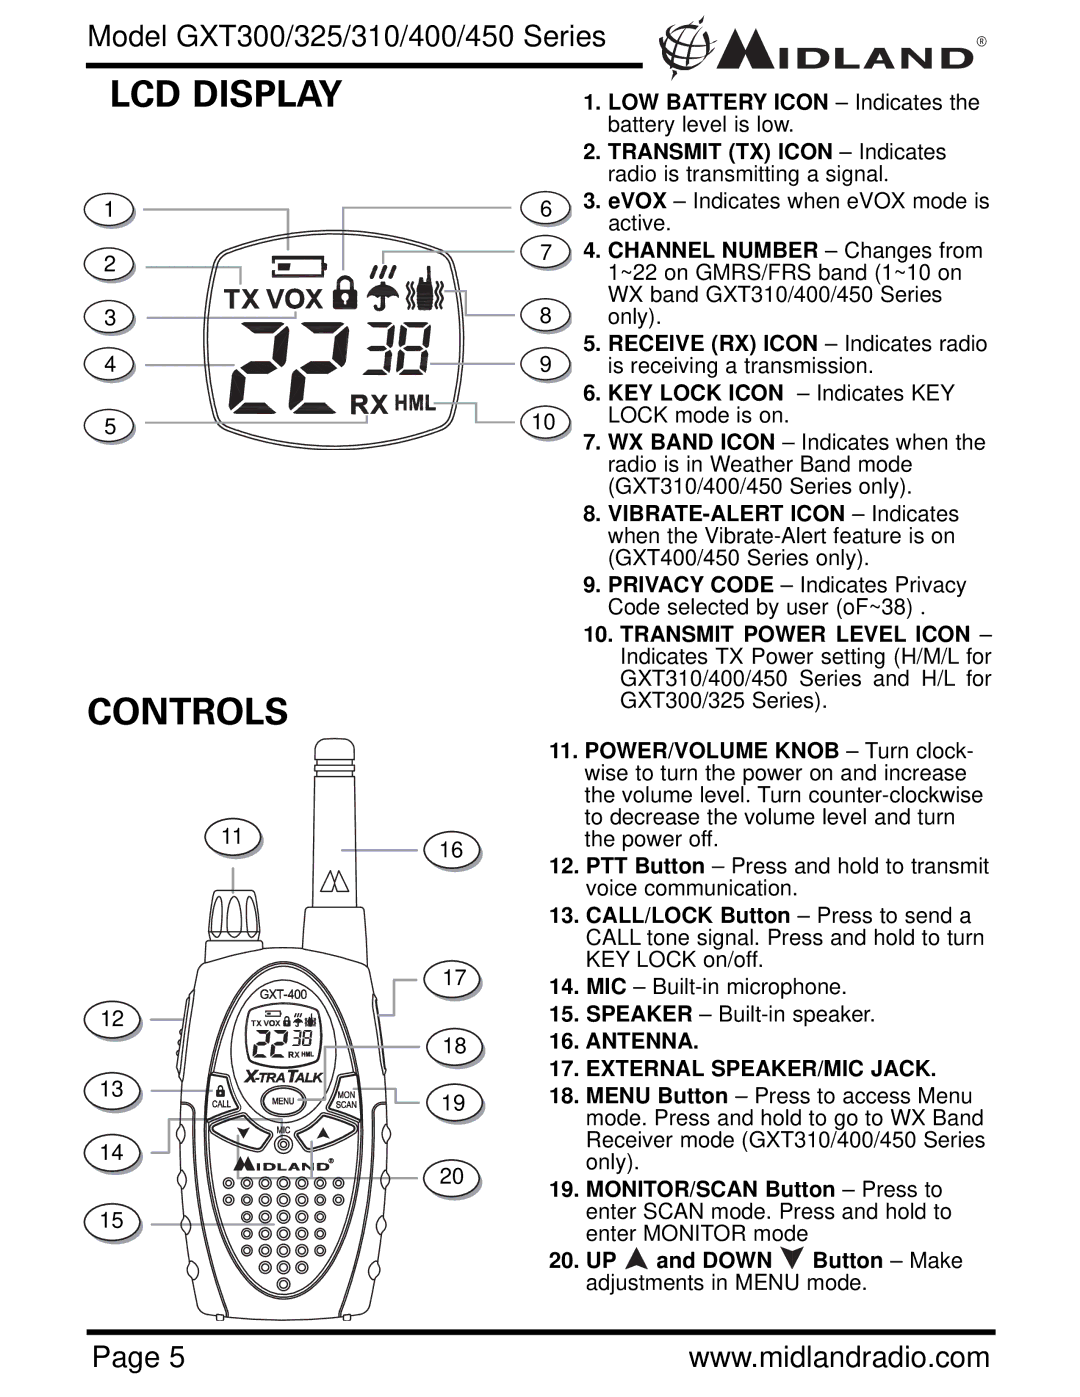
1.LOW BATTERY ICON – Indicates the battery level is low.
2.TRANSMIT (TX) ICON – Indicates radio is transmitting a signal.
63. eVOX – Indicates when eVOX mode is active.
74. CHANNEL NUMBER – Changes from 1~22 on GMRS/FRS band (1~10 on WX band GXT310/400/450 Series
8only).
5.RECEIVE (RX) ICON – Indicates radio
9is receiving a transmission.
6.KEY LOCK ICON – Indicates KEY
10LOCK mode is on.
7.WX BAND ICON – Indicates when the radio is in Weather Band mode (GXT310/400/450 Series only).
8.
9.PRIVACY CODE – Indicates Privacy Code selected by user (oF~38) .
10.TRANSMIT POWER LEVEL ICON – Indicates TX Power setting (H/M/L for GXT310/400/450 Series and H/L for GXT300/325 Series).
11.POWER/VOLUME KNOB – Turn clock- wise to turn the power on and increase the volume level. Turn
12.PTT Button – Press and hold to transmit voice communication.
13.CALL/LOCK Button – Press to send a CALL tone signal. Press and hold to turn KEY LOCK on/off.
14.MIC –
15.SPEAKER –
16.ANTENNA.
17.EXTERNAL SPEAKER/MIC JACK.
18.MENU Button – Press to access Menu mode. Press and hold to go to WX Band Receiver mode (GXT310/400/450 Series only).
19.MONITOR/SCAN Button – Press to enter SCAN mode. Press and hold to enter MONITOR mode
20.UP ![]() and DOWN
and DOWN ![]() Button – Make adjustments in MENU mode.
Button – Make adjustments in MENU mode.
Page 5 |
| www.midlandradio.com |