WR-10 Weather Radio, WR-10 specifications
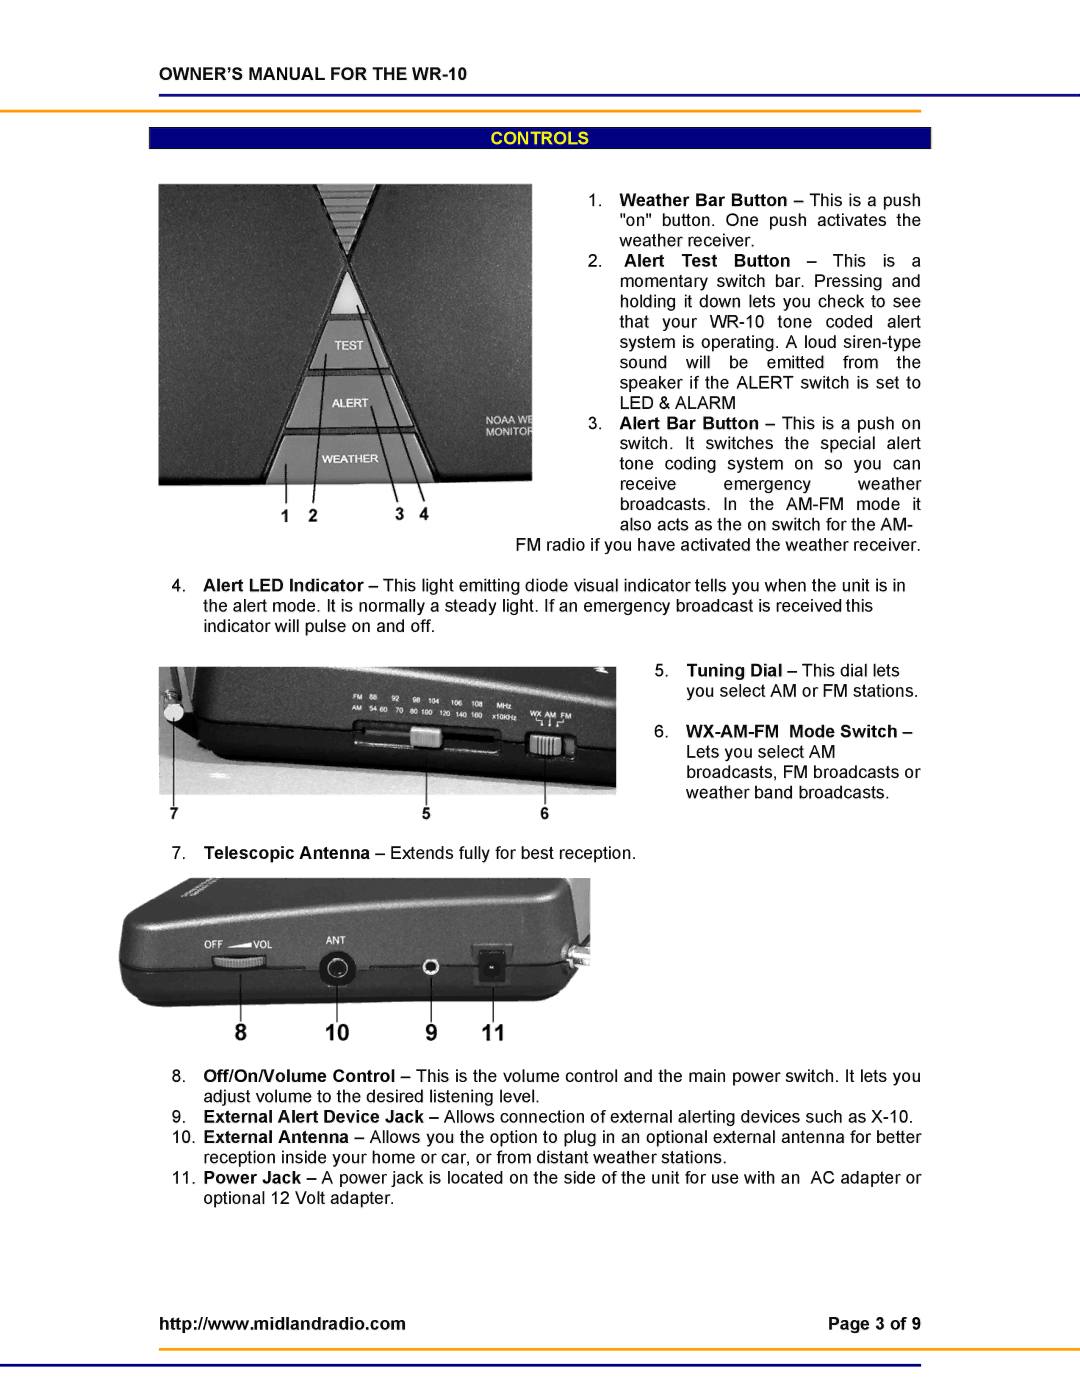
The Midland Radio WR-10 is a compact and reliable weather radio designed to keep you informed during severe weather conditions. This essential device is a trusted companion for outdoor enthusiasts, emergency preparedness, and anyone looking to stay updated on critical weather alerts.One of the standout features of the WR-10 is its National Oceanic and Atmospheric Administration (NOAA) Weather Radio capabilities. The radio provides continuous broadcasts of weather information, including severe weather alerts, forecasts, and other critical data, ensuring that users are always in the know about changing conditions. In emergency situations, this feature can be a lifesaver.
The WR-10 utilizes a built-in alarm clock with a snooze function. This dual purpose allows it to serve as both a weather alert radio and a regular alarm clock, making it a versatile addition to any bedroom or kitchen. The device is equipped with a bright LED display that can be easily read in low-light conditions, ensuring that you can access vital information at any time of day or night.
In terms of portability, the WR-10 is lightweight and compact, making it easy to carry during camping trips, hikes, or other outdoor adventures. Its durable design ensures it can withstand the rigors of outdoor use, while the battery backup feature offers peace of mind in case of power outages. Users can power the device with either an AC adapter or batteries, providing flexibility and reliability.
The WR-10 also includes an earphone jack, a valuable feature for those who prefer to listen to the updates discretely. This added functionality makes it suitable for use in various environments, whether you're at home, in a public space, or enjoying a quiet moment in nature.
Overall, the Midland Radio WR-10 combines essential weather alert capabilities with user-friendly features and a compact design, making it a worthwhile investment for anyone who values safety and preparedness. Whether you are an avid outdoor adventurer or simply want to ensure you receive timely updates in case of emergencies, the WR-10 is a dependable tool to keep you informed and ready for whatever nature has in store. With its combination of technology, versatility, and practicality, the WR-10 stands out as a top choice among weather radios.

