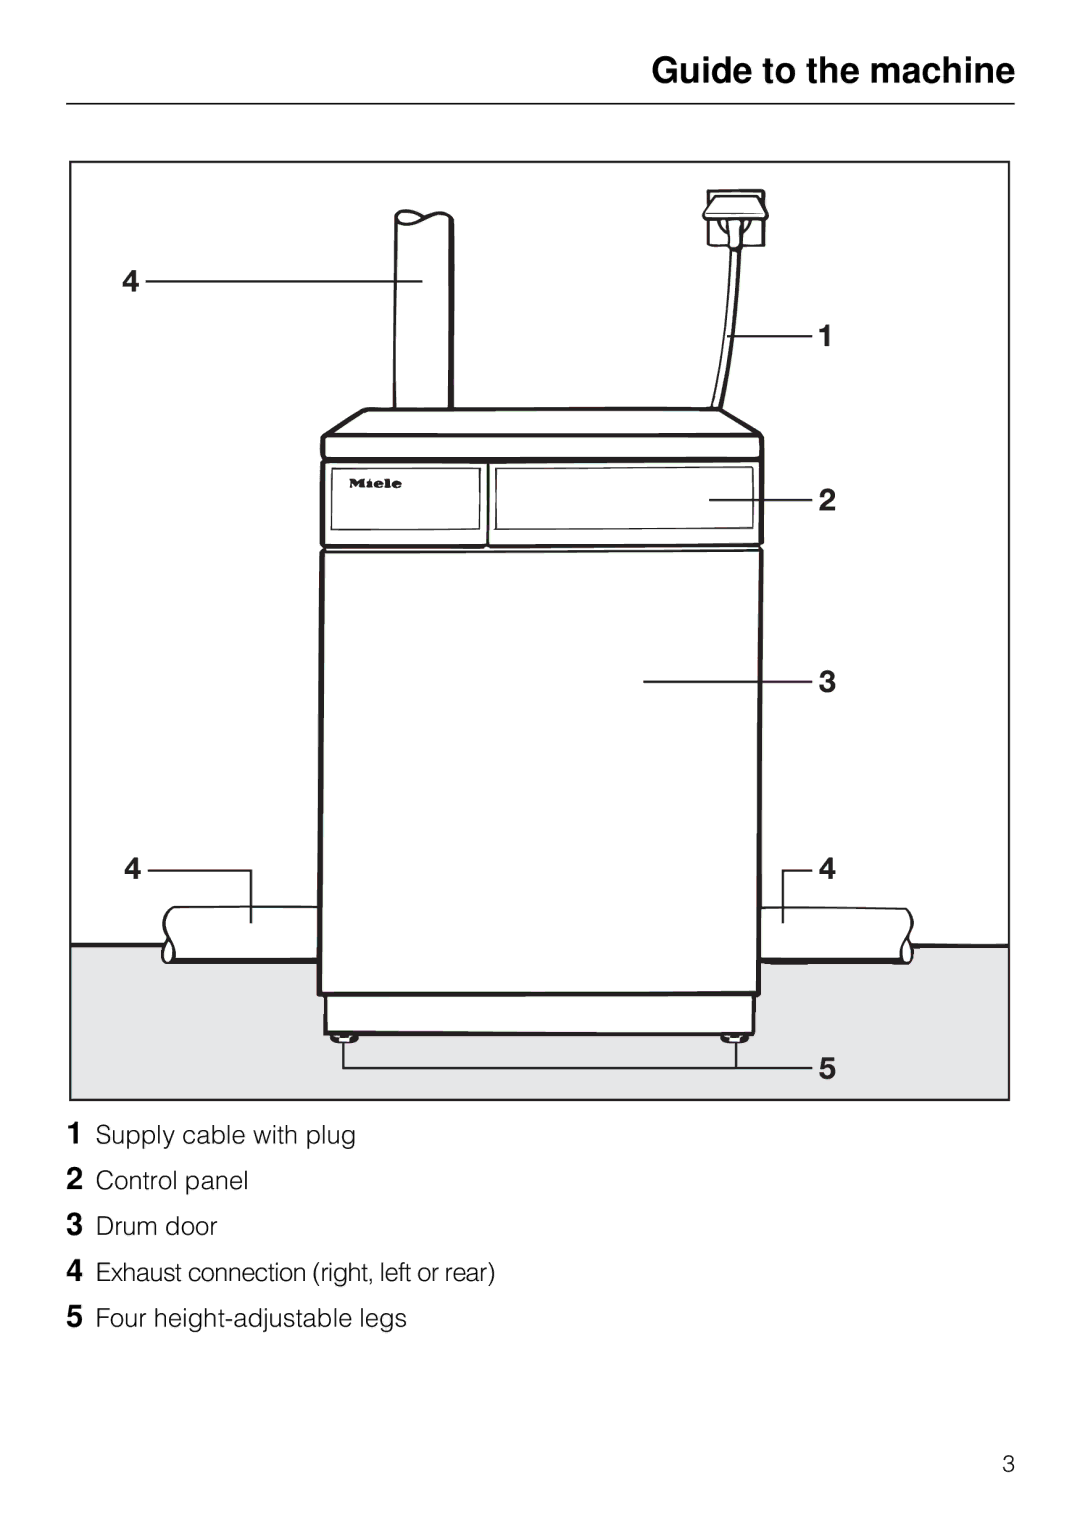
Manuals
/
Miele
/
Laundry Appliance
/
Clothes Dryer
Miele
T 1515 Guide to the machine, Supply cable with plug 2 Control panel 3 Drum door
Models:
T 1515
1
3
28
28
Download
28 pages
4.26 Kb
1
2
3
4
5
6
7
8
<
>
Install
Maintenance
Problem solving guide
Correct procedure
Four height-adjustable legs
Program Setting-Selector
indicator
Safety
in the event of a power
After-sales service
Page 3
Image 3
Guide to the machine
1
Supply cable with plug
2
Control panel
3
Drum door
4
Exhaust connection (right, left or rear)
5
Four
height-adjustable
legs
3
Page 2
Page 4
Page 3
Image 3
Page 2
Page 4
Contents
M.-Nr. 05 275
Operations Manual for the T 1515 Vented Dryer
Your contribution to the environment
Contents
Guide to the machine IMPORTANT SAFETY INSTRUCTIONS
Consumption data Technical data
4 Exhaust connection right, left or rear
Guide to the machine
5 Four height-adjustable legs
1 Supply cable with plug 2 Control panel 3 Drum door
Guide to the machine
Indicator lamps
PROGRAM SETTING-SELECTOR
Pushbuttons
IMPORTANT SAFETY INSTRUCTIONS
SAVE THESE INSTRUCTIONS
This dryer is only intended for residential use
IMPORTANT SAFETY INSTRUCTIONS
Your contribution to the environment
Disposal of the packing ma- terial
Disposal of your old machine
ANT SAFETY INSTRUCTIONS before operating this appliance
OPERATING INSTRUCTIONS
Loading the machine
Unloading the machine
The following fabrics should not be dried in a tumble dryer
Notes on laundry care
Program selection
indicator
“DRYING STAGE REACHED” indicator
“PROGRAM SETTING” selec- tor
To change a program during drying
Correct procedure
The program is cancelled if
To select a program
COTTONS
Programs
TIMED DRYING
Programs
PERMANENT
PRESS
USER MAINTENANCE INSTRUCTIONS
Cleaning and care Cleaning the lint filters
Cleaning the dryer
Remedy
Problem solving guide
What to do if, . . . ?
Cause
Cause
Problem solving guide
in the event of a power
What to do if, . . . ?
To open the door in the event of a power failure
The interior drum light fails to func- tion The bulb may be defective
Problem solving guide
Specimen
After-sales service
Electrical connection
INSTALLATION INSTRUCTIONS
“EASY INSTALLATION KIT”
Grounding and Electrical con- nection Grounding instructions
Where to install the machine
Installation
Installation at the left or right side of the machine
Installation - venting
When installing, try to avoid
Installation at the rear
Installation - venting
To calculate the effective duct length Tabel
Example
Result
Installation - venting
Wall vent kit - example
Installation - venting
available from most hardware stores
Fig.4
Installation - venting
Consumption data
Cottons
Permanent Press
Technical data
4503
All rights reserved/001