2. Installing the Switch
The switch is designed to operate in workgroup environments without a complicated
configuration procedure. It also features an
Before connecting the supplied power cord into the switch, check to see that the cord voltage and current rating conform to the standards of the country of operation.
2.1Packing List
•One switch unit
•One AC power cord
•One RS232 console cable
•
•CD for installation guide, software modules, MIB file and software operation manuals
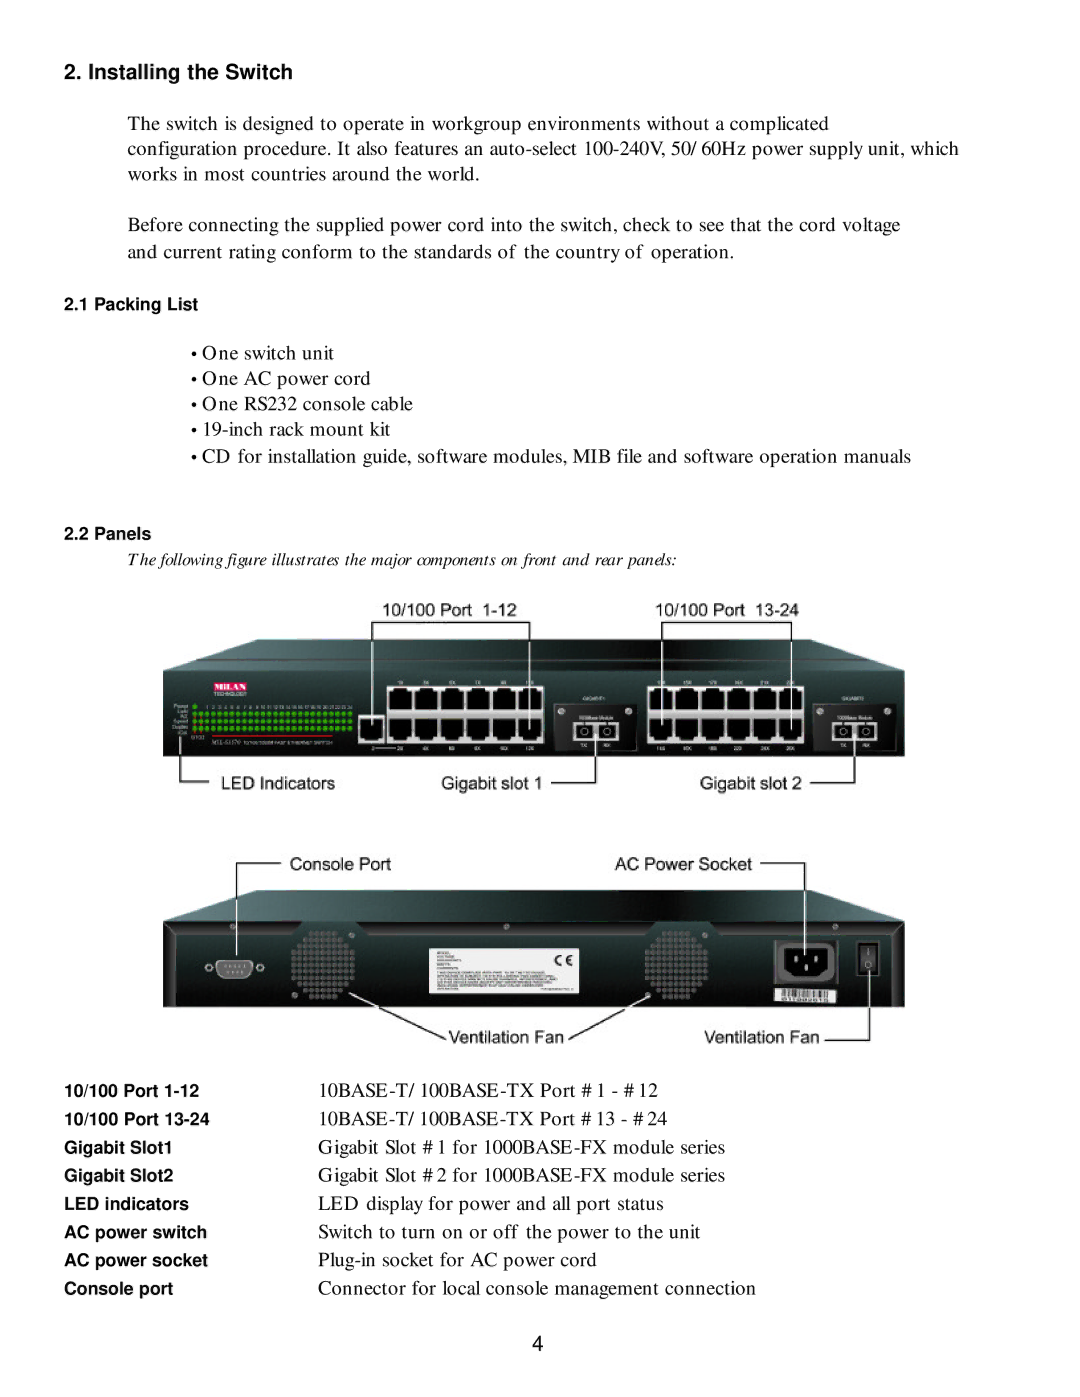
2.2Panels
The following figure illustrates the major components on front and rear panels:
10/100 Port
Connector for local console management connection
4