OPERATION
![]()
![]()
![]() WARNING!
WARNING!
To reduce the risk of injury, always unplug tool before attaching or removing accessories. Use only specifically recommended accessories. Others may be hazardous.
Using the Transport Lock
The transport lock secures the handle for transporting and storing the tool. To release the transport lock, push down the handle and pull out the transport lock. To lock the transport lock, push down the handle and push in the transport lock.
![]()
![]()
![]() WARNING!
WARNING!
To reduce the risk of injury, do not use the FIXTEC nut on any other tool. The FIXTEC nut is specifically designed for this application and may be hazardous when used on other tools.
Using the FIXTEC Nut
The FIXTEC nut allows for wheel changes without tools. To use the FIXTEC nut, pull out the hinged latch and spin off the nut. To replace the nut, hand tighten the nut until it is secure. Do not over tighten the nut. This may damage the wheel and the flanges. When the nut is tight, snap the hinged latch back into position. Make sure the hinged latch is down before using the tool.
![]()
![]()
![]() WARNING!
WARNING!
To reduce the risk of injury, use only the proper TYPE 1 wheels made for this machine. DO NOT USE TOOTHED BLADES.
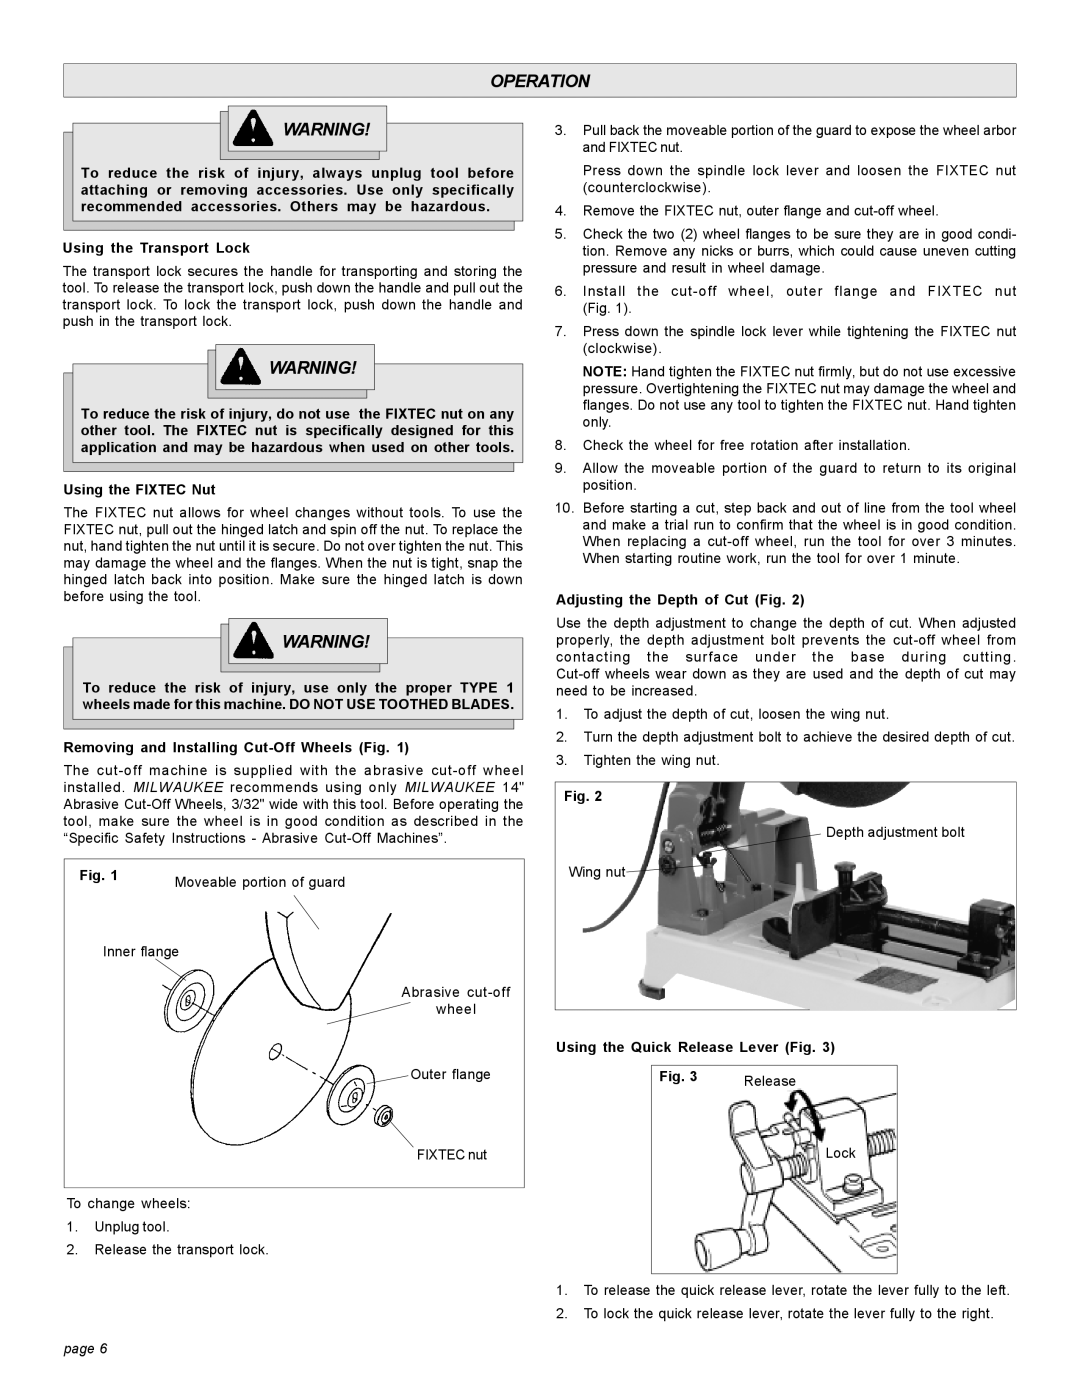
Removing and Installing Cut-Off Wheels (Fig. 1)
The
Fig. 1 | Moveable portion of guard |
| |
Inner flange | |
Abrasive
wheel
Outer flange
FIXTEC nut
To change wheels:
1.Unplug tool.
2.Release the transport lock.
3.Pull back the moveable portion of the guard to expose the wheel arbor and FIXTEC nut.
Press down the spindle lock lever and loosen the FIXTEC nut (counterclockwise).
4.Remove the FIXTEC nut, outer flange and
5.Check the two (2) wheel flanges to be sure they are in good condi- tion. Remove any nicks or burrs, which could cause uneven cutting pressure and result in wheel damage.
6.Install the
7.Press down the spindle lock lever while tightening the FIXTEC nut (clockwise).
NOTE: Hand tighten the FIXTEC nut firmly, but do not use excessive pressure. Overtightening the FIXTEC nut may damage the wheel and flanges. Do not use any tool to tighten the FIXTEC nut. Hand tighten only.
8.Check the wheel for free rotation after installation.
9.Allow the moveable portion of the guard to return to its original position.
10.Before starting a cut, step back and out of line from the tool wheel and make a trial run to confirm that the wheel is in good condition. When replacing a
Adjusting the Depth of Cut (Fig. 2)
Use the depth adjustment to change the depth of cut. When adjusted properly, the depth adjustment bolt prevents the
1.To adjust the depth of cut, loosen the wing nut.
2.Turn the depth adjustment bolt to achieve the desired depth of cut.
3.Tighten the wing nut.
Fig. 2
Depth adjustment bolt
Wing nut
Using the Quick Release Lever (Fig. 3)
Fig. 3 Release
Lock
1.To release the quick release lever, rotate the lever fully to the left.
2.To lock the quick release lever, rotate the lever fully to the right.
page 6