ADVANCED OPERATION
USING THE MODE BUTTON
O | The following modes can be selected: | ||||
Autoflash ( | ), |
|
| ||
| Autoflash with | ), | |||
| Manual fill flash ( | ), |
| ||
| Flash cancel ( | ), |
|
| |
| Night portrait ( |
| ), |
| |
| Continuous mode ( | + ) (O) (P). | |||
P | When you turn the camera on, the built- | ||||
| |||||
| in flash is set to autoflash ( | ). | |||
| • The range of the | ||||
| on the film speed you are using. To | ||||
| ensure proper exposure, make sure | ||||
| your subject is within the flash range | ||||
Q | (Q). |
|
|
| |
ISO 200 0.8 - 5.6m (2.6 - 18.2 ft.) | |||||
| |||||
ISO 200


 AUTOFLASH
The flash will fire automatically when the light level is low.


 AUTOFLASH WITH
 RED-EYE REDUCTION
Use the
the ![]() R low light situations. The
R low light situations. The
The flash will fire automatically when the light level is low.
S
Press the mode button until ![]()
![]()
![]()
![]() appears in the data panel.
appears in the data panel.
• The flash mode remains selected after the shutter is released.


 MANUAL
 FILL-FLASH
The flash will fire with every shutter release, regardless of lighting. This can be used to reduce harsh, unflattering shadows on your subject’s face.
Press the mode button until ![]() appears in the data panel.
appears in the data panel.
• The flash mode remains selected after the shutter is released.


 FLASH CANCEL
With
Press the mode button until ![]() appears in the data panel.
appears in the data panel.
•Shutter speeds may be slow when the flash is canceled. Use of a tripod is recommended.
•The flash mode remains selected after the shutter is released.


 NIGHT PORTRAIT MODE
In night portrait mode, the camera balances the flash and existing light exposure so you can take beautiful pictures of people at sunset or at night. The flash is set to manual
Press the mode button until ![]()
![]() appears in the data panel.
appears in the data panel.
•The shutter speed will be slow. Use of a tripod is recommended.
•The flash mode will return to autoflash ![]()
![]()
![]() after the shutter is released.
after the shutter is released.


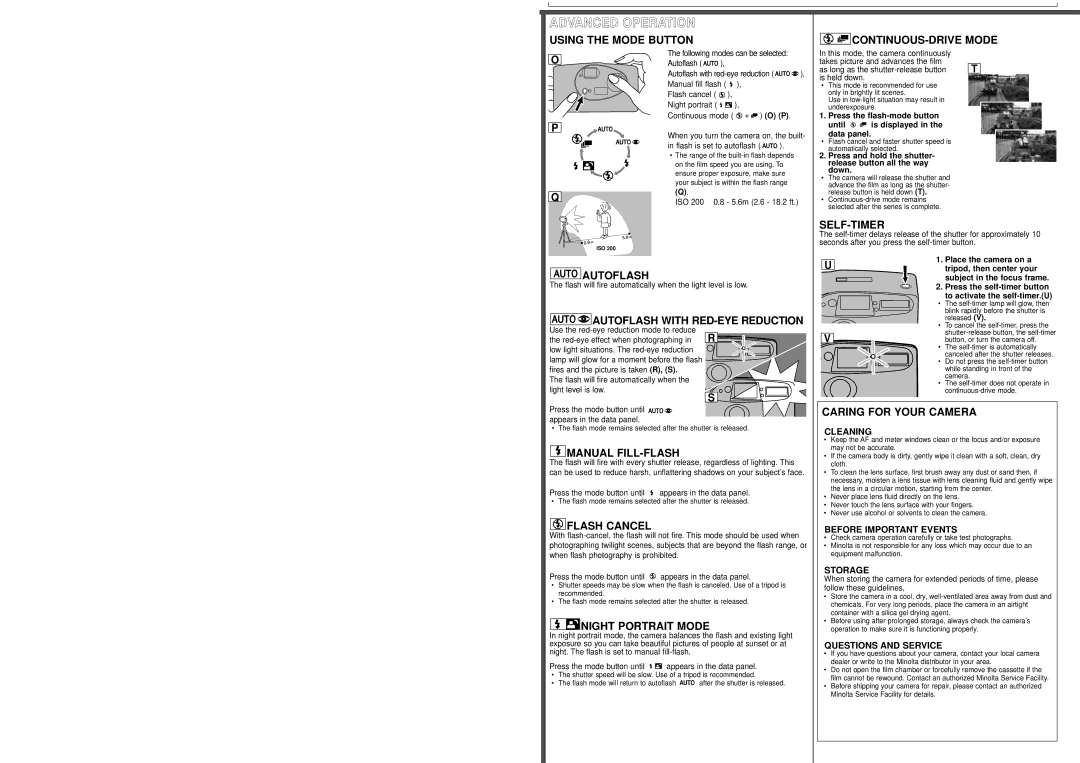
 CONTINUOUS-DRIVE
In this mode, the camera continuously takes picture and advances the film
as long as the
•This mode is recommended for use only in brightly lit scenes.
Use in
1.Press the
until ![]()
![]() is displayed in the
is displayed in the
data panel.
•Flash cancel and faster shutter speed is automatically selected.
2.Press and hold the shutter- release button all the way
down.
•The camera will release the shutter and advance the film as long as the shutter- release button is held down (T).
•
SELF-TIMER
The
U | 1. Place the camera on a | |
| tripod, then center your | |
|
| subject in the focus frame. |
| 2. Press the | |
|
| to activate the |
| • | The |
|
| blink rapidly before the shutter is |
|
| released (V). |
| • | To cancel the |
V |
| |
| button, or turn the camera off. | |
| • | The |
|
| canceled after the shutter releases. |
| • | Do not press the |
|
| while standing in front of the |
|
| camera. |
| • | The |
|
| |
CARING FOR YOUR CAMERA
CLEANING
•Keep the AF and meter windows clean or the focus and/or exposure may not be accurate.
•If the camera body is dirty, gently wipe it clean with a soft, clean, dry cloth.
•To clean the lens surface, first brush away any dust or sand then, if necessary, moisten a lens tissue with lens cleaning fluid and gently wipe the lens in a circular motion, starting from the center.
•Never place lens fluid directly on the lens.
•Never touch the lens surface with your fingers.
•Never use alcohol or solvents to clean the camera.
BEFORE IMPORTANT EVENTS
•Check camera operation carefully or take test photographs.
•Minolta is not responsible for any loss which may occur due to an equipment malfunction.
STORAGE
When storing the camera for extended periods of time, please follow these guidelines,
•Store the camera in a cool, dry,
•Before using after prolonged storage, always check the camera’s operation to make sure it is functioning properly.
QUESTIONS AND SERVICE
•If you have questions about your camera, contact your local camera dealer or write to the Minolta distributor in your area.
•Do not open the film chamber or forcefully remove the cassette if the film cannot be rewound. Contact an authorized Minolta Service Facility.
•Before shipping your camera for repair, please contact an authorized Minolta Service Facility for details.