6
Connecting the Adapter
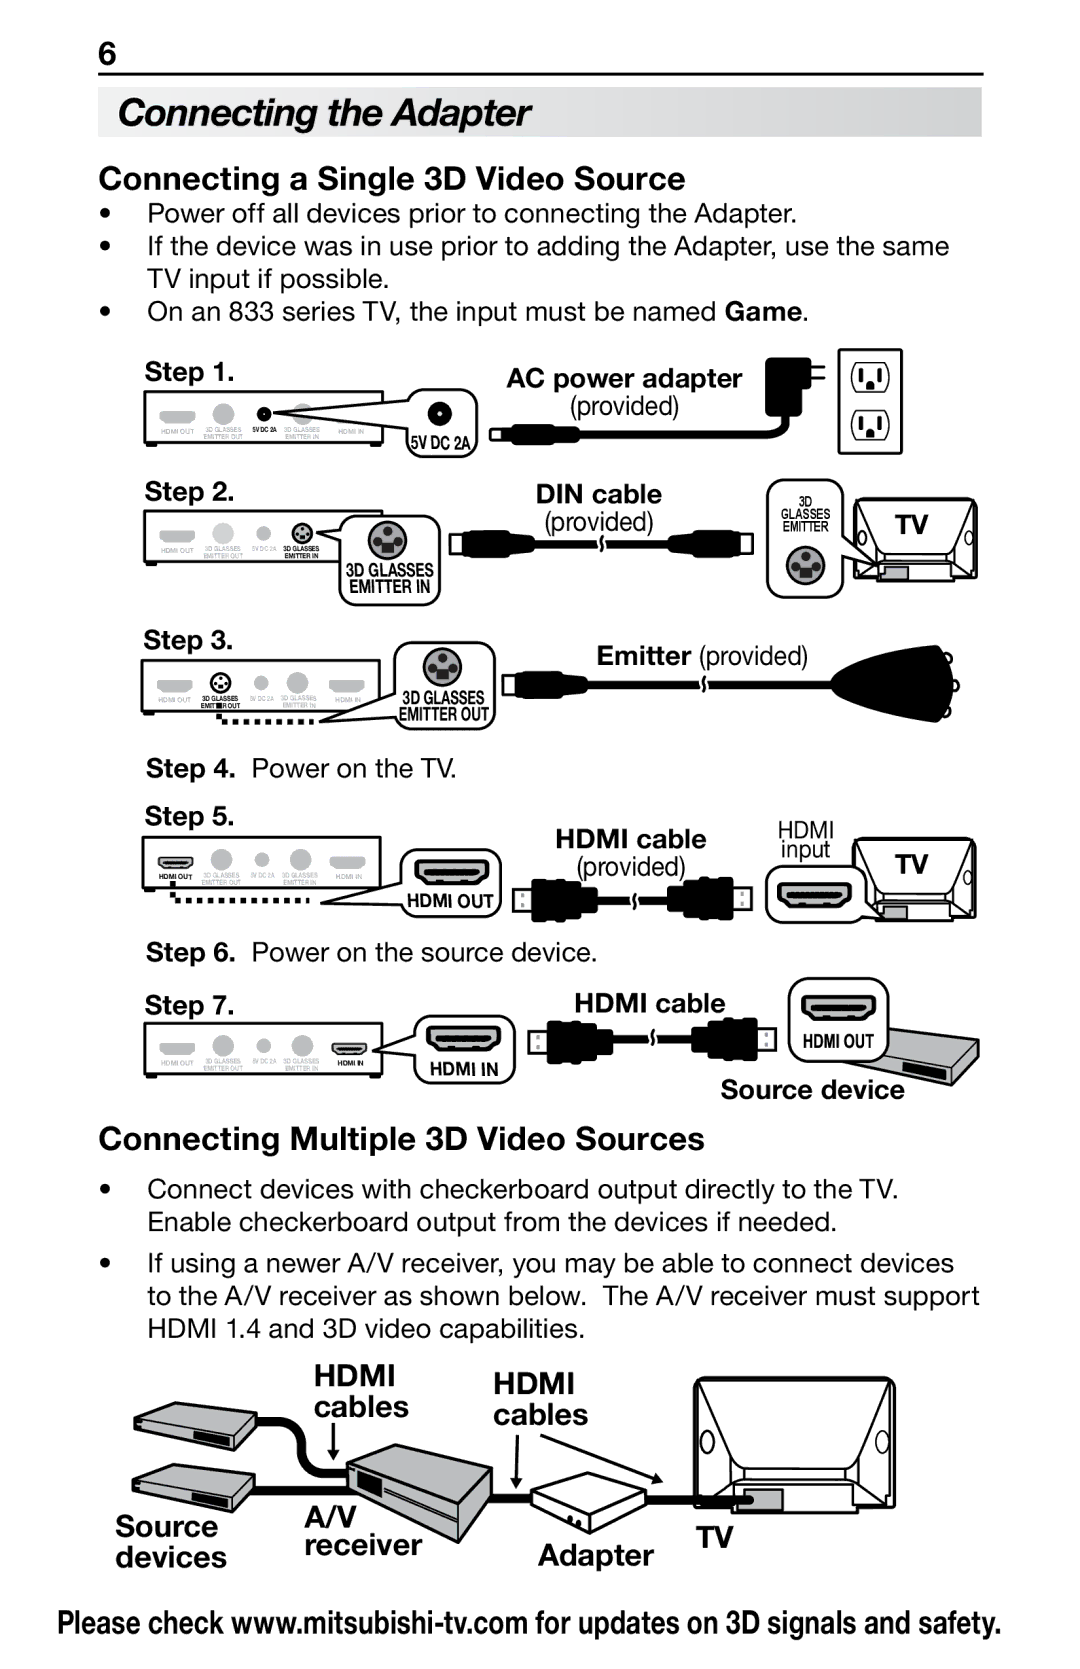
Connecting a Single 3D Video Source
•Power off all devices prior to connecting the Adapter.
•If the device was in use prior to adding the Adapter, use the same TV input if possible.
•On an 833 series TV, the input must be named Game.
Step 1. |
|
|
| AC power adapter |
|
|
|
| (provided) |
HDMI OUT 3D GLASSES | 5V DC 2A | 3D GLASSES | HDMI IN | 5V DC 2A |
EMITTER OUT |
| EMITTER IN |
|
Step 2. |
|
| DIN cable | |
|
|
|
| (provided) |
HDMI OUT | 3D GLASSES | 5V DC 2A | 3D GLASSES | HDMI IN |
| EMITTER OUT |
| EMITTER IN | 3D GLASSES |
|
|
|
| |
|
|
|
| EMITTER IN |
3D
GLASSES EMITTER
TV
Step 3.
|
|
| 3D GLASSES | 5V DC 2A | 3D GLASSES |
|
|
HDMI OUT | HDMI IN | ||||||
|
|
| EMITTER OUT |
| EMITTER IN |
|
|
Emitter (provided)
3D GLASSES EMITTER OUT
Step 4. Power on the TV.
Step 5.
HDMI OUT | 3D GLASSES | 5V DC 2A | 3D GLASSES | HDMI IN |
| EMITTER OUT |
| EMITTER IN |
|
HDMI OUT
HDMI cable | HDMI |
|
(provided) | input | TV |
|
Step 6. Power on the source device.
Step 7. | HDMI cable | ||
|
|
|
|
HDMI OUT
3D GLASSES EMITTER OUT
5V DC 2A
3D GLASSES EMITTER IN
HDMI IN
HDMI IN
Source device
Connecting Multiple 3D Video Sources
•Connect devices with checkerboard output directly to the TV. Enable checkerboard output from the devices if needed.
•If using a newer A/V receiver, you may be able to connect devices to the A/V receiver as shown below. The A/V receiver must support HDMI 1.4 and 3D video capabilities.
HDMI HDMI
cables cables
Source A/V
devices receiver
Adapter TV
Please check
