
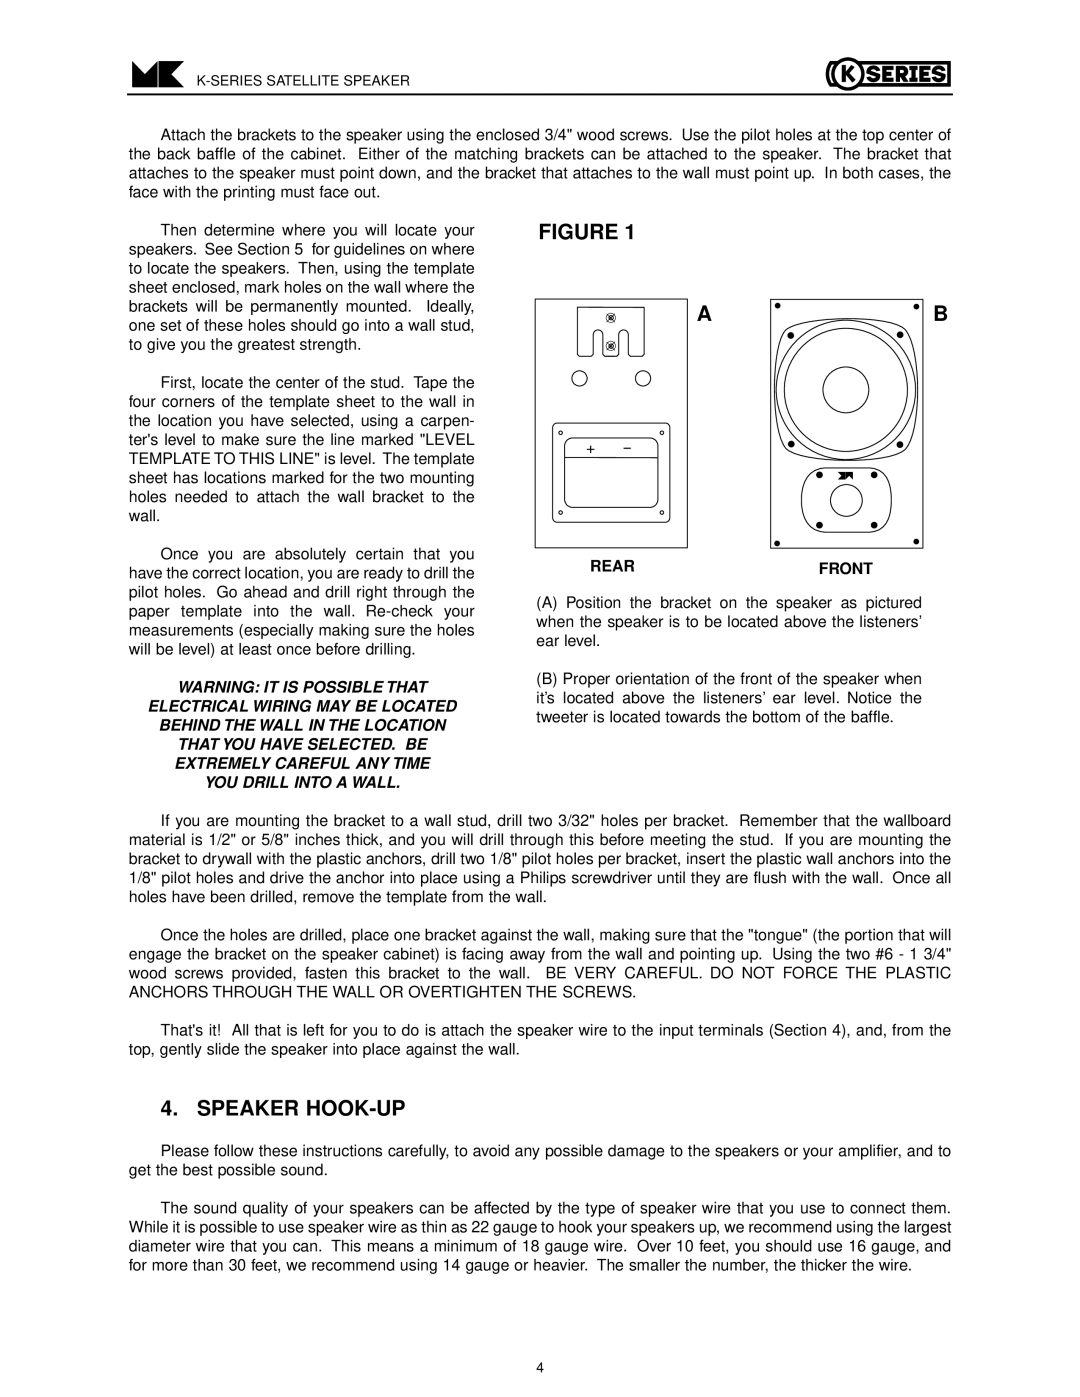
K-5, K-15 K-7, K-17 specifications
MK Sound, a prominent name in the audio industry, has established a reputation for delivering high-performance home theater and audio solutions. Among their noteworthy offerings are the K-5, K-15, K-7, and K-17 speakers, each designed to elevate the listening experience with cutting-edge technology and impeccable sound quality.The K-5 is a compact floor-standing speaker that excels in both music and home theater applications. Featuring a 5.25-inch woofer, the K-5 produces deep bass while maintaining clarity in mid and high frequencies. Its advanced crossover design ensures a seamless transition between drivers, resulting in a cohesive soundstage. The K-5 also employs MK Sound's patented technology, which minimizes distortion and enhances dynamic range, allowing listeners to experience music and films with extraordinary detail.
The K-15 speaker is engineered for those who crave a powerful audio performance without sacrificing space. It boasts a 6.5-inch woofer and a specially designed tweeter that deliver rich, full-bodied sound. The K-15’s cabinet is constructed from high-quality materials to reduce resonance, thereby enhancing audio clarity. Additionally, it features adjustable ports for customizable bass response, catering to different room acoustics and listener preferences.
For audiophiles looking for a more substantial option, the K-7 stands out with its dual 7-inch woofers. This speaker is designed to create a robust sound stage suitable for larger rooms. The K-7 utilizes MK Sound’s advanced phase coherence technology, which aligns the output of the drivers to ensure that sound reaches the listener's ears simultaneously. This results in an incredibly immersive listening experience, whether enjoying music or watching an action-packed film.
Finally, the K-17 speaker combines aesthetic appeal with high-performance acoustics. Featuring innovative driver technology, including a unique tweeter design, the K-17 offers exceptional high-frequency response and detail. Its sophisticated cabinet design helps to control resonance and enhance sound quality, making it an ideal choice for discerning listeners. The K-17 is also equipped with flexible mounting options, making it suitable for various setups in home theaters or music rooms.
In conclusion, MK Sound's K-5, K-15, K-7, and K-17 speakers offer a range of features and technologies tailored for different listening environments. With a commitment to quality and performance, these models exemplify MK Sound's dedication to providing an unparalleled audio experience for all music and movie enthusiasts.