Installation
Be sure lavatory or mounting surface is clean and dry. Place a bead of plumber's putty around the inside lip of the gasket, position gasket on deck. Assemble clamp bars, spacers if needed, and mounting nuts to escutcheon sutds. Tilt clamp bars back as shown in illustration, then place faucet supplies and sutds down through the deck holes.
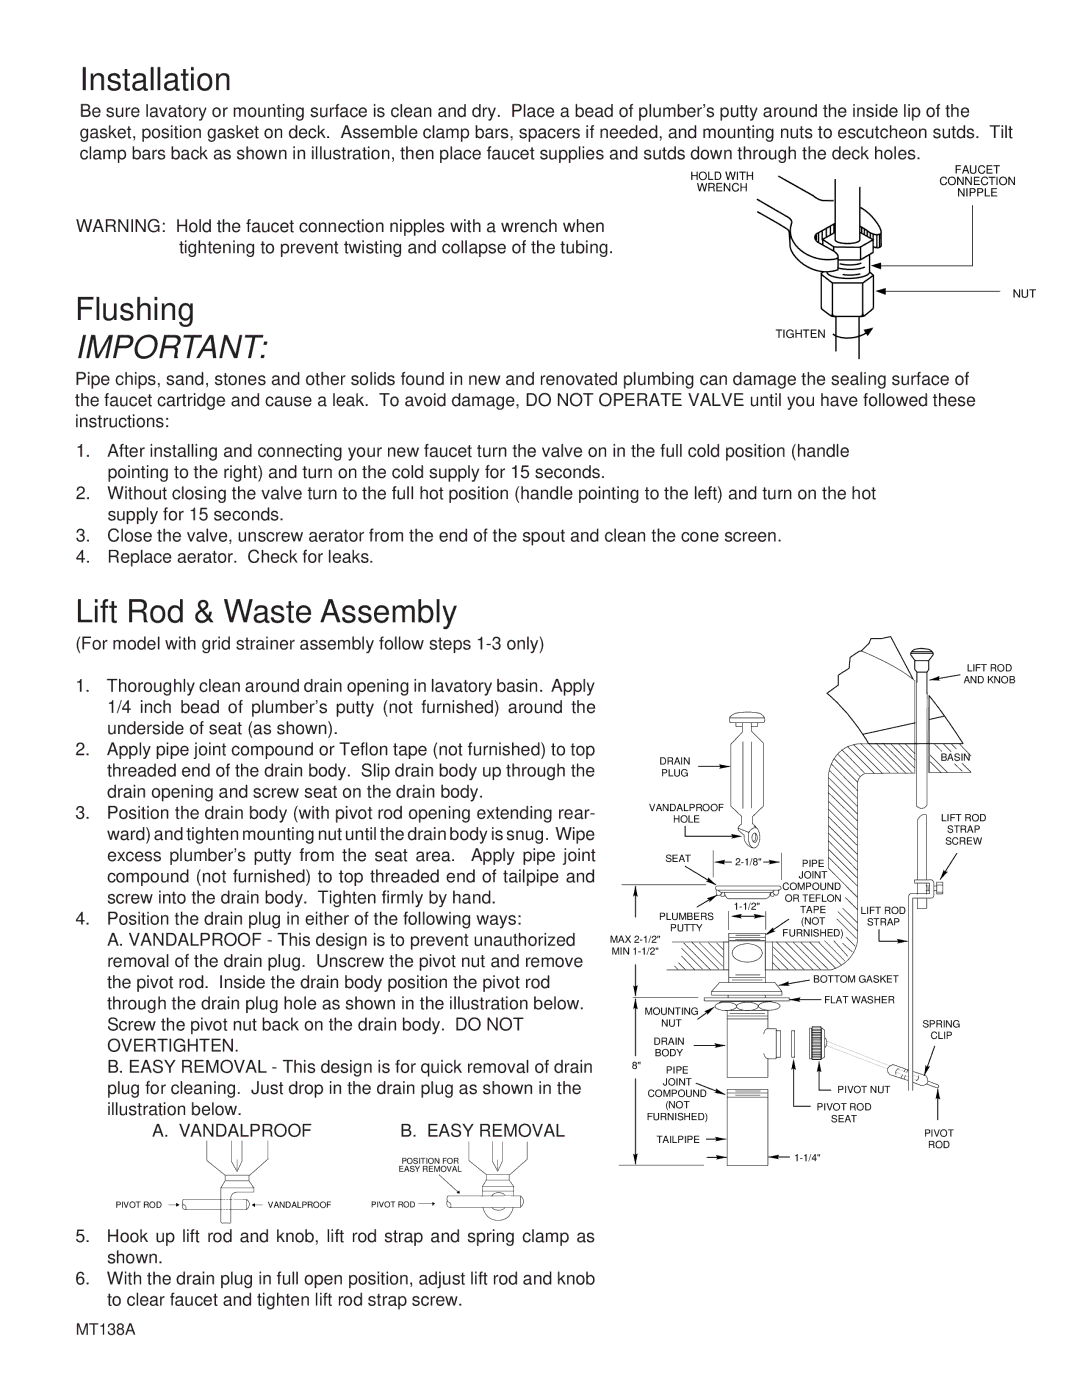
WARNING: Hold the faucet connection nipples with a wrench when tightening to prevent twisting and collapse of the tubing.
Flushing
IMPORTANT:
HOLD WITH | FAUCET | |
CONNECTION | ||
WRENCH | ||
NIPPLE | ||
|
NUT
TIGHTEN
Pipe chips, sand, stones and other solids found in new and renovated plumbing can damage the sealing surface of the faucet cartridge and cause a leak. To avoid damage, DO NOT OPERATE VALVE until you have followed these instructions:
1.After installing and connecting your new faucet turn the valve on in the full cold position (handle pointing to the right) and turn on the cold supply for 15 seconds.
2.Without closing the valve turn to the full hot position (handle pointing to the left) and turn on the hot supply for 15 seconds.
3.Close the valve, unscrew aerator from the end of the spout and clean the cone screen.
4.Replace aerator. Check for leaks.
Lift Rod & Waste Assembly
(For model with grid strainer assembly follow steps 1-3 only)
1.Thoroughly clean around drain opening in lavatory basin. Apply 1/4 inch bead of plumber's putty (not furnished) around the underside of seat (as shown).
2.Apply pipe joint compound or Teflon tape (not furnished) to top threaded end of the drain body. Slip drain body up through the drain opening and screw seat on the drain body.
3.Position the drain body (with pivot rod opening extending rear- ward) and tighten mounting nut until the drain body is snug. Wipe excess plumber's putty from the seat area. Apply pipe joint compound (not furnished) to top threaded end of tailpipe and screw into the drain body. Tighten firmly by hand.
4.Position the drain plug in either of the following ways:
A.VANDALPROOF - This design is to prevent unauthorized removal of the drain plug. Unscrew the pivot nut and remove the pivot rod. Inside the drain body position the pivot rod through the drain plug hole as shown in the illustration below. Screw the pivot nut back on the drain body. DO NOT OVERTIGHTEN.
B.EASY REMOVAL - This design is for quick removal of drain plug for cleaning. Just drop in the drain plug as shown in the illustration below.
A. VANDALPROOF | B. EASY REMOVAL | |
|
| POSITION FOR |
|
| EASY REMOVAL |
PIVOT ROD | VANDALPROOF | PIVOT ROD |
5.Hook up lift rod and knob, lift rod strap and spring clamp as shown.
6.With the drain plug in full open position, adjust lift rod and knob to clear faucet and tighten lift rod strap screw.
DRAIN
PLUG
VANDALPROOF
HOLE
| SEAT | PIPE |
| |
|
|
| ||
|
|
| JOINT |
|
|
|
| COMPOUND |
|
|
| OR TEFLON |
| |
| PLUMBERS | TAPE | LIFT ROD | |
|
| |||
|
| (NOT | STRAP | |
| PUTTY |
| ||
|
| FURNISHED) |
| |
MAX |
|
| ||
|
|
| ||
MIN |
|
|
| |
|
|
| BOTTOM GASKET | |
|
|
| FLAT WASHER | |
| MOUNTING |
|
|
|
| NUT |
|
|
|
| DRAIN |
|
|
|
| BODY |
|
|
|
8" | PIPE |
|
|
|
|
|
|
| |
| JOINT |
| PIVOT NUT | |
| COMPOUND |
| ||
|
|
|
| |
| (NOT |
| PIVOT ROD | |
| FURNISHED) |
| SEAT |
|
| TAILPIPE |
|
|
|
|
|
|
| |
LIFT ROD ![]() AND KNOB
AND KNOB
BASIN
LIFT ROD
STRAP
SCREW
SPRING
CLIP
PIVOT
ROD
MT138A