hank you for choosing a Mountain Hardwear tent. We take pride in making lightweight, durable shelters
for outdoor enthusiasts. Please take the time to read this user manual and “test pitch” your new tent before taking it into the wilderness.
Satellite
WARNING !!!
For your safety, please read and understand the warning on page 14. If you do not understand any part of the warning call Mountain Hardwear at 510.559.6700 before using the tent.
PARTS LIST
◆ Owner’s Manual | ◆ Tent fly |
◆ Tent body | ◆ Pole sack |
◆ Tent poles (5 long purple poles, | ◆ Tent peg sack |
5 shorter black poles) | ◆ Tent stuff sack |
◆ Tent pegs (20) | ◆ Cord (20 pieces) |
◆ Window covers (3) | ◆ Seam sealer (6 tubes) |
◆ Line tighteners (20) | ◆ Pole repair sleeves (3) |
◆ 200 ft. spool of cord |
|
SELECTING A SITE
Choose a site that is level, clear of sharp stones and other debris, is sheltered from the wind, and will drain when it rains. You may wish to face your tent south or east to catch the morning sun. Do not pitch your tent under trees, in water drainages, or on ridge tops.
ASSEMBLING THE POLES
Unfold the tent body and lay it flat on the ground with the door unzipped. Unfold the
insert
Figure 1
PITCHING THE TENT
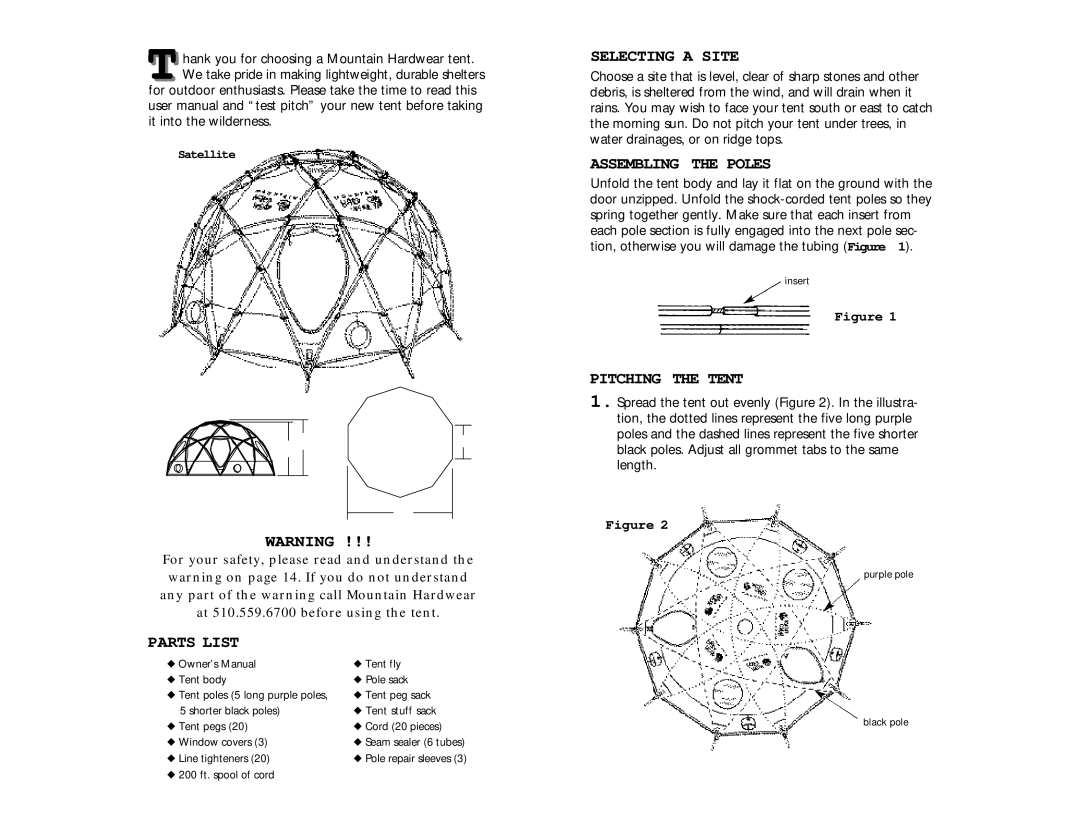
1. Spread the tent out evenly (Figure 2). In the illustra- tion, the dotted lines represent the five long purple poles and the dashed lines represent the five shorter black poles. Adjust all grommet tabs to the same length.
Figure 2
purple pole
black pole
