
ECMP40 specifications
The Mr. Coffee ECMP40 is a versatile espresso machine that brings café-quality coffee into the comfort of your home. Known for its ease of use and reliable performance, the ECMP40 is ideally suited for both budding baristas and experienced coffee enthusiasts.One of the standout features of the Mr. Coffee ECMP40 is its dual-functionality. It serves as both an espresso maker and a coffee maker, allowing users to brew rich espressos or smoother, traditional coffee. This versatility is bolstered by the machine’s 15-bar pump system, which ensures optimal extraction of flavors and aromas, resulting in a robust and full-bodied brew.
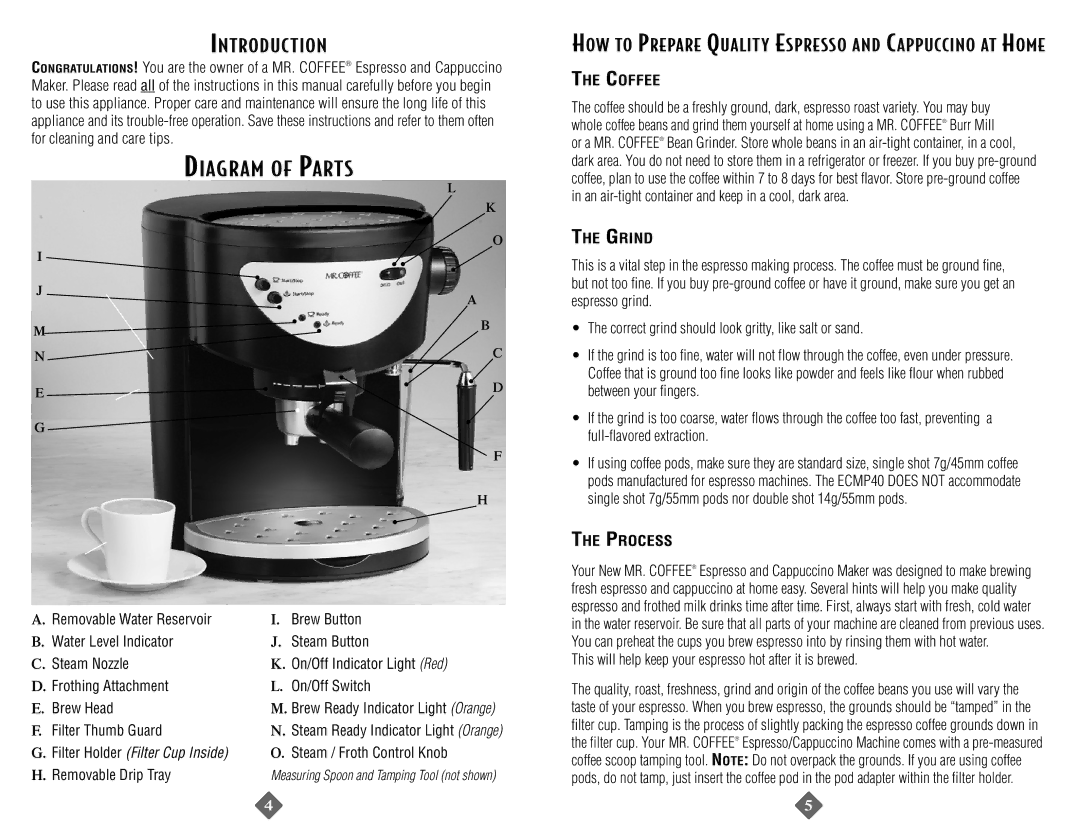
The ECMP40 also includes a convenient frothing arm, which allows users to create creamy froth for lattes and cappuccinos. This feature is invaluable for anyone looking to replicate the café experience at home, as it enables the preparation of a variety of espresso-based drinks. The frothing arm is designed for easy operation, making it accessible even for those who have never frothed milk before.
In terms of design, the Mr. Coffee ECMP40 boasts a compact footprint, making it perfect for kitchens with limited counter space. Its sleek and modern aesthetic is complemented by user-friendly controls, allowing coffee lovers to brew their preferred beverages with minimal fuss. The machine is also equipped with a removable water reservoir, making it easy to fill and clean.
Another noteworthy characteristic is the machine’s ability to brew one or two shots of espresso simultaneously, catering to both solo coffee drinkers and those who enjoy sharing a cup with friends. The included filter basket is compatible with both ground coffee and convenient coffee pods, providing flexibility in choices.
Durability is another highlight of the ECMP40, constructed from quality materials that can withstand daily use. Moreover, the machine features a built-in safety feature that prevents overheating, ensuring a safe brewing experience.
In summary, the Mr. Coffee ECMP40 is an efficient and user-friendly espresso machine. With its impressive features, from the 15-bar pump to the steaming frother, it captures the essence of café-quality coffee. The combination of design, functionality, and safety makes the ECMP40 an exceptional choice for anyone passionate about their coffee. Ultimately, this machine not only simplifies the brewing process but also elevates the home coffee experience.