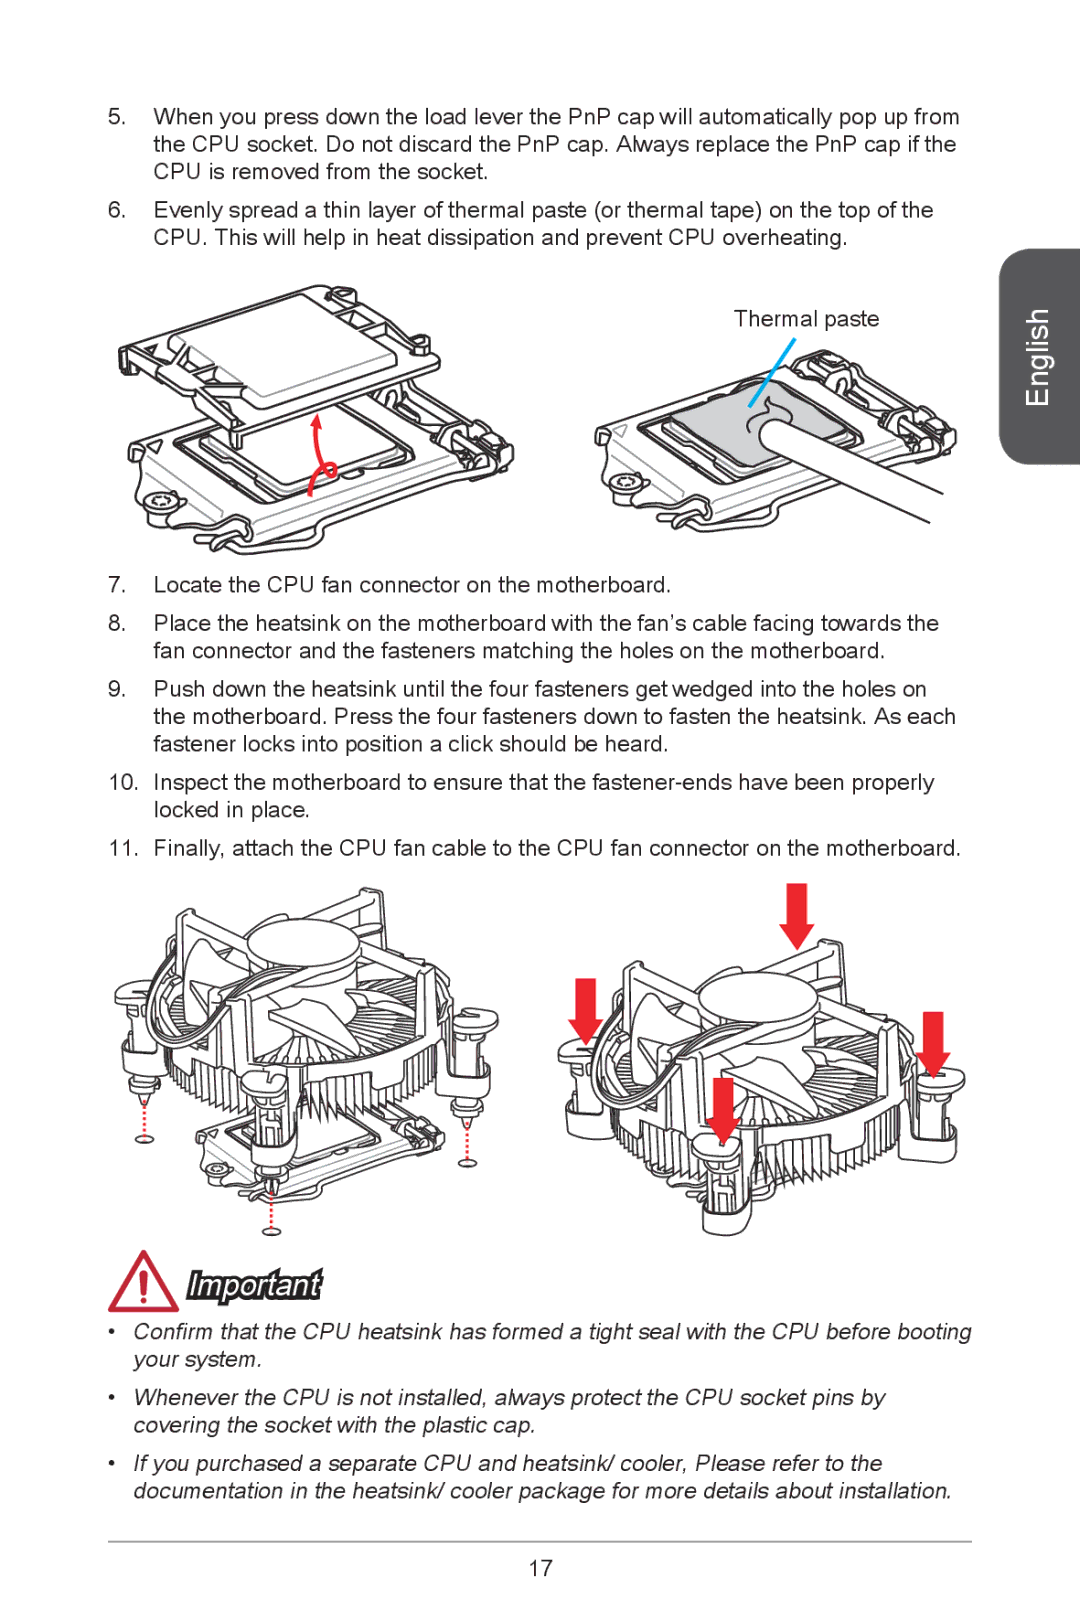
5.When you press down the load lever the PnP cap will automatically pop up from the CPU socket. Do not discard the PnP cap. Always replace the PnP cap if the CPU is removed from the socket.
6.Evenly spread a thin layer of thermal paste (or thermal tape) on the top of the CPU. This will help in heat dissipation and prevent CPU overheating.
Thermal paste
7.Locate the CPU fan connector on the motherboard.
8.Place the heatsink on the motherboard with the fan’s cable facing towards the fan connector and the fasteners matching the holes on the motherboard.
9.Push down the heatsink until the four fasteners get wedged into the holes on the motherboard. Press the four fasteners down to fasten the heatsink. As each fastener locks into position a click should be heard.
10.Inspect the motherboard to ensure that the
11.Finally, attach the CPU fan cable to the CPU fan connector on the motherboard.
English
Important
•Confirm that the CPU heatsink has formed a tight seal with the CPU before booting your system.
•Whenever the CPU is not installed, always protect the CPU socket pins by covering the socket with the plastic cap.
•If you purchased a separate CPU and heatsink/ cooler, Please refer to the documentation in the heatsink/ cooler package for more details about installation.
17