31AE640F352 specifications
The MTD 31AE640F352 is a powerful and versatile engine designed for a variety of applications, particularly in the field of outdoor power equipment. Recognized for its reliability and performance, this engine is a perfect choice for lawn mowers, tillers, and other landscaping tools.One of the standout features of the MTD 31AE640F352 is its robust construction. The engine utilizes a cast-iron cylinder sleeve, which not only enhances durability but also improves heat dissipation. This is crucial in maintaining optimal operating temperatures, especially during prolonged use. The engine's design is engineered for easy maintenance, making it user-friendly for both professionals and hobbyists.
The MTD 31AE640F352 is powered by a four-stroke engine, which contributes to its efficiency and fuel economy. With a displacement of 196cc, this engine provides ample power for a range of tasks while ensuring low emissions, adhering to environmental regulations. The engine's overhead valve (OHV) design allows for better airflow and greater combustion efficiency, resulting in improved torque and horsepower.
Additionally, the MTD 31AE640F352 features an integrated recoil starter and a primer bulb, which facilitate quick and effortless starting, even in cold conditions. This ensures that users can get to work without delays, maximizing productivity. The engine's air filtration system is designed to minimize dust and debris intake, prolonging the engine's lifespan and reducing maintenance frequency.
Another notable characteristic is the quiet operation of the MTD 31AE640F352, making it a suitable choice for residential areas where noise regulations may be a concern. The engine operates smoothly with reduced vibration, providing a comfortable experience for the user.
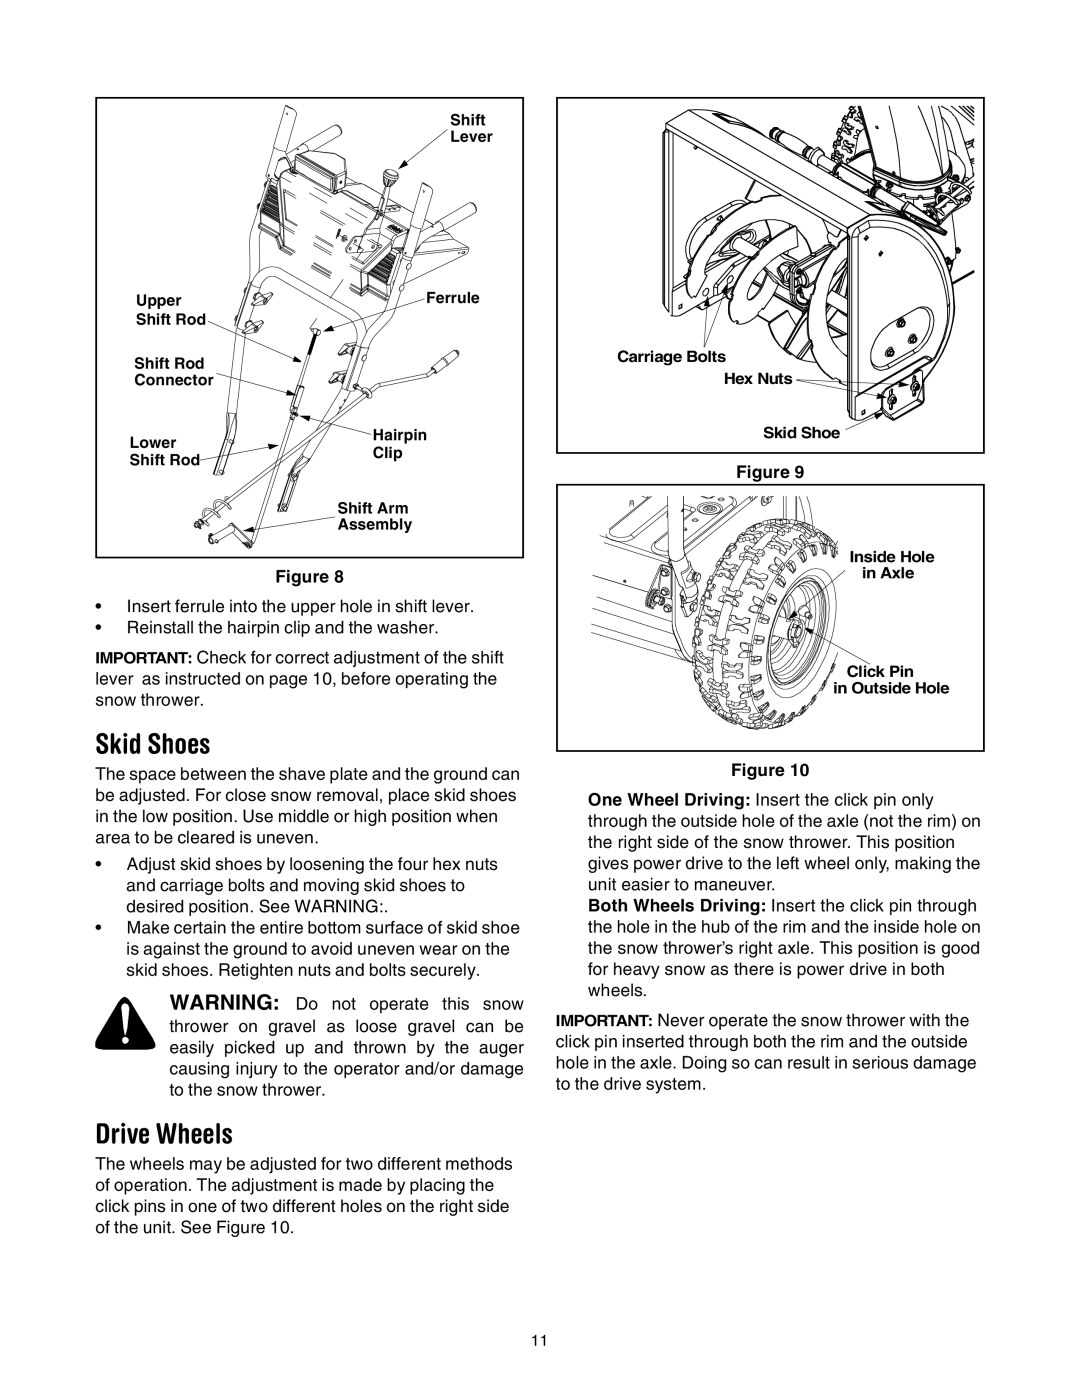
In terms of versatility, this engine can be found in various MTD products, showcasing its adaptability across different applications. Whether it’s powering a lawn mower or a snow blower, the MTD 31AE640F352 delivers consistent performance, meeting the needs of various outdoor tasks.
Overall, the MTD 31AE640F352 stands out in the engine market for its combination of power, efficiency, and user-friendly features. With its reliable performance and durable construction, it continues to be a preferred choice for numerous outdoor power equipment applications, catering to both residential and commercial users alike.