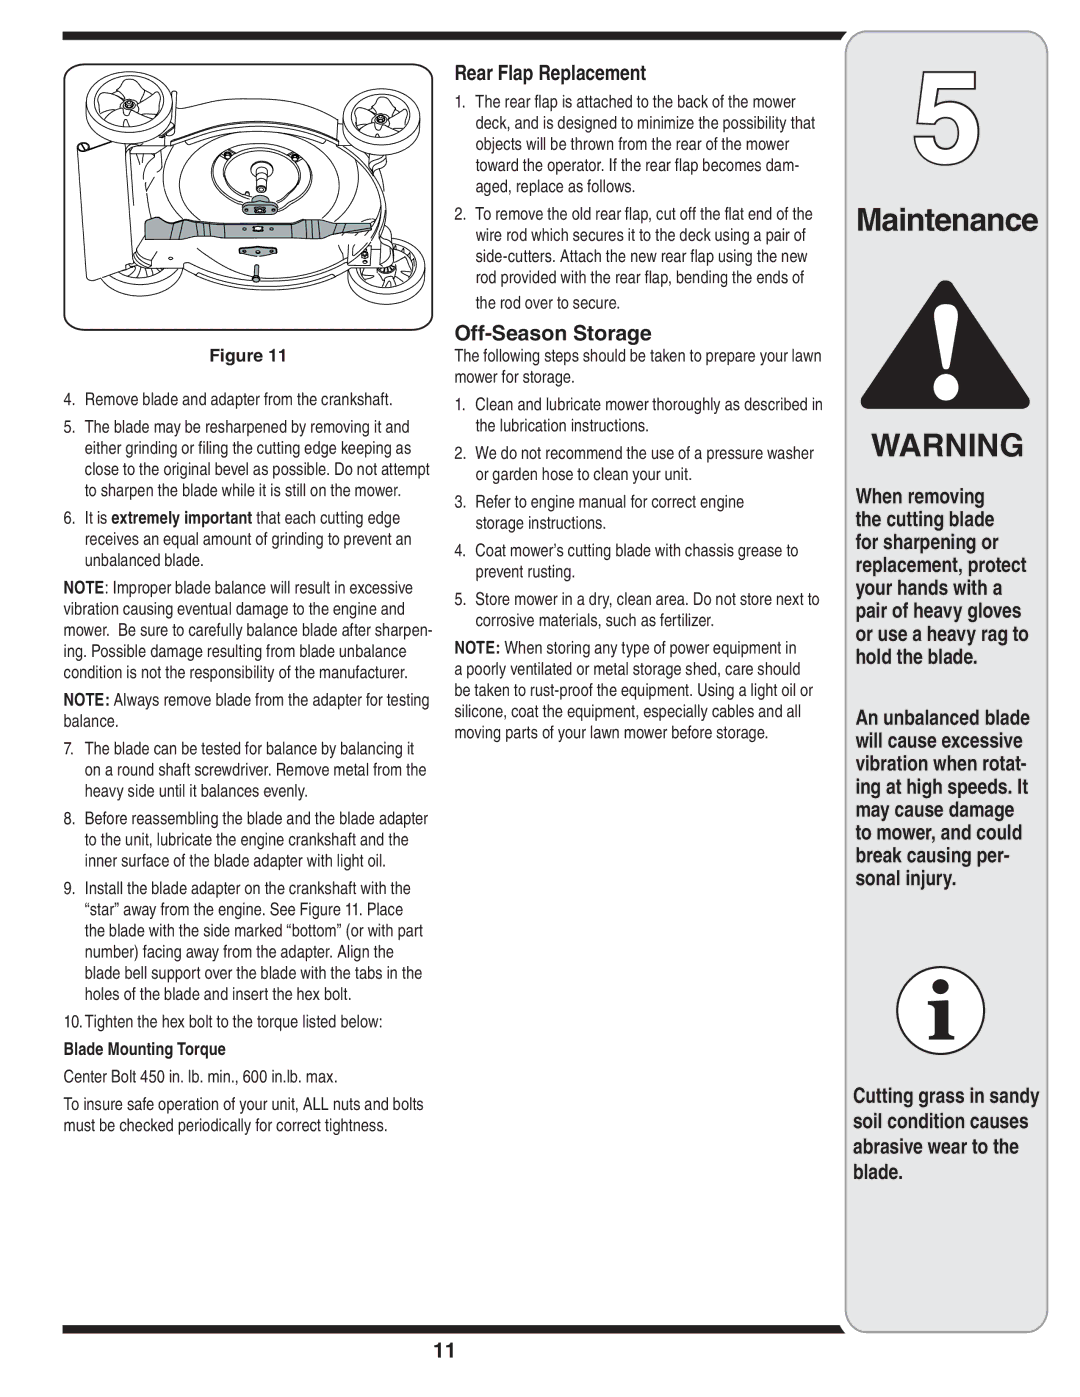
400 specifications
The MTD 400 is a state-of-the-art multifunctional tractor known for its robust performance and versatility in various agricultural applications. Designed with both small and medium-sized farms in mind, the MTD 400 combines modern technology with user-friendly features, making it an essential tool for farmers seeking efficiency and reliability.One of the standout features of the MTD 400 is its powerful engine. Equipped with a high-performance diesel engine, it delivers exceptional torque and fuel efficiency, ensuring that operators can complete tasks without frequent refueling. The engine is designed to meet stringent emissions standards, contributing to a cleaner environment while maintaining optimum performance.
The tractor's transmission system is another highlight. The MTD 400 incorporates a seamless gearbox that allows for smooth shifting between gears. This feature not only enhances the overall driving experience but also enables the operator to adapt easily to different terrains and operational needs. With a variety of speed settings, the tractor can handle both high-speed transport and slow, precise operations.
The MTD 400 is engineered with a robust chassis and a durable frame, ensuring stability and longevity in various working conditions. Its compact design enables maneuverability in tight spaces, making it ideal for fieldwork, landscaping, and other agricultural tasks. The tractor also features an advanced suspension system that absorbs shocks, providing a smoother ride even on rough terrain.
Additionally, the MTD 400 is equipped with advanced hydraulic systems that facilitate the operation of various attachments and implements. This allows farmers to perform a wide range of tasks, from plowing and tilling to planting and hauling. The hydraulics are designed for efficiency, enabling quick attachment changes and reducing downtime during operations.
User comfort is a priority in the design of the MTD 400. The tractor features an ergonomic seat with ample padding and adjustable settings, ensuring that operators can work for extended periods without discomfort. The intuitive control layout makes it easy for users to access all necessary functions without distraction.
In summary, the MTD 400 is a versatile and powerful tractor that embraces modern technology and user-centric design. Its combination of a high-performance engine, advanced transmission, durable construction, and user comfort make it an invaluable asset for farmers looking to enhance productivity and streamline their operations. Whether for small plots or larger fields, the MTD 400 stands out as a reliable partner in agricultural tasks.